

可视化日志组件:LogDashboard:
前言
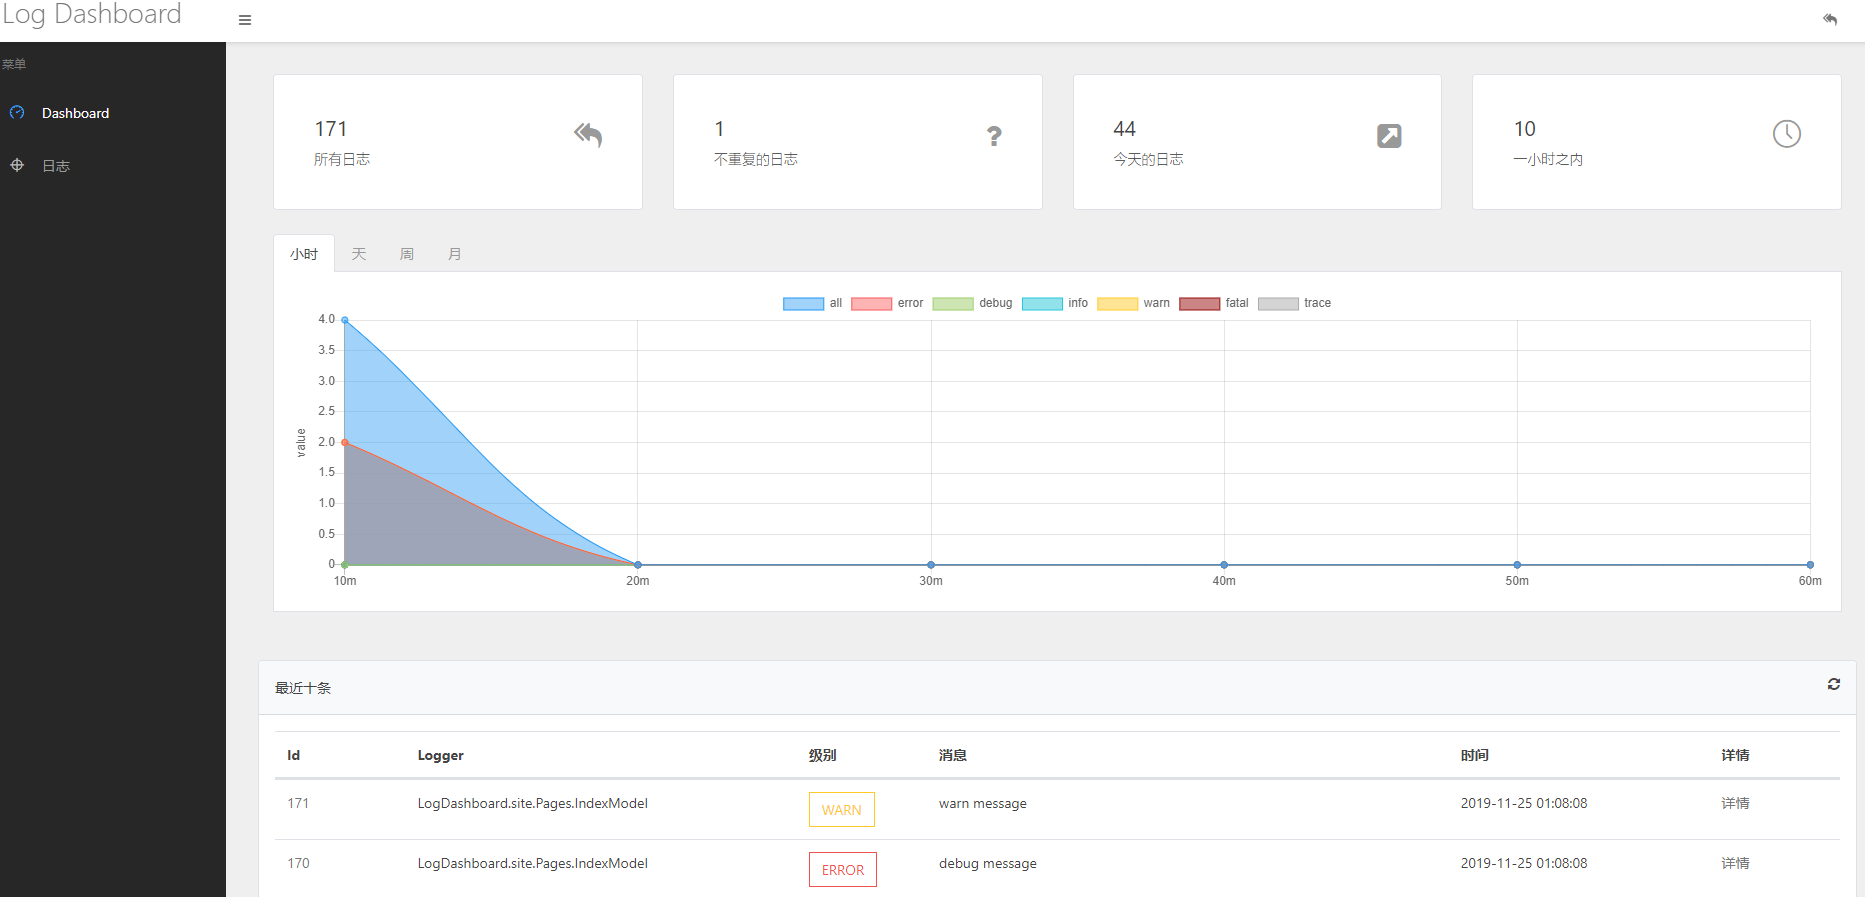
今天站长推荐一款日志可视化组件LogDashboard,可以不用安装第三方进程,只需要在项目中安装相应的NuGet包,添加数行代码,就可以实现拥有带 Web 页面的日志管理面板,十分 nice 哦。
下面是官方介绍:
官方文档地址:https://doc.logdashboard.net/
LogDashboard是在 github 上开源的 aspnetcore 项目, 它旨在帮助开发人员排查项目运行中出现错误时快速查看日志排查问题通常我们会在项目中使用 nlog、log4net 等日志组件,它们用于记录日志的功能非常强大和完整,常见情况会将日志写到 txt 或数据库中, 但通过记事本和 sql 查看日志并不简单方便.
LogDashboard提供了一个可以简单快速查看日志的面板.
LogDashboard适用于 aspnetcore 2.x - aspnetcore3.x 项目, 采用 aspnetcore 中间件技术开发. 轻量快速
OK,本文带大家从 0 创建一个ASP.NET Core Web API新项目,然后添加日志组件Serilog,最后搭配使用LogDashboard完成此项目。
相信使用LogDashboard能极大提高你平时工作中的问题排查速度。
步骤:
- 创建一个 ASP.NET Core Web API 项目
- 添加
Serilog日志组件 - 添加
LogDashboard - 可视化日志演示
本文实战开始
1. 创建一个 ASP.NET Core Web API 项目
这一步很简单,使用 VS 2019,创建一个ASP.NET Core Web API项目,命名为LogDashboardDemo。
2. 添加 Serilog 日志组件
2.1 NuGet 安装 Serilog 包
Install-Package Serilog.AspNetCore
2.2 Program.cs 中添加 Serilog 配置
public class Program
{
  public static void Main(string[] args)
  {
    string logOutputTemplate = "{Timestamp:HH:mm:ss.fff zzz} || {Level} || {SourceContext:l} || {Message} || {Exception} ||end {NewLine}";
    Log.Logger = new LoggerConfiguration()
      .MinimumLevel.Debug()
      .MinimumLevel.Override("Default", LogEventLevel.Information)
      .MinimumLevel.Override("Microsoft", LogEventLevel.Error)
      .MinimumLevel.Override("Microsoft.Hosting.Lifetime", LogEventLevel.Information)
      .Enrich.FromLogContext()
      .WriteTo.Console(theme: Serilog.Sinks.SystemConsole.Themes.AnsiConsoleTheme.Code)
      .WriteTo.File($"{AppContext.BaseDirectory}Logs/Dotnet9.log", rollingInterval: RollingInterval.Day, outputTemplate: logOutputTemplate)
      .CreateLogger();

    CreateHostBuilder(args).Build().Run();
  }

  public static IHostBuilder CreateHostBuilder(string[] args) =>
    Host.CreateDefaultBuilder(args)
      .UseSerilog()
      .ConfigureWebHostDefaults(webBuilder =>
      {
        webBuilder.UseStartup<Startup>();
      });
}
注意代码中输出日志的格式,日志分隔符使用 "||",这是LogDashboard组件的建议,当然你可以修改,详细配置见LogDashboard文档。
2.3 验证日志组件安装成功
在Startup.cs中添加测试日志
public void ConfigureServices(IServiceCollection services)
{
  Log.Information("ConfigureServices");
  Log.Error("测试Serilog添加异常日志");
  Log.Fatal("测试Serilog添加严重日志");
  // ....
}
运行项目:
输出目录下产生日志文件:\LogDashboardDemo\bin\Debug\net6.0\Logs\Dotnet920210417.log
08:37:27.884 +08:00 || Information ||  || ConfigureServices ||  ||end
08:37:27.964 +08:00 || Error ||  || 测试Serilog添加异常日志 ||  ||end
08:37:27.965 +08:00 || Fatal ||  || 测试Serilog添加严重日志 ||  ||end
08:37:28.154 +08:00 || Information ||  || Configure ||  ||end
08:37:28.423 +08:00 || Information || Microsoft.Hosting.Lifetime || Now listening on: "http://localhost:5000" ||  ||end
08:37:28.427 +08:00 || Information || Microsoft.Hosting.Lifetime || Application started. Press Ctrl+C to shut down. ||  ||end
08:37:28.427 +08:00 || Information || Microsoft.Hosting.Lifetime || Hosting environment: "Development" ||  ||end
08:37:28.428 +08:00 || Information || Microsoft.Hosting.Lifetime || Content root path: "C:\Users\Administrator\Desktop\LogDashboardDemo" ||  ||end
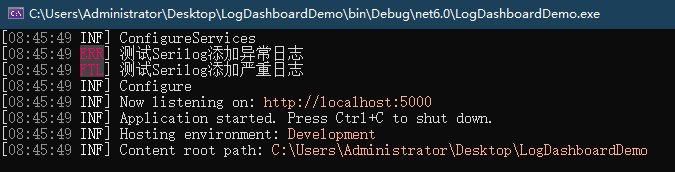
控制台输出:
好了,日志组件已经添加成功,进入下一步。
3. 添加 LogDashboard
3.1 NuGet 安装 LogDashboard 包
Install-Package LogDashboard
3.2 配置 LogDashboard
这一步很简单,真的很简单,打开Startup.cs,添加如下代码:
public void ConfigureServices(IServiceCollection services)
{
  services.AddLogDashboard();
  // ...
}

public void Configure(IApplicationBuilder app, IWebHostEnvironment env)
{
  app.UseLogDashboard();
  // ...
}
这一步就完成了,使用 LogDashboard就是这么简单。
4. 可视化日志演示
运行项目,浏览器地址栏输入:http://localhost:5000/logdashboard就是日志管理面板,直接录一个小视频演示下吧: