(6/30) Learning Blazor Together: Extracting C# Code

(6/30) Learning Blazor Together: Extracting C# Code

Yesterday I saw that the code in `FetchData.razor` was too long. For convenience, we extracted the `@code` section into a separate file.

Last updated 12/12/2021 9:59 PM
StrayaWorker
8 min read
Category
Blazor
Topic
Learning Blazor Together Series
Tags
.NET C# ASP.NET Core Blazor

Yesterday I noticed that the FetchData.razor code was too long. For convenience, we extracted the @code section into a separate file.

Blazor provides two methods: partial class and ComponentBase. Both have their pros and cons. I prefer ComponentBase, but it depends on personal habits.

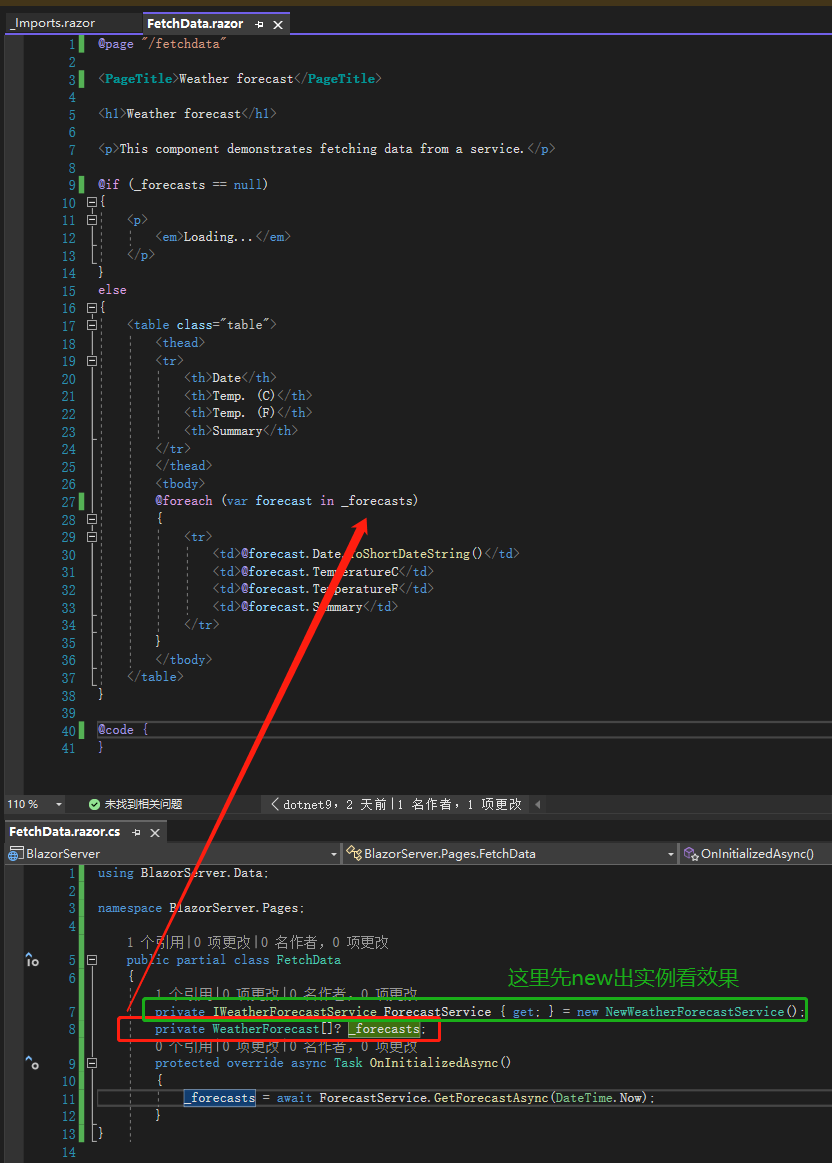
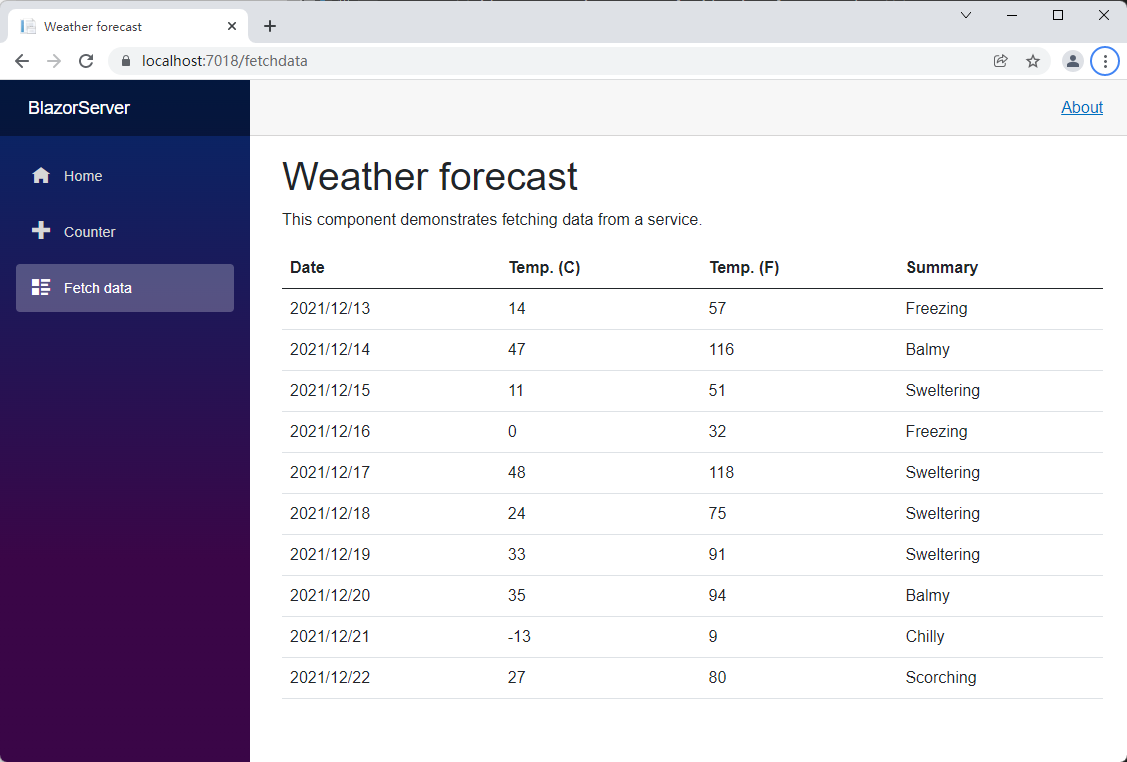
Let's first look at partial class. Open FetchData.razor, move the previously mentioned @using BlazorServer.Data to _Imports.razor, then create a class called FetchData.razor.cs. Add the partial modifier between public and class, then cut the @code block from FetchData.razor and paste it into FetchData.razor.cs. After a slight modification, it looks no different from old C# code. Press F5, and we still see 10 weather data entries.

Original FetchData.razor:

Original FetchData.razor

Screenshot after extracting C# code:

Screenshot after extracting C# code

Page display remains unchanged:

Page display unchanged

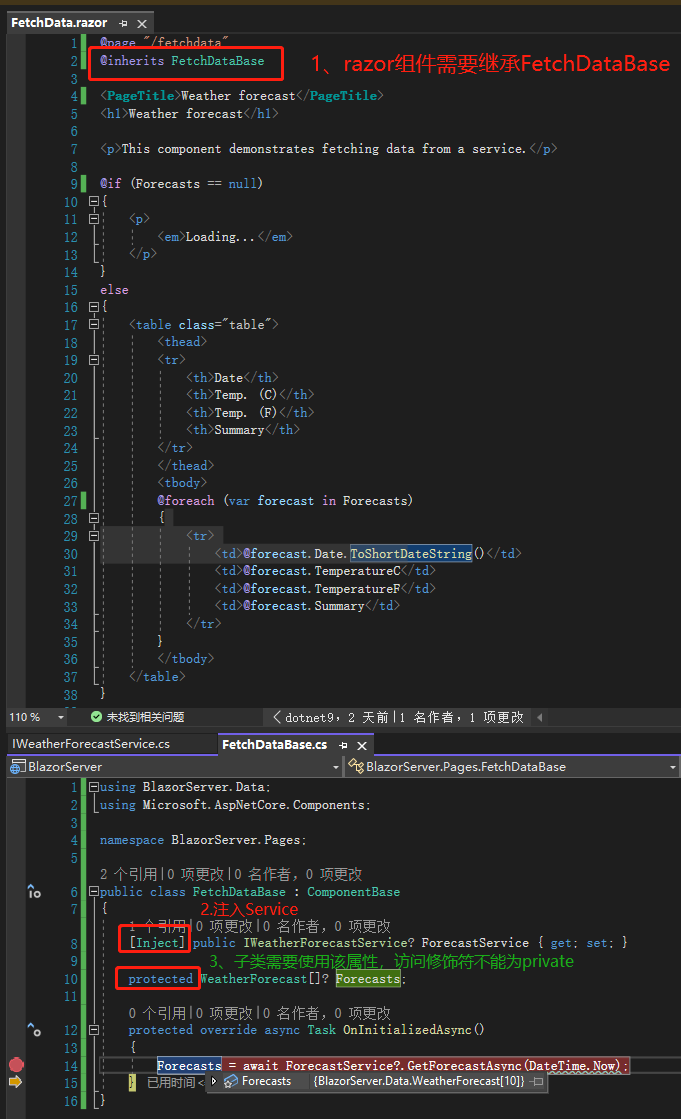
Now let's look at ComponentBase. First, copy the code from the partial class, then create a new class named FetchDataBase.cs. Paste the code and make slight modifications. Then delete FetchData.razor.cs, the partial class, because the two modes cannot coexist. You can see that apart from inheriting ComponentBase and adding [Inject], there is almost no difference. Here, [Inject] is equivalent to using @inject WeatherForecastService ForecastService in FetchData.razor.cs. Press F5 to start debug mode, click on the left side of line 14 to set a breakpoint, and we can see the weather data is retrieved.

Using ComponentBase:

Using ComponentBase

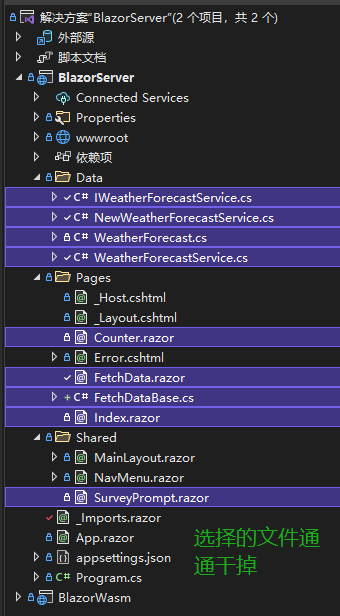
Now let's start building our own Component! First, delete unnecessary Components. In Program.cs and _Import.razor, remove the using statements and registrations related to weather. If you forget where these two files are, after deleting the Component, right-click on the project BlazorServer, select Rebuild, and Visual Studio will tell you where the errors are.

Delete excess component files:

Delete excess component files

As mentioned before, we want to build a website for users to write logs, so we need basic input fields. The log unit is one post. First, create the Models folder, create a PostModel type with three simple properties. Then create Post.razor and PostBase.razor.cs in the Pages folder. Finally, keep only one link in NavMenu.razor and change the href attribute value to Post.

/Models/PostModel.cs

namespace BlazorServer.Models;

public class PostModel
{
	public int Id { get; set; }

	public string? Title { get; set; }

	public string? Content { get; set; }
}

/Shared/NavMenu.razor:

<div class="@NavMenuCssClass" @onclick="ToggleNavMenu">
  <nav class="flex-column">
    <div class="nav-item px-3">
      <NavLink class="nav-link" href="/Post" Match="NavLinkMatch.All">
        <span class="oi oi-home" aria-hidden="true"></span> Post
      </NavLink>
    </div>
  </nav>
</div>

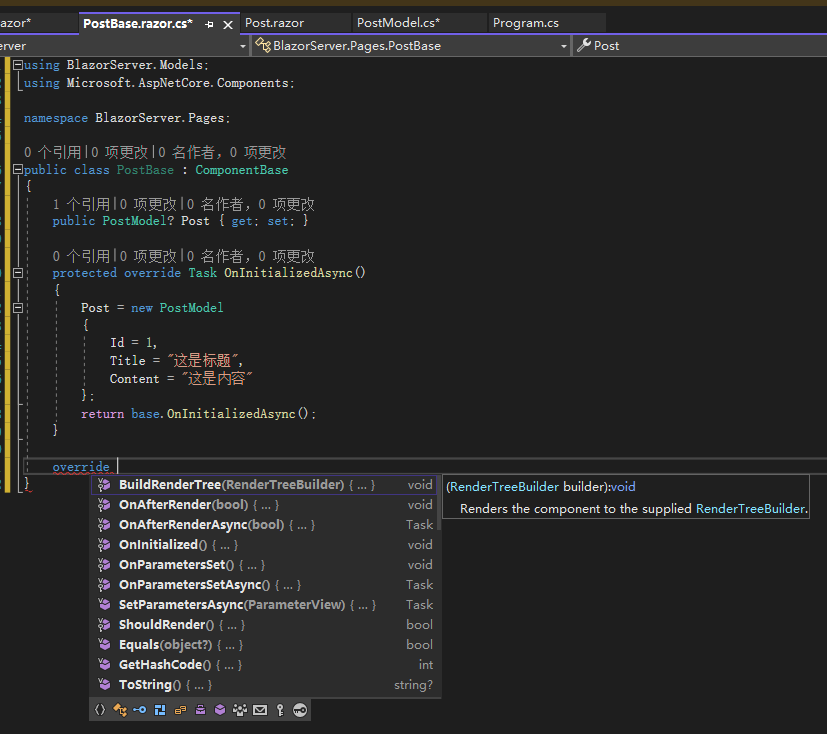
PostModel is a container for data. Currently, there is no Service, so we put a fake data entry in PostBase.razor.cs. Here you can see a method OnInitializedAsync(), which means that when the Component lifecycle starts, the things inside it are executed first. Other methods include OnAfterRenderAsync, OnParametersSetAsync, etc. Just type override and press space to see these methods. They also have both synchronous and asynchronous modes. We'll explain these methods when the opportunity arises.

PostBase

Post.razor uses the EditForm Component. After compilation, it is equivalent to the HTML form element. Inside, there are three input elements. Blazor also provides corresponding Input Components. You can see the compiled HTML elements from the official documentation.

@page "/Post" @inherits PostBase

<EditForm Model="@Post">
  <input type="number" value="@Post!.Id" />
  <input type="text" value="@Post!.Title" />
  <textarea value="@Post!.Content"></textarea>

  <button type="submit">Submit</button>
</EditForm>

Comparison of the two writing styles:

@page "/Post" @inherits PostBase

<EditForm Model="@Post">
  <InputNumber @bind-Value="Post!.Id"></InputNumber>
  <InputText @bind-Value="Post!.Title"></InputText>
  <InputTextArea @bind-Value="Post!.Content"></InputTextArea>

  <button type="submit">Submit</button>
</EditForm>

Blazor provides corresponding Input Components:

Input Component

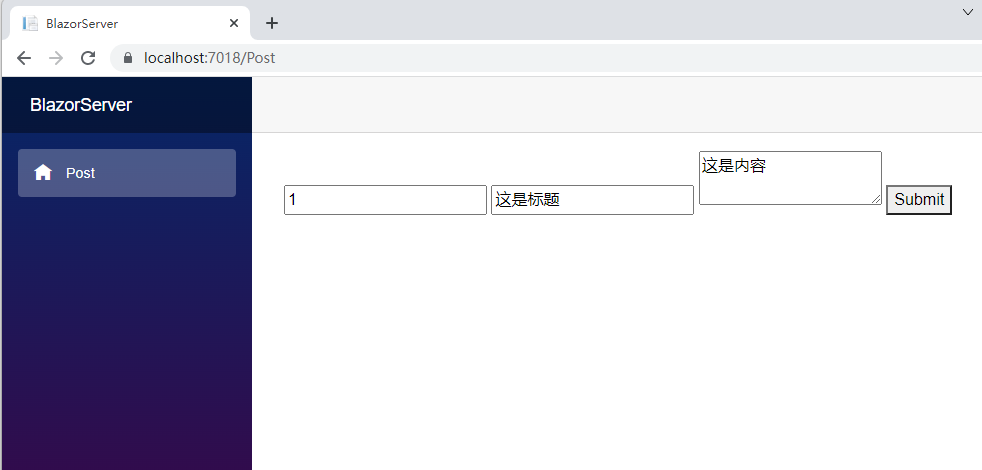
Now open the web page, and you can see the values defined in PostBase.razor.cs are displayed. But how is this connection made? The reason is the Model property of EditForm and the @bind-Value attribute of the three <Input> Components. This tells Blazor: My Model and its values should be bound to this EditForm. If there is a connection to backend code, the content entered on the web page will be submitted to the backend for processing after an event is triggered.

Post page display

However, the default CSS styles of <Input> are not very attractive. Let's first apply basic Bootstrap styles. Since the Id is usually not entered by the user, we comment it out for now. Then we add form validation mechanisms to prevent users from submitting the form randomly. But if you don't want to write a bunch of validation mechanisms yourself, you can try Blazor's DataAnnotationsValidator and ValidationSummary Components.

Add styles

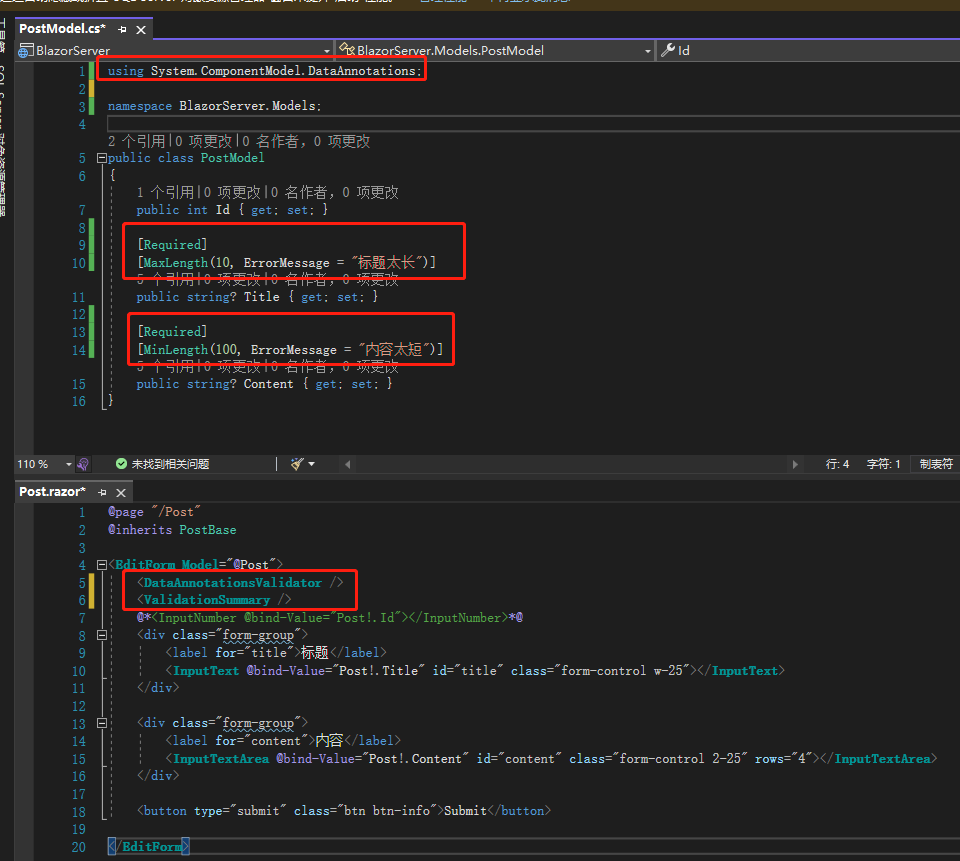
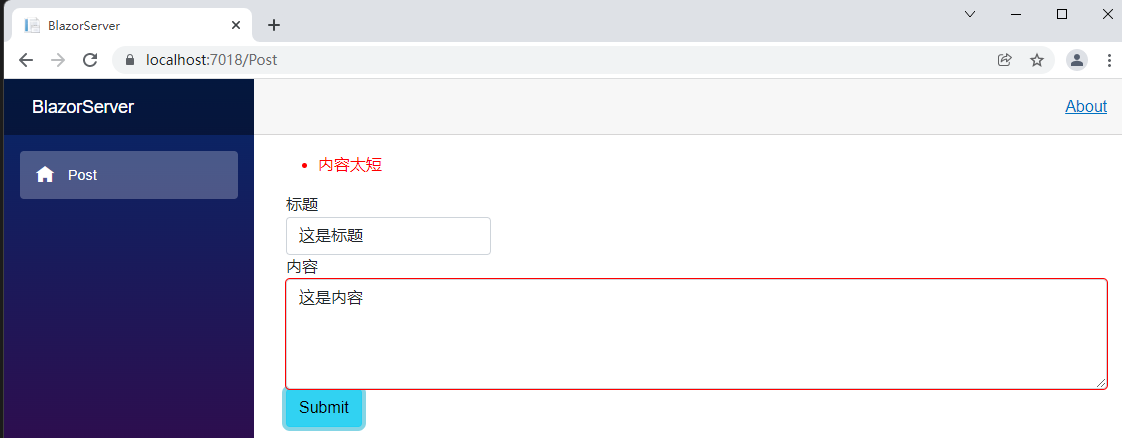
First, add two Attributes to Title and Content in PostModel. Required means required, MaxLength and MinLength limit the maximum and minimum character count. You can also customize error messages. Then add those two Components DataAnnotationsValidator and ValidationSummary inside the EditForm. The first validates each Input, and the second displays error messages at the top of the form.

Add validation

Validation error prompt

But what if you don't like the default CSS styles of the validation mechanism? Blazor also provides a customization method. First, create a class called CustomFieldClassProvider that inherits FieldCssClassProvider, and override the method GetFieldCssClass. We'll talk about its content later.

using Microsoft.AspNetCore.Components.Forms;

namespace BlazorServer;

public class CustomFieldClassProvider : FieldCssClassProvider
{
	public override string GetFieldCssClass(EditContext editContext, in FieldIdentifier fieldIdentifier)
	{
		var isValid = !editContext.GetValidationMessages(fieldIdentifier).Any();

		return isValid ? "text-primary" : "text-danger";
	}
}

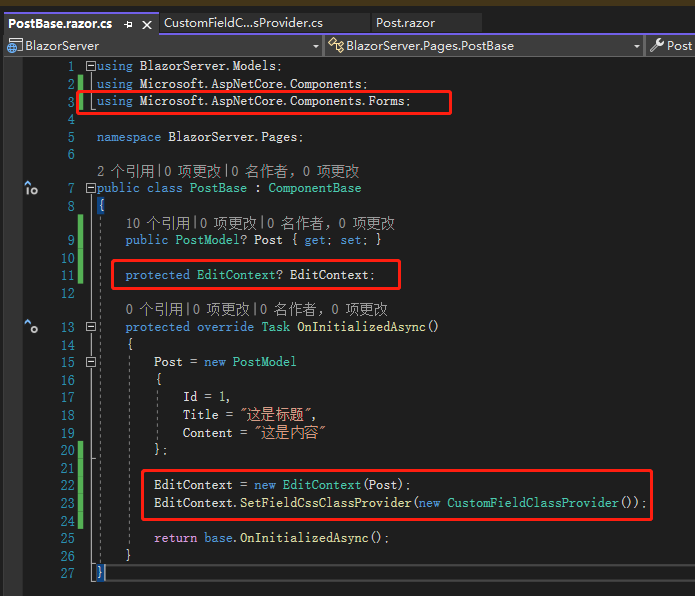
Then add a field of type EditContext named EditContext in PostBase.razor.cs. Initialize the EditContext field by passing the Post field into it. Then call the SetFieldCssClassProvider method of EditContext, adding an instance of CustomFieldClassProvider.

Custom style association

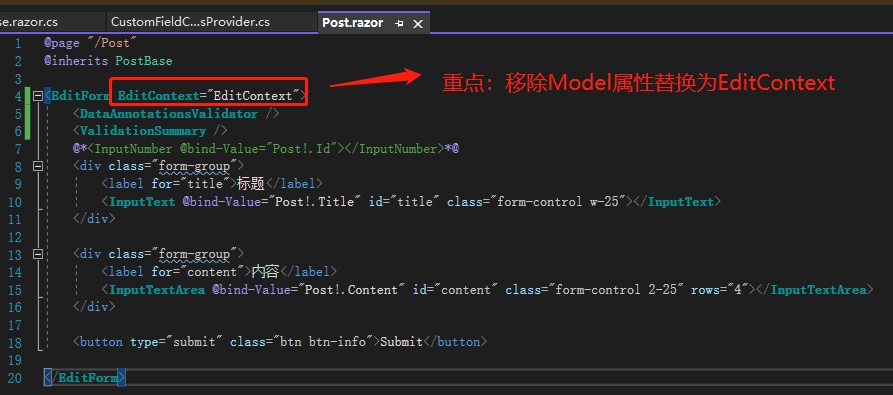
Finally, the most important step: in Post.razor, remove the Model parameter of EditForm and replace it with the EditContext parameter, whose value is the EditContext field we just created.

Replace Model with EditContext

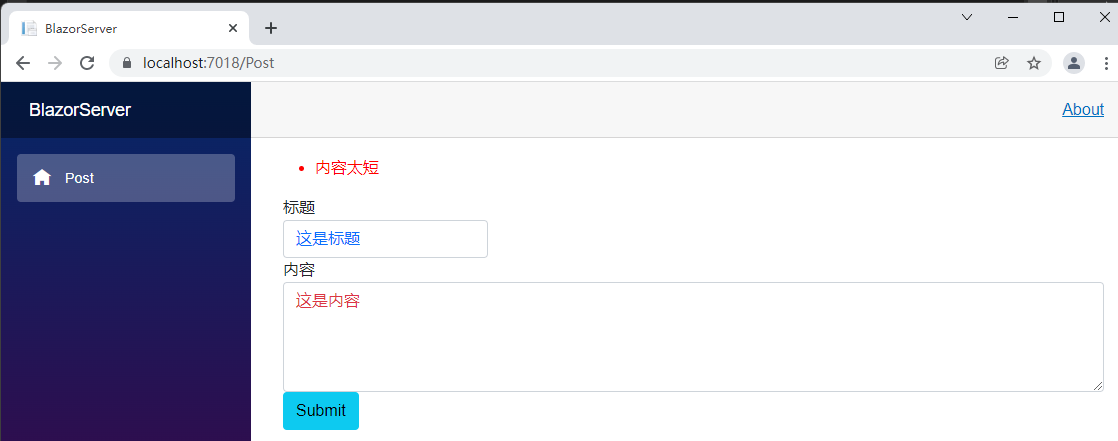
Now submit the form again. You can see that the red border around the textarea is gone, and the font color has become the red of text-danger, while the correct field values have become the blue of text-primary. Let's look back at CustomFieldClassProvider. It turns out that EditContext refers to the content of the EditForm, and fieldIdentifier is the currently validated <Input> tag. If the method GetValidationMessages called by EditContext gets any information from fieldIdentifier, it means the field value is incorrect; otherwise, it is correct. This is how Blazor allows us to customize Form styling.

Custom data validation prompt

References:

  1. Split HTML And C# Code In Blazor Using Either Partial Class Or ComponentBase Class
  2. ASP.NET Core Blazor forms and validation
  3. Custom validation CSS class attributes

Note: The code in this article has been refactored using .NET 6 + Visual Studio 2022. You can click the original link to compare it with the refactored code. Thank you for reading and supporting the original author.

Keep Exploring

Related Reading

More Articles
Same category / Same tag 12/25/2021

(29/30)Learn Blazor Together: Blazor Unit Testing

The most boring part of developing a system is probably fixing bugs, especially errors like trying to access a null object (`Object reference not set to an instance of an object.`), which is the most common problem most people encounter when they first step into programming. To break free from the tedious bug-fixing process, this article introduces `unit testing`.

Continue Reading
Same category / Same tag 12/25/2021

(28/30) Learning Blazor Together: Policy-based Authorization

It was mentioned earlier that `ASP.NET Core Identity` uses `Claim`-based authentication. In fact, `ASP.NET Core Identity` has different types of authorization methods, the simplest being `Login Authorization`, `Role Authorization`, and `Claim Authorization`. However, all of the above are implemented in one way: Policy-based Authorization.

Continue Reading