本文由网友投稿,站长是一点都不懂硬件。
作者:陈显达
原文标题:单片机入门第二课----点灯大师
原文链接:https://www.cnblogs.com/1996-Chinese-Chen/p/16814553.html
引言
在上一博客中,我们正式开始了单片机的学习之路,讲了单片机的概念,以及我们使用的 ESP32 系列的单片机的 IO 引脚,讲了什么是 GPIO,以及相关的总线通讯概念(UART,IIC,SPI),脉冲调制概念(PWM),以及信号数字互转的(ADC 和 DAC),板子自带的一些功能,在今天的博客中,我会带你们正式进入控制硬件的第一课;
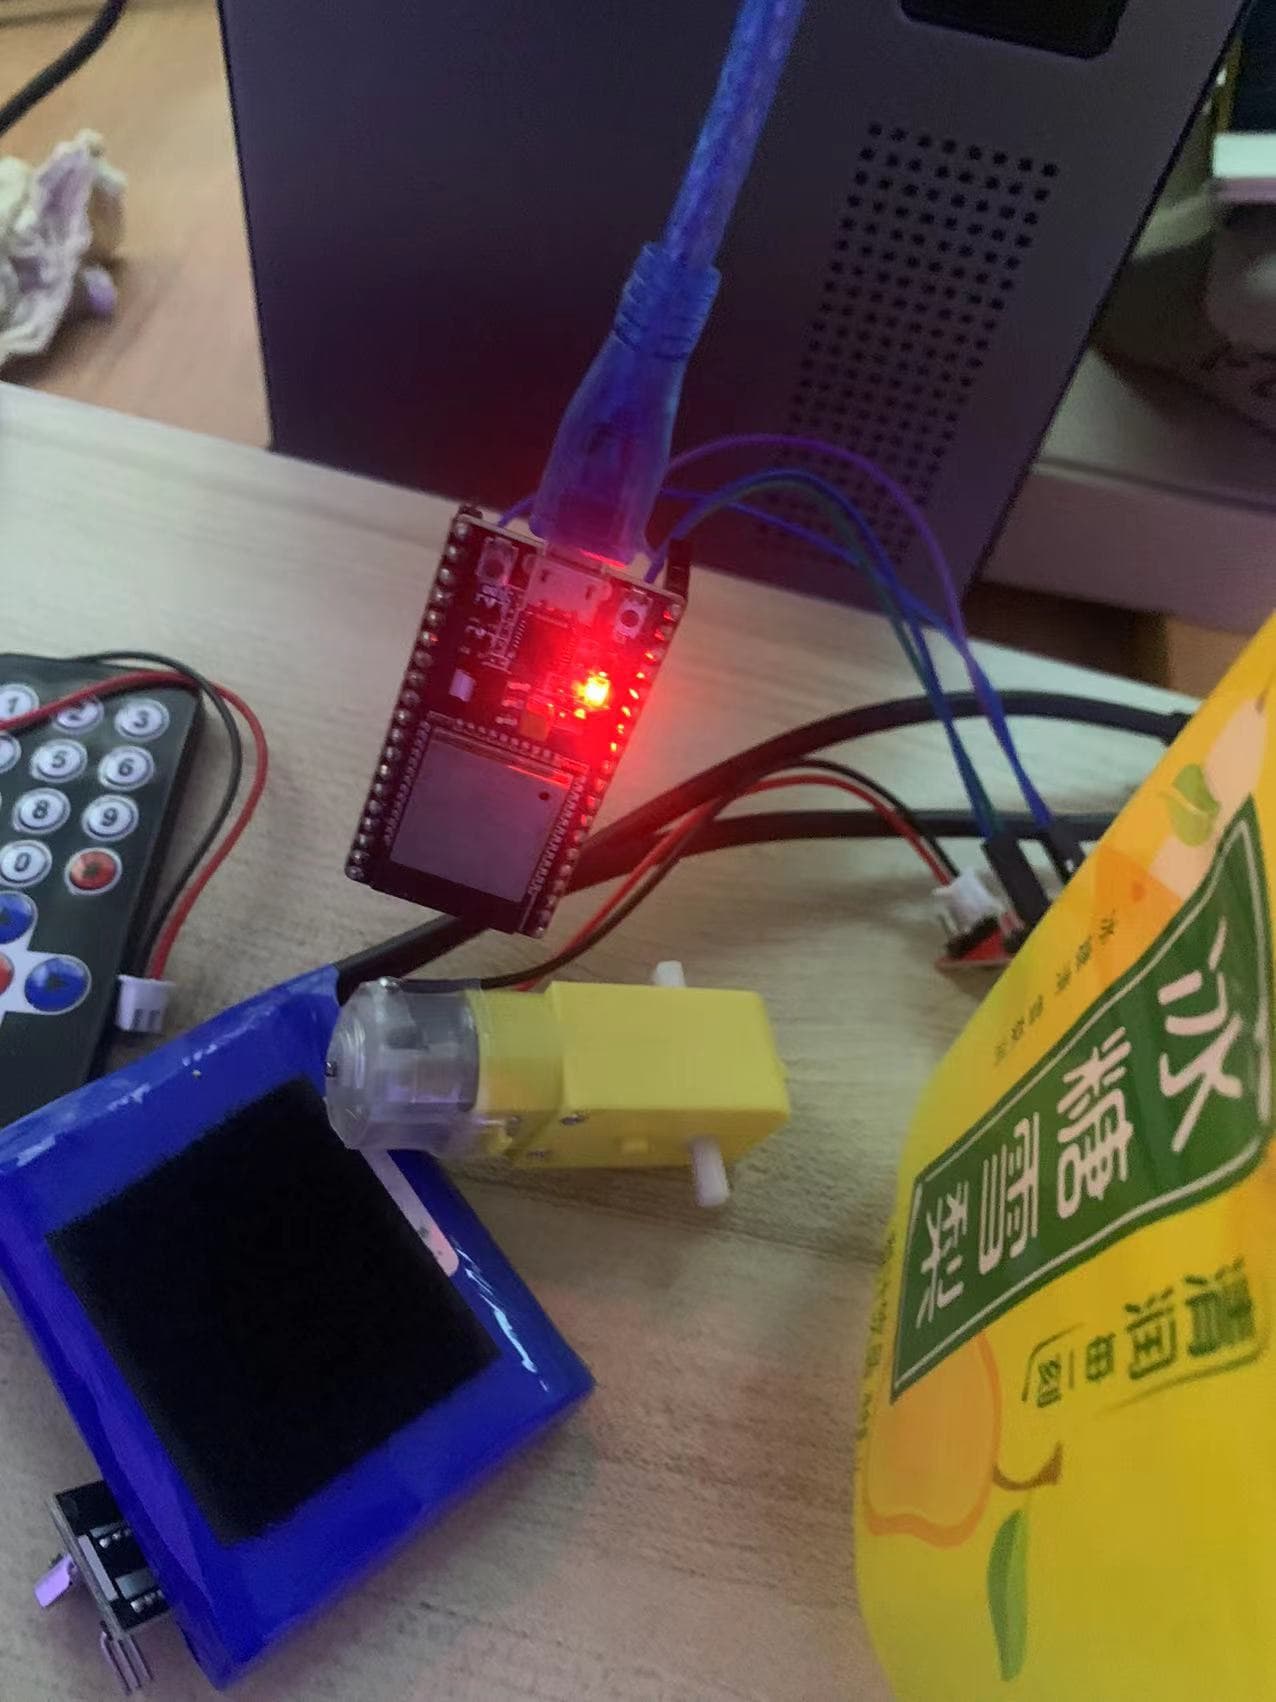
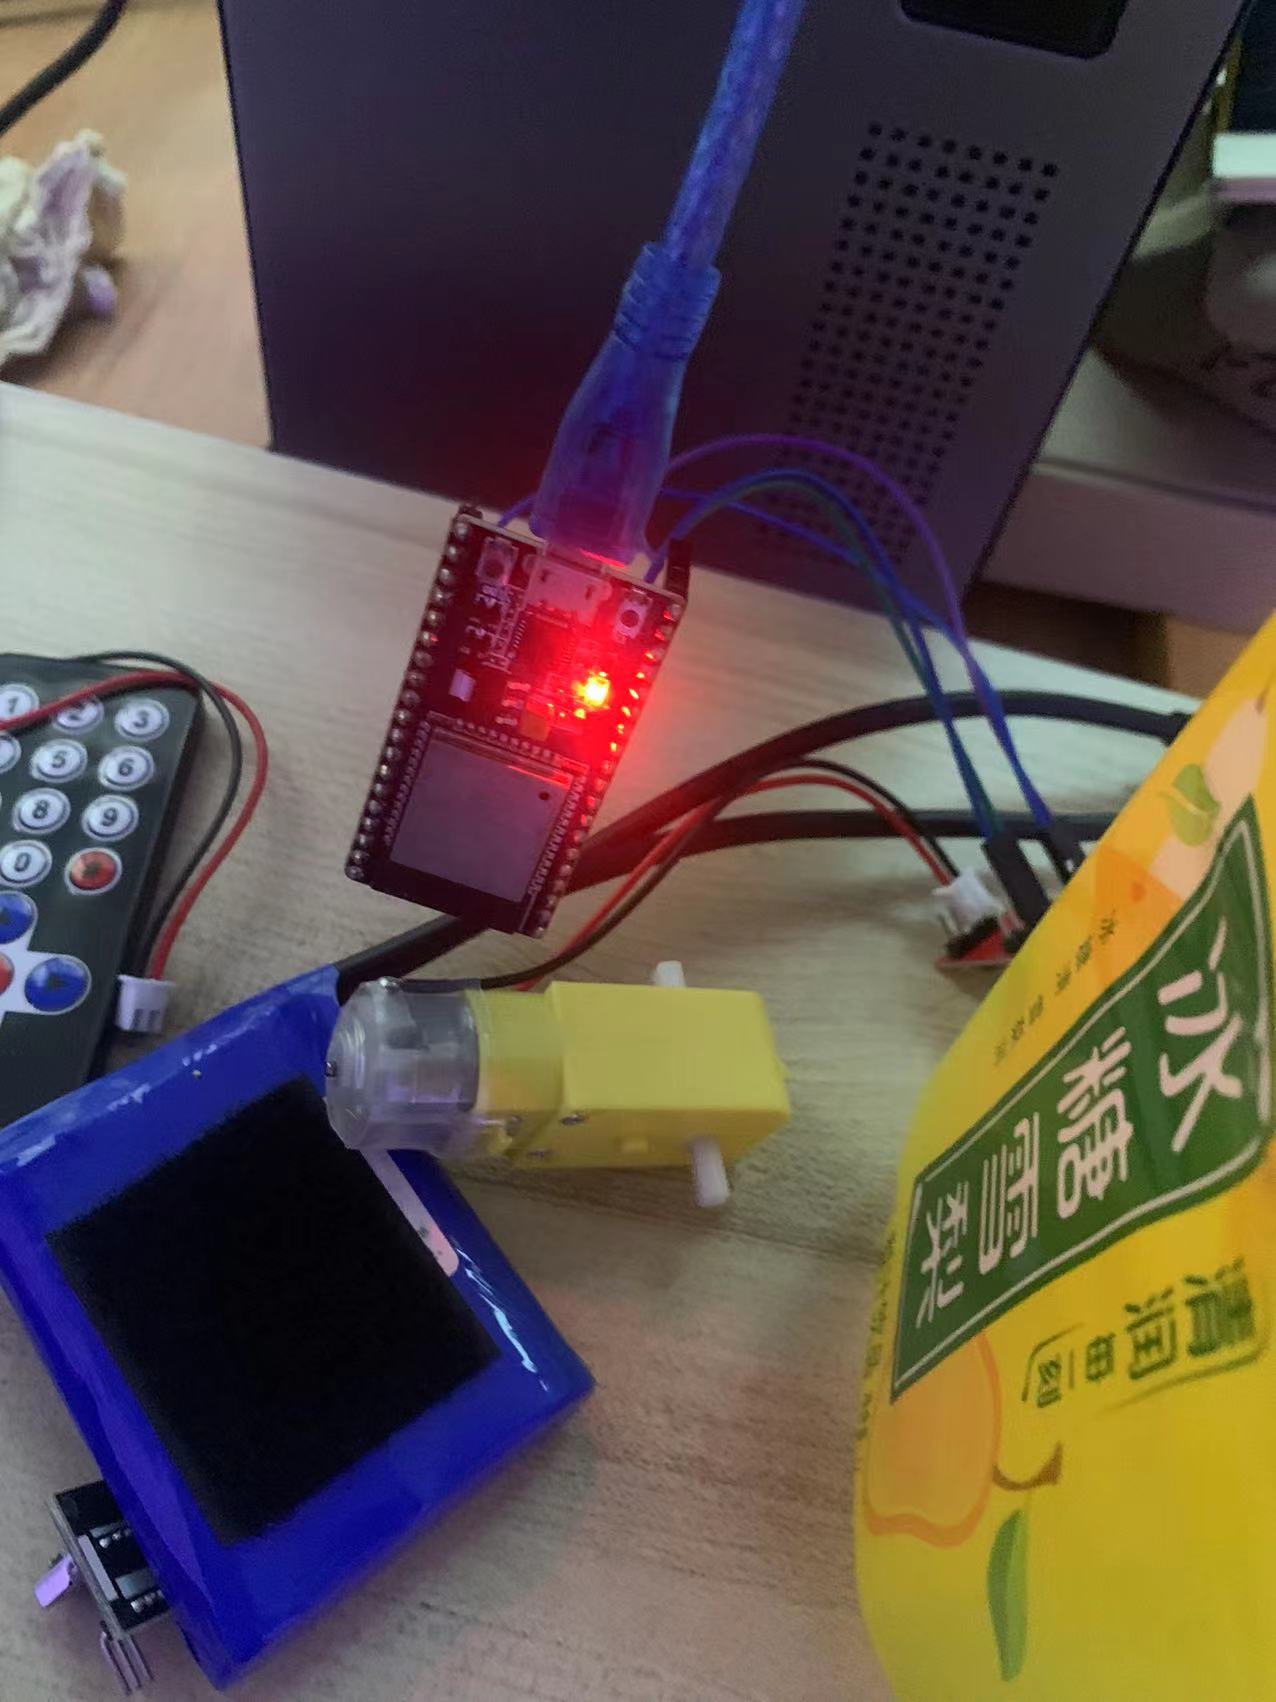
不管是什么单片机,入门第一课都是点亮 LED 灯,俗称“点灯大师”,哈哈,我们的第一课也是点灯,那我在群里,没有让大家去购买 LED,是因为我们实际上可以使用代码去控制 ESP 板子上面的其中一个 LED 灯管,当电源接通后会有一个电源灯,红色的灯亮起,电源正常,同时还有一个灯为蓝色的,默认为不显示的,接下来我们便让 ESP32 开发板的另外一个 LED 灯进行闪烁。
点灯
void setup() {

  // put your setup code here, to run once:
 pinMode(2,OUTPUT);
}

void loop() {
  digitalWrite(2, HIGH);   // sets the LED on
  delay(1000);                  // waits for a second
  digitalWrite(2, LOW);    // sets the LED off
  delay(1000);
}
先上代码,如上所示,即可点亮板子的另一个蓝色的灯,先讲一下代码,上面的 setup,一个单片机通电,只会运行一次,即每通电一次,运行一次,下面的 loop 是循环的一个代码,通电期间,一直循环,先运行 setup,在运行 loop,上面的 setup 顾名思义,是用来对单片机做一些配置,上面的配置就是将第二个引脚设置为输出,即单片机向引脚 2 输出,输出高低电平,用来点亮 LED 灯,在 ESP32 中,蓝色灯的引脚为 2,所以在此处我们设置引脚 2 为输出模式,
第二个 loop 循环代码,第一行调用了一个 digitalWrite 的方法,这个方法是给我们指定的引脚写入高低电平,以此来给某个引脚开关通电,断电,第一个参数为要写入的引脚的 pin 值,即引脚值,第二个参数为需要写入的值,HIGH,LOW 这两个为高低电平,HIGH 通电,LOW 断电,第二行代码,则是一个延迟函数,里面的值是毫秒值,1000,即代表暂停一秒
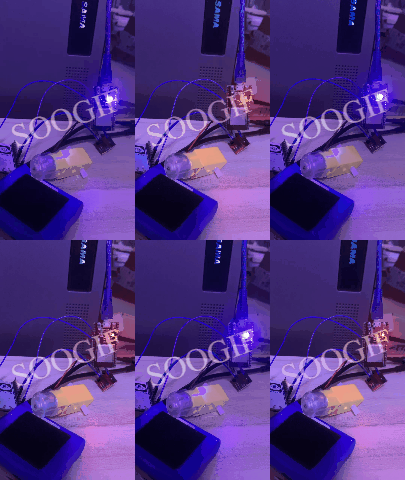
下面的 gif 展示了我们这次的一个运行结果,可以看到蓝色灯在不停的进行闪烁。
代码编译和烧录
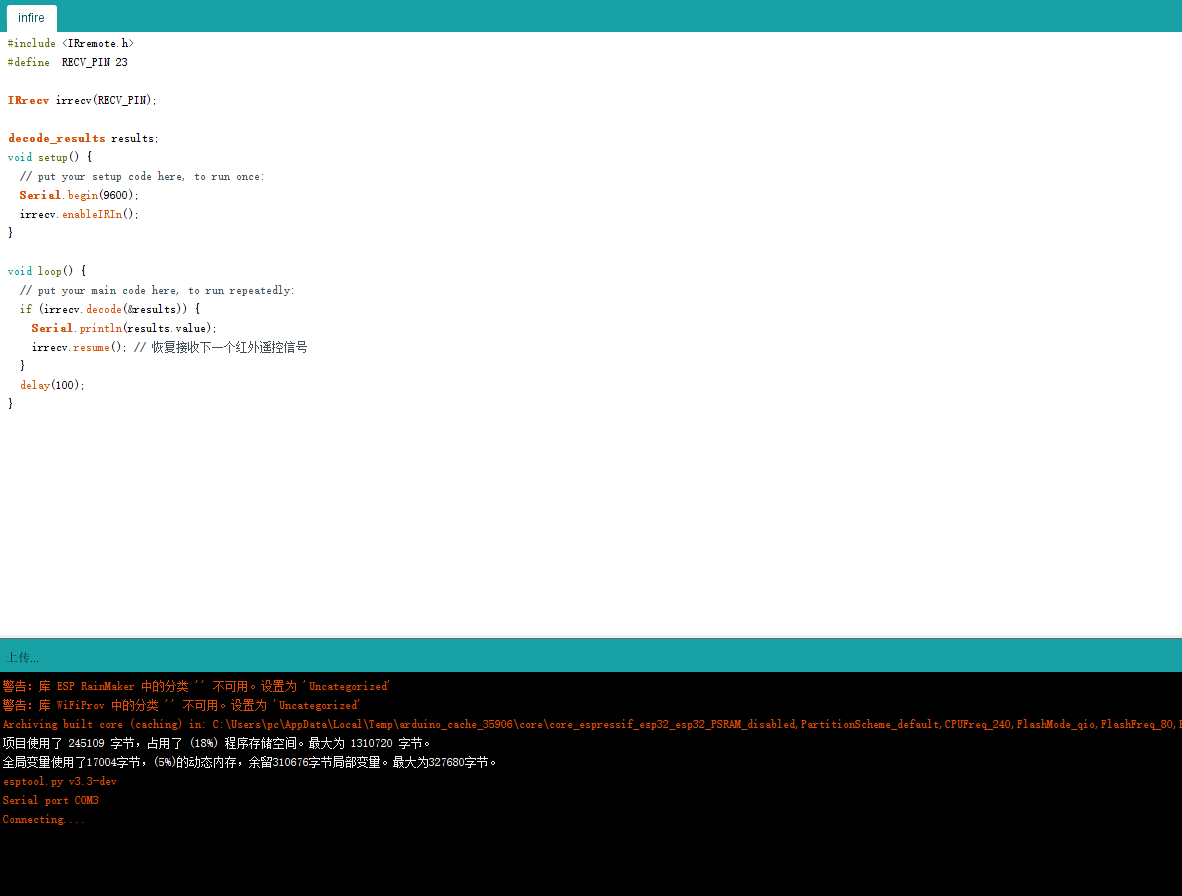
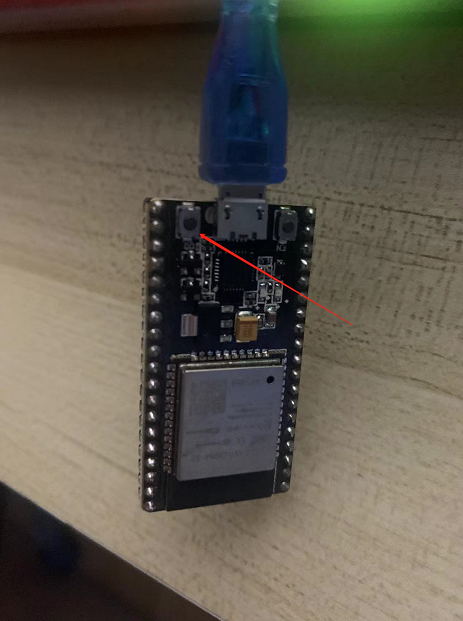
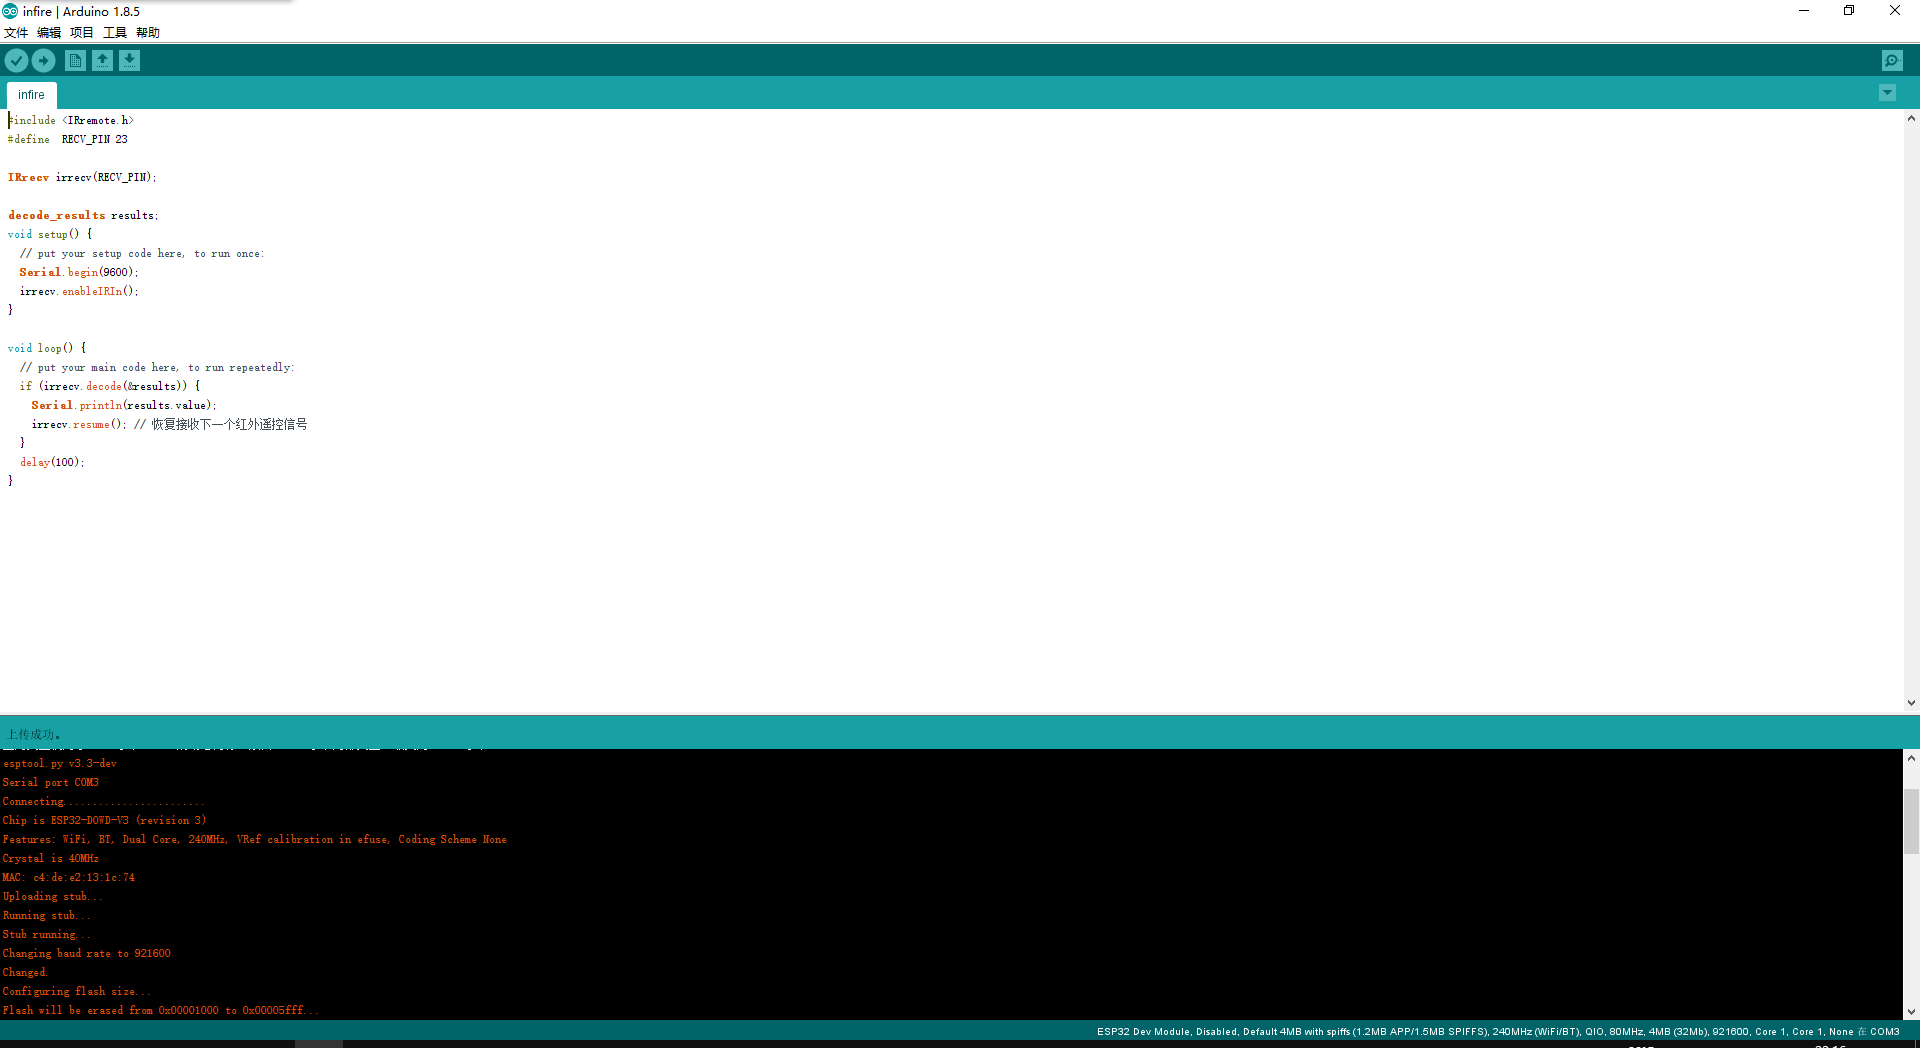
在我们代码写完成之后,我们需要编译,然后在烧写到单片机里面去,那每次写完之后呢,在编辑器左上角有一个对号的按钮,我们点击这个按钮之后,ide 会开始编译我们的代码,在编译之后,我们需要将代码烧录到单片机内部,点击对号旁边的右箭头按钮,代码开始烧录,等待下方出现 Connecting 的时候,我们要让单片机进入下载模式,单片机上面有两个按钮,电源灯上面有一个按钮,同横着水平旁边还有一个按钮,当出现了 Connecting 的时候需要去按住下方箭头所指的那个按钮不松手,则会写入程序。
Arduino
我们的开发 IDE 为 Arduino,我之前配过 vsc 使用纯 c 语言去进行开发 ESP32 单片机,后面使用了 Arduino,因为这个相比于纯 c 来说更简单一些,更适合入门,但是对于 C 开发,原理也是一样的,无非就是写法上纯在差异。
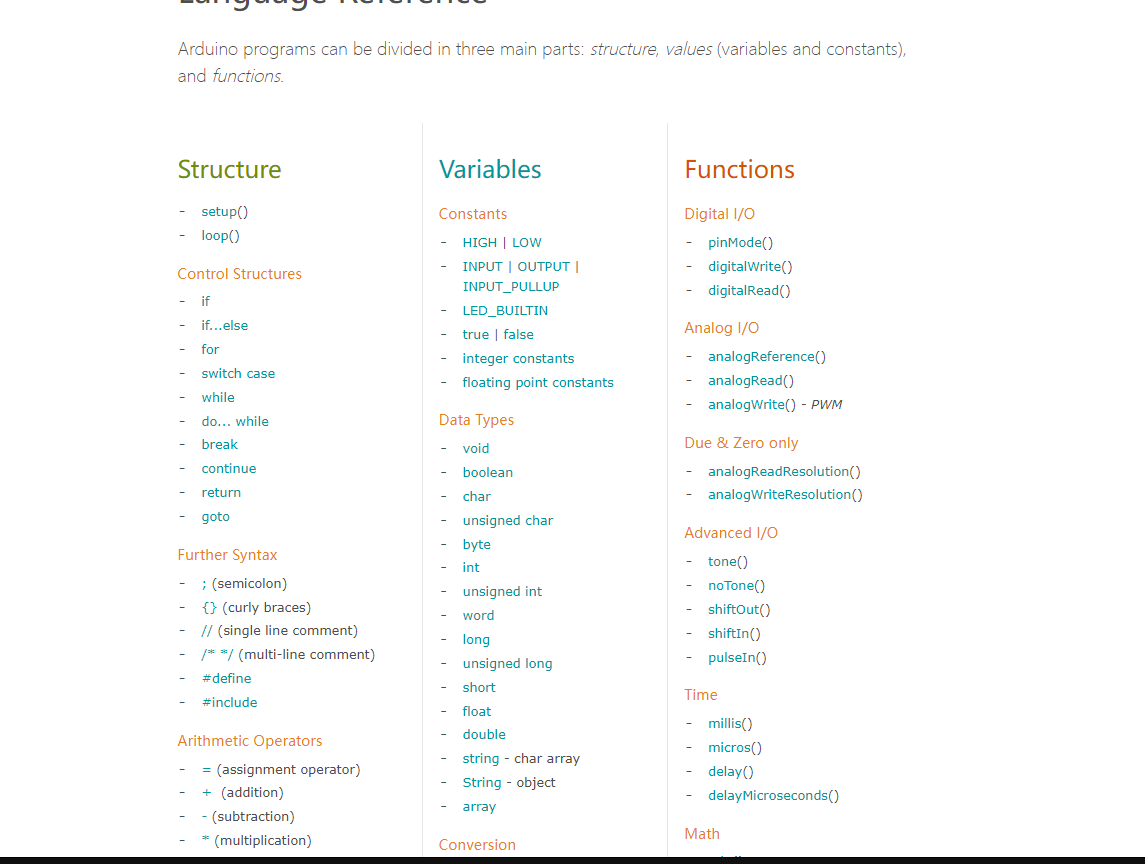
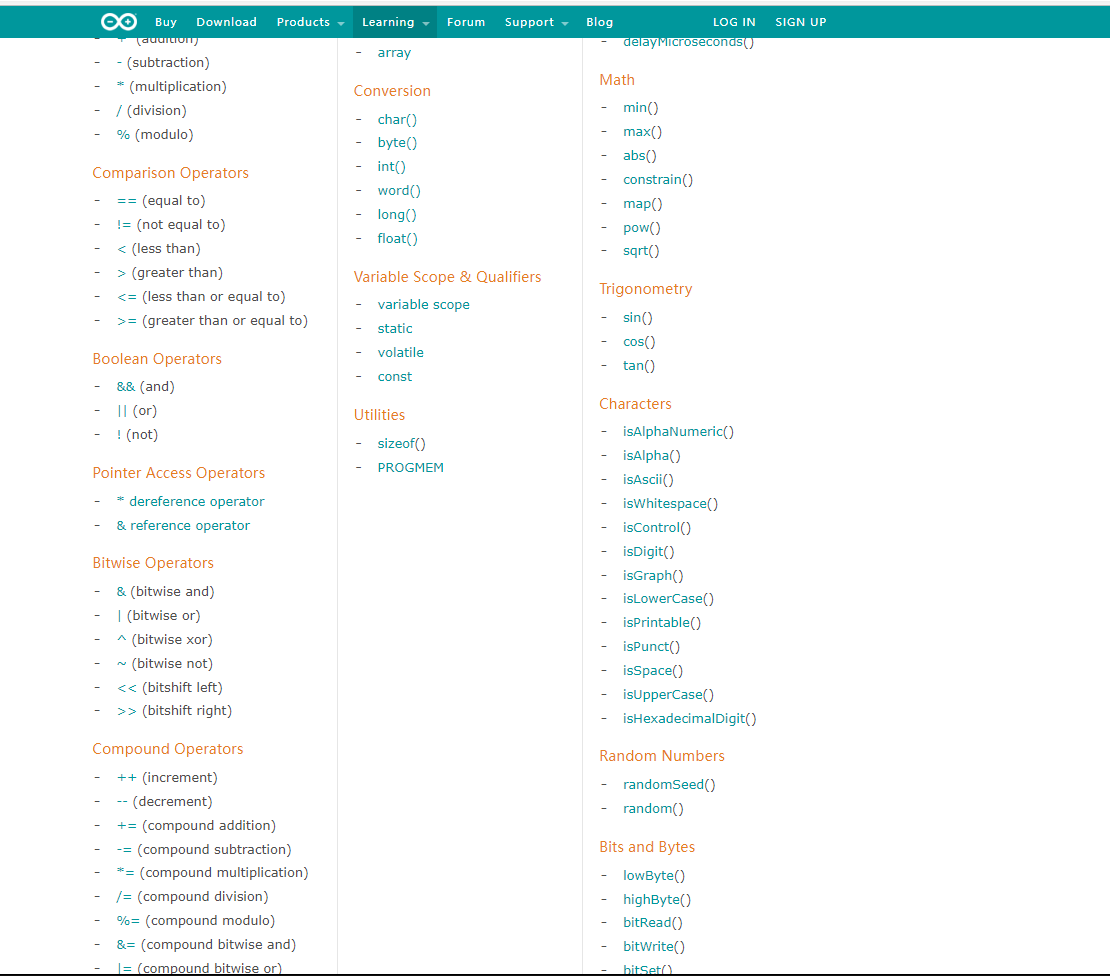
在程序运行都是不停的在进行循环代码,但是方法上一个是 main 方法,一个是 loop 其他的就是语法的区别了,Arduino 是基于 c 和 c++进行封装的,里面的封装更趋近于高级语言,这里展示一下 Arduino 的一些方法或者常量,数据类型等。
C 语言
而对于 c 语言来说,有的基础不好,或者没有深入使用过 c 语言的来讲是有一些难度的,我在这里贴一下我之前写的一个红外线控制智能小车的代码,此处使用的是 esp32 原生的 c 文件来进行开发,其复杂程度和 Arduino 相比还是略现复杂。
/* brushed dc motor control example
   This example code is in the Public Domain (or CC0 licensed, at your option.)

   Unless required by applicable law or agreed to in writing, this
   software is distributed on an "AS IS" BASIS, WITHOUT WARRANTIES OR
   CONDITIONS OF ANY KIND, either express or implied.
*/

/*
 * This example will show you how to use MCPWM module to control brushed dc motor.
 * This code is tested with L298 motor driver.
 * User may need to make changes according to the motor driver they use.
 */

#include <stdio.h>
#include "sdkconfig.h"
#include <string.h>
#include "freertos/FreeRTOS.h"
#include "freertos/task.h"
#include "esp_attr.h"
#include "driver/rmt.h"
#include "driver/mcpwm.h"
#include "soc/mcpwm_periph.h"
#include "IR_Rev.h"
// const static char *TAG = "IR_Rre Demo";

#define RECV_PIN 23  // 一体化红外接收头GPIO
uint8_t command = 0; // 接收到的ENC红外指令
int direction = 0;
float currentspeed = 0;
int currentcolor = 2;
#define GPIO_PWM0A_OUT 15 // Set GPIO 15 as PWM0A
#define GPIO_PWM0B_OUT 16 // Set GPIO 16 as PWM0B
#define GPIO_PWM1A_OUT 17
#define GPIO_PWM1B_OUT 18
#define GPIO_PWM2A_OUT 12 // Set GPIO 15 as PWM0A
#define GPIO_PWM2B_OUT 14 // Set GPIO 16 as PWM0B
#define GPIO_PWM3A_OUT 25
#define GPIO_PWM3B_OUT 26
#define RED 2
#define GREEN 4
#define BLUE 5
#define INFARE 21
static void mcpwm_example_gpio_initialize(void)
{
    printf("initializing mcpwm gpio...\n");
    mcpwm_gpio_init(MCPWM_UNIT_0, MCPWM0A, GPIO_PWM0A_OUT);
    mcpwm_gpio_init(MCPWM_UNIT_0, MCPWM0B, GPIO_PWM0B_OUT);
    mcpwm_gpio_init(MCPWM_UNIT_0, MCPWM1A, GPIO_PWM1A_OUT);
    mcpwm_gpio_init(MCPWM_UNIT_0, MCPWM1B, GPIO_PWM1B_OUT);
    mcpwm_gpio_init(MCPWM_UNIT_1, MCPWM0A, GPIO_PWM2A_OUT);
    mcpwm_gpio_init(MCPWM_UNIT_1, MCPWM0B, GPIO_PWM2B_OUT);
    mcpwm_gpio_init(MCPWM_UNIT_1, MCPWM1A, GPIO_PWM3A_OUT);
    mcpwm_gpio_init(MCPWM_UNIT_1, MCPWM1B, GPIO_PWM3B_OUT);
}
// forwards he forward 替换实现顺时针吹风和逆时针吹风
/**
 * @brief motor moves in forward direction, with duty cycle = duty %
 */
static void brushed_motor_forward(mcpwm_unit_t mcpwm_num, mcpwm_timer_t timer_num, float duty_cycle)
{
    mcpwm_set_signal_low(mcpwm_num, timer_num, MCPWM_OPR_A);
    mcpwm_set_duty(mcpwm_num, timer_num, MCPWM_OPR_B, duty_cycle);
    mcpwm_set_duty_type(mcpwm_num, timer_num, MCPWM_OPR_B, MCPWM_DUTY_MODE_0); // call this each time, if operator was previously in low/high state
}
static void brushed_motor_forwards(mcpwm_unit_t mcpwm_num, mcpwm_timer_t timer_num, float duty_cycle)
{
    ESP_ERROR_CHECK(mcpwm_set_signal_low(mcpwm_num, timer_num, MCPWM_OPR_B));
    ESP_ERROR_CHECK(mcpwm_set_duty(mcpwm_num, timer_num, MCPWM_OPR_A, duty_cycle));
    ESP_ERROR_CHECK(mcpwm_set_duty_type(mcpwm_num, timer_num, MCPWM_OPR_A, MCPWM_DUTY_MODE_0)); // call this each time, if operator was previously in low/high state
}
// forwards he forward 替换实现顺时针吹风和逆时针吹风
/**
 * @brief motor moves in forward direction, with duty cycle = duty %
 */
static void brushed_motor_backward(mcpwm_unit_t mcpwm_num, mcpwm_timer_t timer_num, float duty_cycle)
{
    mcpwm_set_signal_low(mcpwm_num, timer_num, MCPWM_OPR_B);
    mcpwm_set_duty(mcpwm_num, timer_num, MCPWM_OPR_A, duty_cycle);
    mcpwm_set_duty_type(mcpwm_num, timer_num, MCPWM_OPR_A, MCPWM_DUTY_MODE_0); // call this each time, if operator was previously in low/high state
}
static void brushed_motor_backwards(mcpwm_unit_t mcpwm_num, mcpwm_timer_t timer_num, float duty_cycle)
{
    ESP_ERROR_CHECK(mcpwm_set_signal_low(mcpwm_num, timer_num, MCPWM_OPR_A));
    ESP_ERROR_CHECK(mcpwm_set_duty(mcpwm_num, timer_num, MCPWM_OPR_B, duty_cycle));
    ESP_ERROR_CHECK(mcpwm_set_duty_type(mcpwm_num, timer_num, MCPWM_OPR_B, MCPWM_DUTY_MODE_0)); // call this each time, if operator was previously in low/high state
}

/**
 * @brief motor stop
 */
static void brushed_motor_stop(mcpwm_unit_t mcpwm_num, mcpwm_timer_t timer_num)
{
    mcpwm_set_signal_low(mcpwm_num, timer_num, MCPWM_OPR_A);
    mcpwm_set_signal_low(mcpwm_num, timer_num, MCPWM_OPR_B);
}

static void setspeed(uint8_t command)
{
    if ((uint8_t)command == 22)
    {
        printf("%d\n", 22);
        currentspeed = 10;
    }
    else if ((uint8_t)command == 12)
    {
        printf("%d\n", 12);
        currentspeed = 20;
    }
    else if ((uint8_t)command == 24)
    {
        printf("%d\n", 24);
        currentspeed = 30;
    }
    else if ((uint8_t)command == 94)
    {
        printf("%d\n", 94);
        currentspeed = 40;
    }
    else if ((uint8_t)command == 8)
    {
        printf("%d\n", 8);
        currentspeed = 50;
    }
    else if ((uint8_t)command == 28)
    {
        printf("%d\n", 28);
        currentspeed = 60;
    }
    else if ((uint8_t)command == 90)
    {
        printf("%d\n", 90);
        currentspeed = 70;
    }
    else if ((uint8_t)command == 66)
    {
        printf("%d\n", 66);
        currentspeed = 80;
    }
    else if ((uint8_t)command == 82)
    {
        printf("%d\n", 82);
        currentspeed = 90;
    }
    else if ((uint8_t)command == 74)
    {
        printf("%d\n", 74);
        currentspeed = 100;
    }
}
static void head(float speed)
{
    brushed_motor_forward(MCPWM_UNIT_0, MCPWM_TIMER_0, speed);
    brushed_motor_forwards(MCPWM_UNIT_0, MCPWM_TIMER_1, speed);
    brushed_motor_forward(MCPWM_UNIT_1, MCPWM_TIMER_0, speed);
    brushed_motor_forwards(MCPWM_UNIT_1, MCPWM_TIMER_1, speed);
}
static void last(float speed)
{
    brushed_motor_backward(MCPWM_UNIT_0, MCPWM_TIMER_0, speed);
    brushed_motor_backwards(MCPWM_UNIT_0, MCPWM_TIMER_1, speed);
    brushed_motor_backward(MCPWM_UNIT_1, MCPWM_TIMER_0, speed);
    brushed_motor_backwards(MCPWM_UNIT_1, MCPWM_TIMER_1, speed);
}
static void left(float speed)
{
    mcpwm_set_signal_low(MCPWM_UNIT_0, MCPWM_TIMER_1, MCPWM_OPR_A);
    mcpwm_set_signal_low(MCPWM_UNIT_1, MCPWM_TIMER_0, MCPWM_OPR_B);
}
static void right(float speed)
{
    mcpwm_set_signal_low(MCPWM_UNIT_0, MCPWM_TIMER_0, MCPWM_OPR_B);
    mcpwm_set_signal_low(MCPWM_UNIT_1, MCPWM_TIMER_1, MCPWM_OPR_A);
}
/**
 * @brief Configure MCPWM module for brushed dc motor
 */
static void mcpwm_example_brushed_motor_control(void *arg)
{
    // 1. mcpwm gpio initialization
    mcpwm_example_gpio_initialize();

    // 2. initial mcpwm configuration
    printf("Configuring Initial Parameters of mcpwm...\n");
    mcpwm_config_t pwm_config;
    pwm_config.frequency = 1000; // frequency = 500Hz,
    pwm_config.cmpr_a = 0;       // duty cycle of PWMxA = 0
    pwm_config.cmpr_b = 0;       // duty cycle of PWMxb = 0
    pwm_config.counter_mode = MCPWM_UP_COUNTER;
    pwm_config.duty_mode = MCPWM_DUTY_MODE_0;
    ESP_ERROR_CHECK(mcpwm_init(MCPWM_UNIT_0, MCPWM_TIMER_0, &pwm_config)); // Configure PWM0A & PWM0B with above settings
    mcpwm_config_t pwm_configs;
    pwm_configs.frequency = 1000; // frequency = 500Hz,
    pwm_configs.cmpr_a = 0;       // duty cycle of PWMxA = 0
    pwm_configs.cmpr_b = 0;       // duty cycle of PWMxb = 0
    pwm_configs.counter_mode = MCPWM_UP_COUNTER;
    pwm_configs.duty_mode = MCPWM_DUTY_MODE_0;
    ESP_ERROR_CHECK(mcpwm_init(MCPWM_UNIT_0, MCPWM_TIMER_1, &pwm_configs)); // Configure PWM0A & PWM0B with above settings

    mcpwm_config_t pwm_configA;
    pwm_configA.frequency = 1000; // frequency = 500Hz,
    pwm_configA.cmpr_a = 0;       // duty cycle of PWMxA = 0
    pwm_configA.cmpr_b = 0;       // duty cycle of PWMxb = 0
    pwm_configA.counter_mode = MCPWM_UP_COUNTER;
    pwm_configA.duty_mode = MCPWM_DUTY_MODE_0;
    ESP_ERROR_CHECK(mcpwm_init(MCPWM_UNIT_1, MCPWM_TIMER_0, &pwm_configA)); // Configure PWM0A & PWM0B with above settings
    mcpwm_config_t pwm_configAs;
    pwm_configAs.frequency = 1000; // frequency = 500Hz,
    pwm_configAs.cmpr_a = 0;       // duty cycle of PWMxA = 0
    pwm_configAs.cmpr_b = 0;       // duty cycle of PWMxb = 0
    pwm_configAs.counter_mode = MCPWM_UP_COUNTER;
    pwm_configAs.duty_mode = MCPWM_DUTY_MODE_0;
    ESP_ERROR_CHECK(mcpwm_init(MCPWM_UNIT_1, MCPWM_TIMER_0, &pwm_configAs)); // Configure PWM0A & PWM0B with above settings */ */
    while (1)
    {
        command = IRrecvReadIR();


        printf("IR Command is %02X\n", command);
        printf("IR 111 is %d\n", (uint8_t)command);
        if ((uint8_t)command == 69)
        {
            brushed_motor_stop(MCPWM_UNIT_0, MCPWM_TIMER_0);
            brushed_motor_stop(MCPWM_UNIT_0, MCPWM_TIMER_1);
            brushed_motor_stop(MCPWM_UNIT_1, MCPWM_TIMER_0);
            brushed_motor_stop(MCPWM_UNIT_1, MCPWM_TIMER_1);
        }
        else if ((uint8_t)command == 64)
        {
            direction = 64;
            head(currentspeed);
        }
        else if ((uint8_t)command == 25)
        {
            direction = 25;
            last(currentspeed);
        }
        else if ((uint8_t)command == 7)
        {
            printf("IR 32 is %d\n", (uint8_t)command);
            left(currentspeed);
        }
        else if ((uint8_t)command == 9)
        {
            printf("IR 23 is %d\n", (uint8_t)command);
            right(currentspeed);
        }
        else
        {
            printf(" %d\n", direction);
            setspeed(command);
            if (direction == 64)
            {
                head(currentspeed);
            }
            else if (direction == 25)
            {
                last(currentspeed);
            }
        }
    }
}
static void openlight(void *arg)
{
    gpio_set_level(INFARE, 1);
    while (1)
    {

        gpio_set_level(currentcolor, 1);
        vTaskDelay(200 / portTICK_PERIOD_MS);
        gpio_set_level(currentcolor, 0);
        if(currentcolor==2)
        {
            currentcolor=4;
        }
        else if (currentcolor==4)
        {
            currentcolor=5;
        }
        else if (currentcolor==5)
        {
            currentcolor=2;
        }
    }

}
void app_main(void)
{
    IRrecvInit(RECV_PIN, 3);
    gpio_set_direction(INFARE, GPIO_MODE_OUTPUT);
    gpio_set_direction(RED, GPIO_MODE_OUTPUT);
    gpio_set_direction(GREEN, GPIO_MODE_OUTPUT);
    gpio_set_direction(BLUE, GPIO_MODE_OUTPUT);
    xTaskCreate(mcpwm_example_brushed_motor_control, "mcpwm_examlpe_brushed_motor_control", 4096, NULL, 5, NULL);
    xTaskCreate(openlight, "openlight", 4096, NULL, 5, NULL);
}
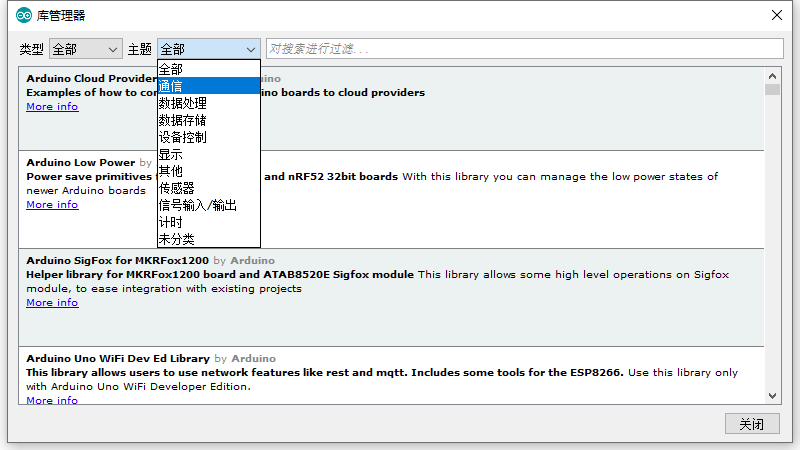
而令我最喜欢 Arduino 的一点是,我们需要使用一些第三方库的时候,这里的扩展相比 VSC 更容易找一些,C 的话在插件市场极大可能找不到,需要在网上自己搜索,找到 c 语言写好的文件,然后 include 进来再去使用,找的话有点难度,对于红外线来讲,上次我在网上找就找了挺久的一段时间。而在 Arduino 我只需在管理库界面搜索我想要的库或者关键字都可以找到,emmm,我觉得就像 nuget 一样简单,哈哈,所以我更喜欢用这个一点。
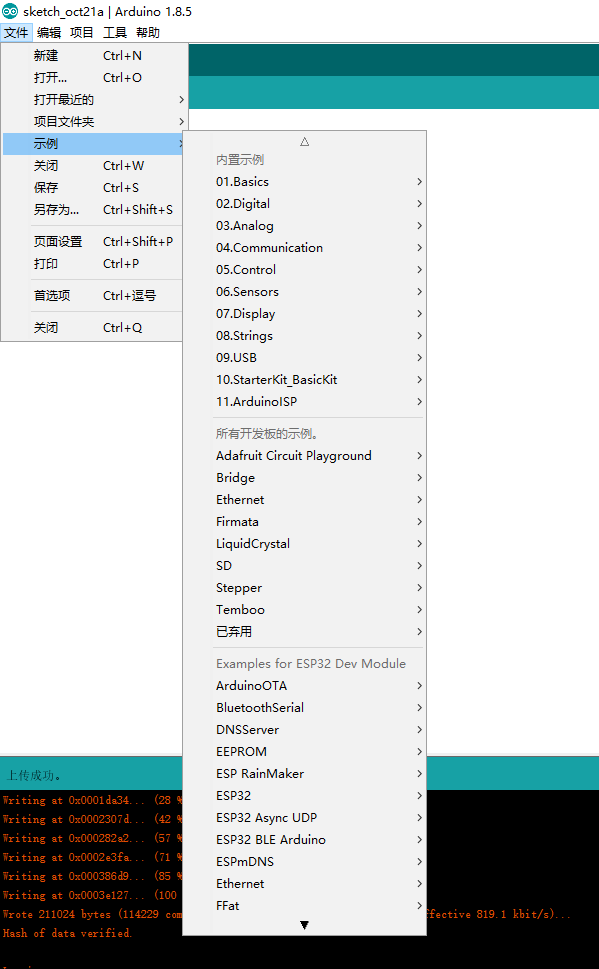
在这里,我们就可以根据关键字,类型去搜索我们想要的第三方库,很方便,同时有的第三方库也是有例子可以直接使用,总体来说,作为简单入门,Arduino 还是很不错的一个选择。
结语
好啦,今天的点灯第一课就到这里啦,如果又不懂的可以随时问我,可以加这个群一起来学习单片机,后面还会开 stm32 系列的课程,IDE 的话可以看上一篇博客中的下载地址是有百度网盘的地址,同时群文件也有,有需要的可以下载啦,我们系列教程会出到可以自己做一个智能小车为止。