
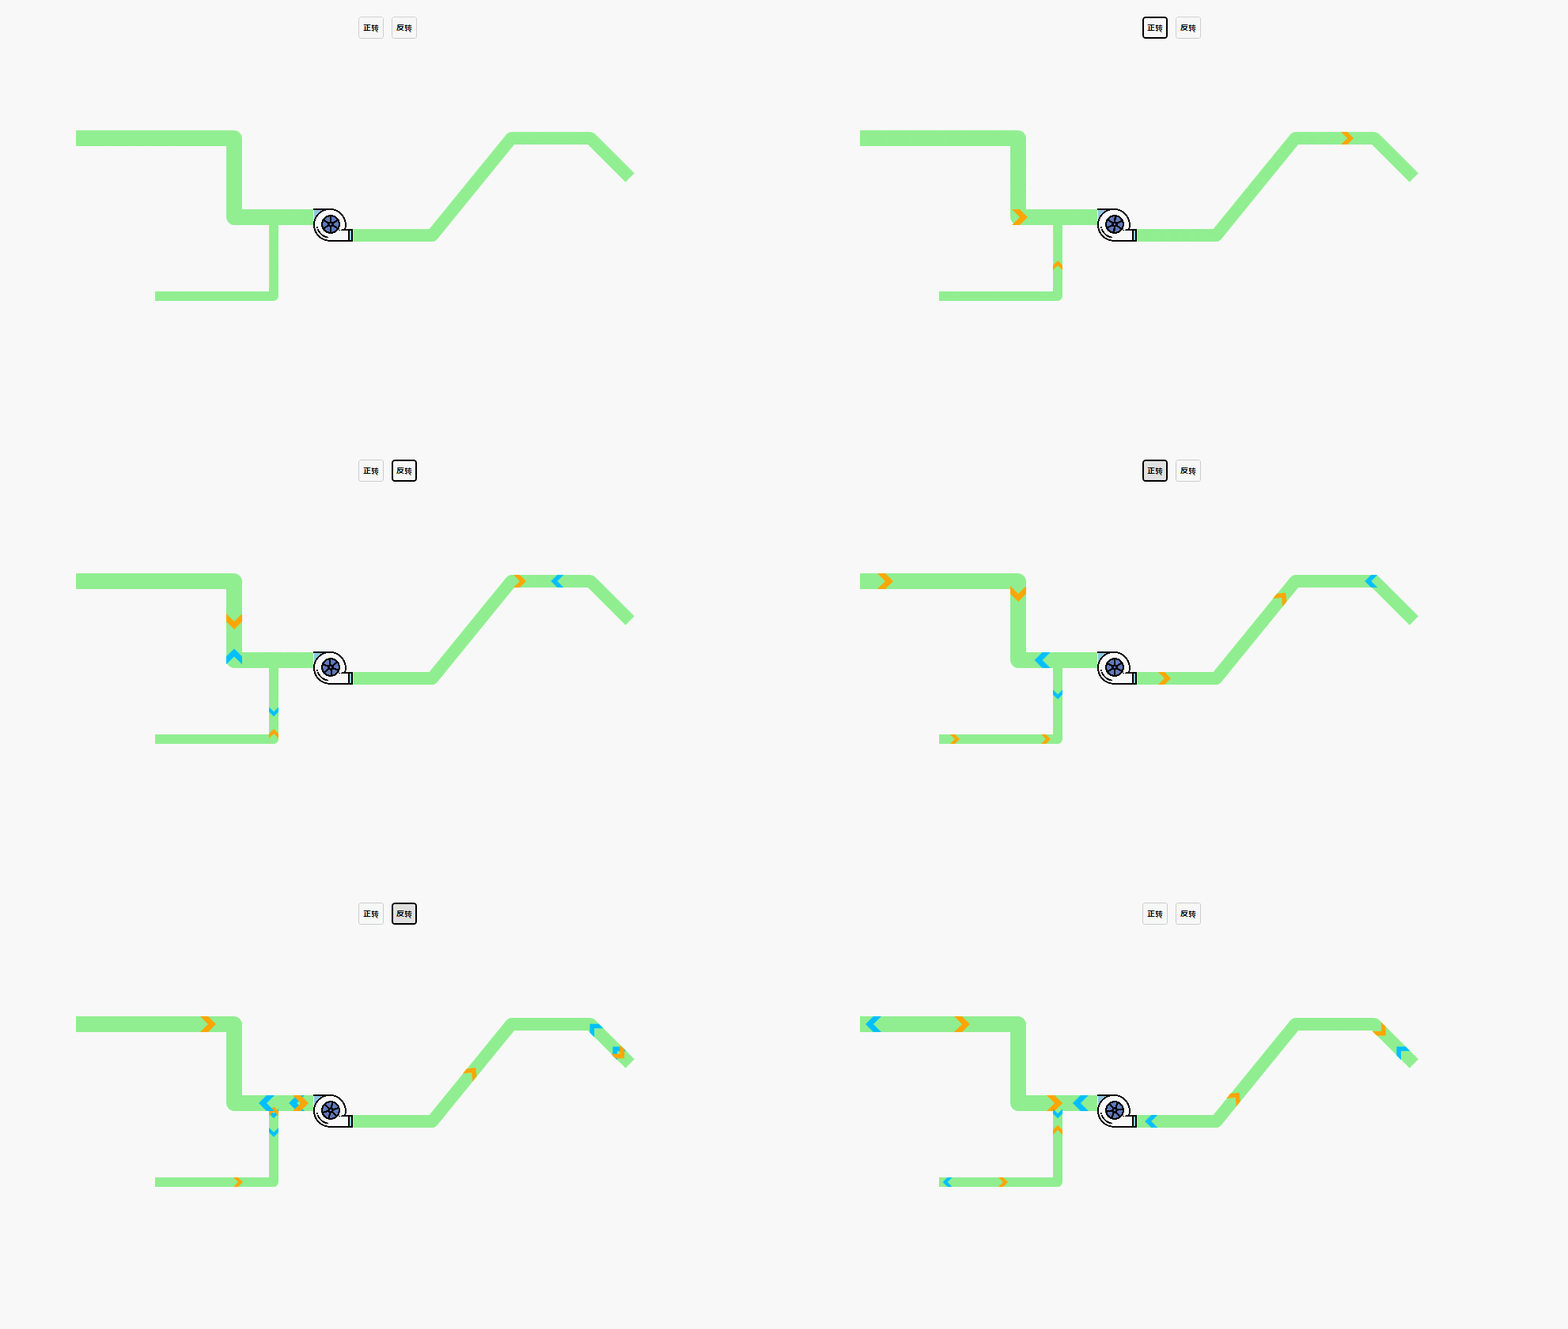
WPF 的一大特性就的动画系统,使用动画能够实现很多在 WinForm 很难实现的效果。最近在网上偶然看到大神用 WPF 动画实现对象沿特定路径正向或反向移动的效果,就想参考着自己试一试。
1. 简单路径动画
先来一个最简单的路径动画,一个方块加一条线段,让方块从线段起点移动到线段终点。前台页面代码如下:
<Grid>
  <Grid.RowDefinitions>
    <RowDefinition Height="80"></RowDefinition>
    <RowDefinition></RowDefinition>
  </Grid.RowDefinitions>
  <WrapPanel VerticalAlignment="Center" HorizontalAlignment="Center">
    <button x:Name="btnAnimo" Click="btnAnimo_Click" Margin="0,0,10,0">
      开始
    </button>
  </WrapPanel>
  <Grid Grid.Row="1">
    <canvas x:Name="cvsMain">
      <Path
        x:Name="path1"
        Data="M100,100 L300,100 400,200 500,200"
        Stroke="LightGreen"
        StrokeThickness="20"
        StrokeLineJoin="Round"
      ></Path>
    </canvas>
  </Grid>
</Grid>
后台逻辑代码如下:
private void btnAnimo_Click(object sender, RoutedEventArgs e)
{
    AnimationByPath(cvsMain, path1,path1.StrokeThickness);
}

/// <summary>
/// 路径动画
/// </summary>
/// <param name="cvs">画板</param>
/// <param name="path">路径</param>
/// <param name="target">动画对象</param>
/// <param name="duration">时间</param>
private void AnimationByPath(Canvas cvs, Path path,double targetWidth, int duration = 5)
{
    #region 创建动画对象
    Rectangle target = new Rectangle();
    target.Width = targetWidth;
    target.Height = targetWidth;
    target.Fill = new SolidColorBrush(Colors.Orange);
    cvs.Children.Add(target);
    Canvas.SetLeft(target, -targetWidth / 2);
    Canvas.SetTop(target, -targetWidth / 2);
    target.RenderTransformOrigin = new Point(0.5, 0.5);
    #endregion

    MatrixTransform matrix = new MatrixTransform();
    TransformGroup groups = new TransformGroup();
    groups.Children.Add(matrix);
    target.RenderTransform = groups;
    string registname = "matrix" + Guid.NewGuid().ToString().Replace("-", "");
    this.RegisterName(registname, matrix);
    MatrixAnimationUsingPath matrixAnimation = new MatrixAnimationUsingPath();
    matrixAnimation.PathGeometry = PathGeometry.CreateFromGeometry(Geometry.Parse(path.Data.ToString()));
    matrixAnimation.Duration = new Duration(TimeSpan.FromSeconds(duration));
    matrixAnimation.DoesRotateWithTangent = true;//跟随路径旋转
    matrixAnimation.RepeatBehavior = RepeatBehavior.Forever;//循环
    Storyboard story = new Storyboard();
    story.Children.Add(matrixAnimation);
    Storyboard.SetTargetName(matrixAnimation, registname);
    Storyboard.SetTargetProperty(matrixAnimation, new PropertyPath(MatrixTransform.MatrixProperty));

    story.FillBehavior = FillBehavior.Stop;
    story.Begin(target, true);
}
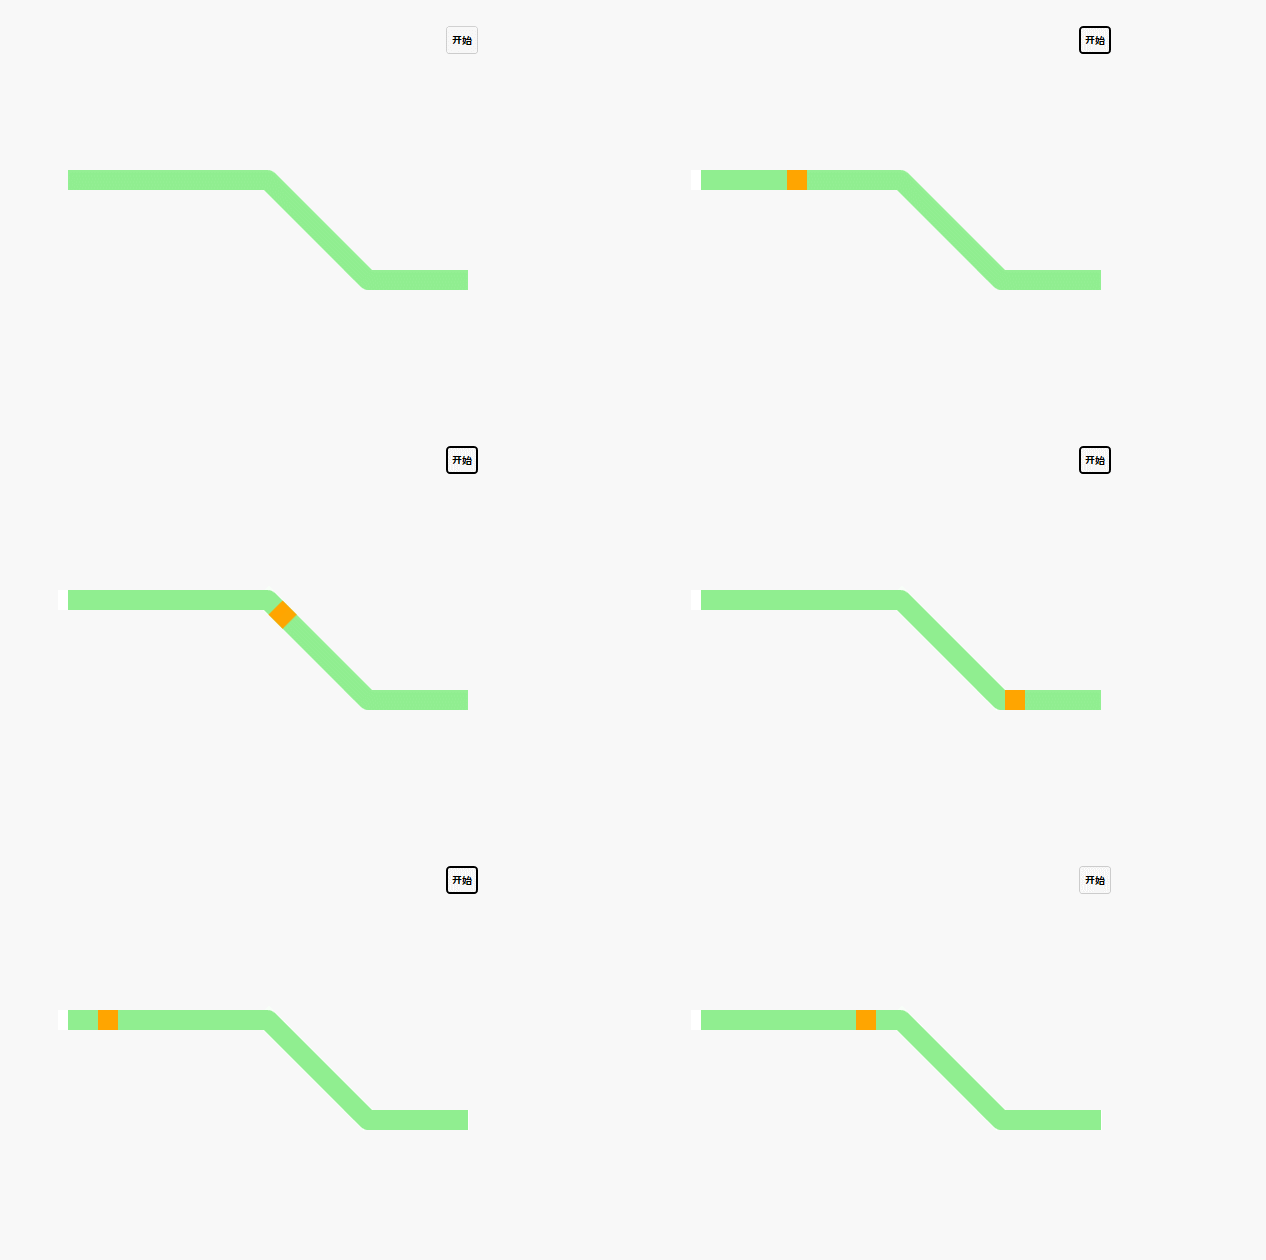
其中的关键点在于动态创建一个Rectangle正方体作为动画对象,正方体的宽高设为跟路径宽度一致,并设置正方体的变换原点为中心点(RenderTransformOrigin ="0.5,0.5"),确保正方体随路径移动时也能随着路径旋转。最终效果如下:
2. 反向路径动画
在上个示例的基础上,将线段改成多条连续线段甚至加上弧线都不影响效果,小方块都会沿着路径移动下去。对于一条路径来讲是有起点和终点的,正常情况下动画对象是从起点移动到终点的,能否让对象从终点移动到起点呢?
其是换个思路思考,将原有路径反转,起点、终点对调,不就能得到一条与原路径外观一致但数据相反的路径了吗?让动画对象沿着反转后的路径移动,从视觉效果上来看就是从终点移动到起点了。
解决这个问题的关键就在于路径数据的转换了。
private string ConvertPathData(string data)
{
    data = data.Replace("M", "");
    Regex regex = new Regex("[a-z]", RegexOptions.IgnoreCase);
    MatchCollection mc = regex.Matches(data);
    //item1 从上一个位置到当前位置开始的字符 (match.Index=原始字符串中发现捕获的子字符串的第一个字符的位置。)
    //item2 当前发现的匹配符号(L C Z M)
    List<Tuple<string, string>> tmps = new List<Tuple<string, string>>();
    int index = 0;
    for (int i = 0; i < mc.Count; i++)
    {
        Match match = mc[i];
        if (match.Index != index)
        {
            string str = data.Substring(index, match.Index - index);
            tmps.Add(new Tuple<string, string>(str, match.Value));
        }
        index = match.Index + match.Length;
        if (i + 1 == mc.Count)//last
        {
            tmps.Add(new Tuple<string, string>(data.Substring(index), match.Value));
        }
    }
    List<string[]> arrys = new List<string[]>();
    Regex regexnum = new Regex(@"(\-?\d+\.?\d*)", RegexOptions.IgnoreCase);
    for (int i = 0; i < tmps.Count; i++)
    {
        MatchCollection childMcs = regexnum.Matches(tmps[i].Item1);
        if (childMcs.Count % 2 != 0)
        {
            continue;
        }
        int groups = childMcs.Count / 2;
        var strTmp = new string[groups];
        for (int j = 0; j < groups; j++)
        {
            string cdatas = childMcs[j * 2] + "," + childMcs[j * 2 + 1];//重组数据
            strTmp[j] = cdatas;
        }
        arrys.Add(strTmp);
    }

    List<string> result = new List<string>();
    for (int i = arrys.Count - 1; i >= 0; i--)
    {
        string[] clist = arrys[i];
        for (int j = clist.Length - 1; j >= 0; j--)
        {
            if (j == clist.Length - 2 && i > 0)//对于第二个元素增加 L或者C的标识
            {
                var pointWord = tmps[i - 1].Item2;//获取标识
                result.Add(pointWord + clist[j]);
            }
            else
            {
                result.Add(clist[j]);
                if (clist.Length == 1 && i > 0)//说明只有一个元素 ex L44.679973,69.679973
                {
                    result.Add(tmps[i - 1].Item2);
                }
            }
        }
    }
    return "M" + string.Join(" ", result);

}
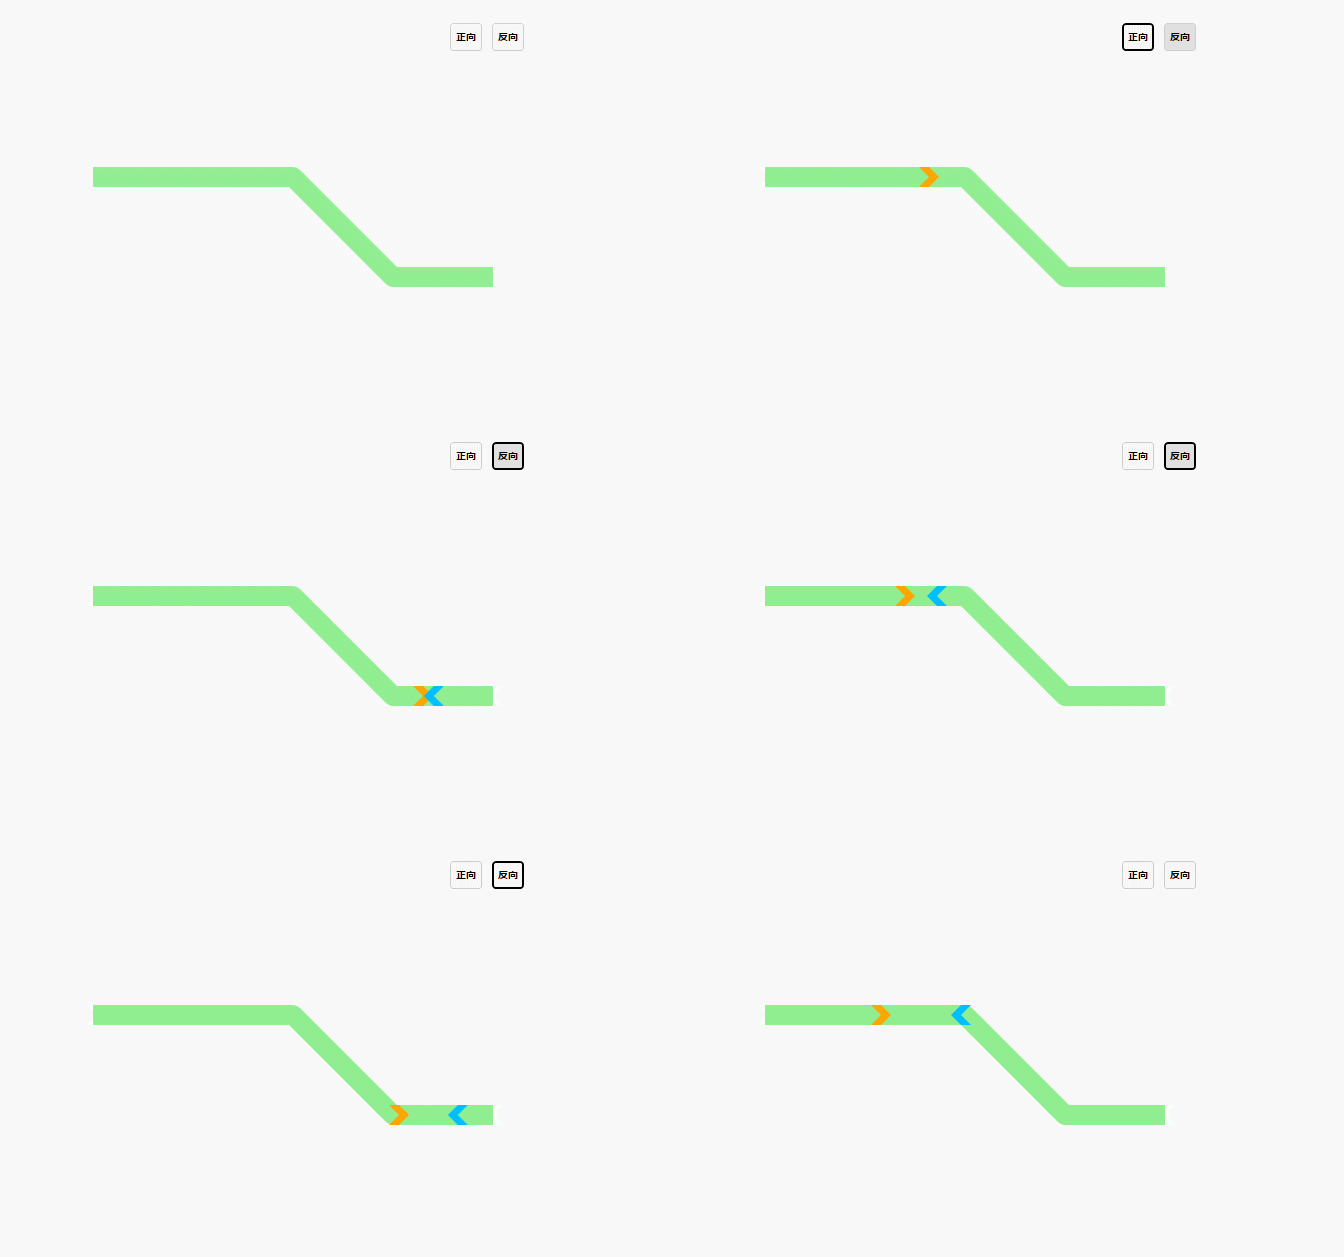
另外作为动画对象的正方体可以换成任意控件对象,为了形象点,就把正方体换成箭头;同时为了区分正向和反向动画,路径也设置成不同的颜色。修改之后的代码如下:
/// <summary>
/// 正向
/// </summary>
/// <param name="sender"></param>
/// <param name="e"></param>
private void btnAnimo_Click(object sender, RoutedEventArgs e)
{
    AnimationByPath(cvsMain, path1,path1.StrokeThickness,false,3);
}
/// <summary>
/// 反向
/// </summary>
/// <param name="sender"></param>
/// <param name="e"></param>
private void btnReback_Click(object sender, RoutedEventArgs e)
{
    AnimationByPath(cvsMain, path1, path1.StrokeThickness, true, 3);
}


/// <summary>
/// 路径动画
/// </summary>
/// <param name="cvs">画板</param>
/// <param name="path">路径</param>
/// <param name="targetWidth">动画对象宽高</param>
/// <param name="isInverse">是否反向</param>
/// <param name="duration">动画时间</param>
private void AnimationByPath(Canvas cvs, Path path, double targetWidth, bool isInverse = false, int duration = 5)
{
    Polygon target = new Polygon();
    target.Points = new PointCollection()
    {
        new Point(0,0),
        new Point(targetWidth/2,0),
        new Point(targetWidth,targetWidth/2),
        new Point(targetWidth/2,targetWidth),
        new Point(0,targetWidth),
        new Point(targetWidth/2,targetWidth/2)
    };

    if (isInverse)//反向
    {
        target.Fill = new SolidColorBrush(Colors.DeepSkyBlue);
    }
    else//正向
    {
        target.Fill = new SolidColorBrush(Colors.Orange);
    }

    cvs.Children.Add(target);
    Canvas.SetLeft(target, -targetWidth / 2);
    Canvas.SetTop(target, -targetWidth / 2);
    target.RenderTransformOrigin = new Point(0.5, 0.5);

    MatrixTransform matrix = new MatrixTransform();
    TransformGroup groups = new TransformGroup();
    groups.Children.Add(matrix);
    target.RenderTransform = groups;
    string registname = "matrix" + Guid.NewGuid().ToString().Replace("-", "");
    this.RegisterName(registname, matrix);
    MatrixAnimationUsingPath matrixAnimation = new MatrixAnimationUsingPath();
    if (!isInverse)//正向
    {
        matrixAnimation.PathGeometry = PathGeometry.CreateFromGeometry(Geometry.Parse(path.Data.ToString()));
    }
    else//反向
    {
        string data = ConvertPathData(path.Data.ToString());
        matrixAnimation.PathGeometry = PathGeometry.CreateFromGeometry(Geometry.Parse(data));
    }
    matrixAnimation.Duration = new Duration(TimeSpan.FromSeconds(duration));
    matrixAnimation.DoesRotateWithTangent = true;//旋转
    matrixAnimation.RepeatBehavior = RepeatBehavior.Forever;
    Storyboard story = new Storyboard();
    story.Children.Add(matrixAnimation);
    Storyboard.SetTargetName(matrixAnimation, registname);
    Storyboard.SetTargetProperty(matrixAnimation, new PropertyPath(MatrixTransform.MatrixProperty));

    story.FillBehavior = FillBehavior.Stop;
    story.Begin(target, true);
}
效果就变成下面的样子了,是不是有点意思了:
3. 模拟管道流体动画
有了上面的基础,就考虑改进一下做个模拟水管中水流动的动画效果。管子当然不止一根,要多根,管径也不同;再加个水泵,水泵启动水就流动,水泵反转,水就倒流。因为在上一步已经解决了最核心的问题,这步加个关键帧动画用来控制动画对象旋转就好了。
前台代码改为:
<Grid>
  <Grid.RowDefinitions>
    <RowDefinition Height="80"></RowDefinition>
    <RowDefinition></RowDefinition>
  </Grid.RowDefinitions>
  <WrapPanel VerticalAlignment="Center" HorizontalAlignment="Center">
    <button x:Name="btnAnimo" Click="btnAnimo_Click" Margin="0,0,10,0">
      正转
    </button>
    <button x:Name="btnReback" Click="btnReback_Click" Margin="0,0,10,0">
      反转
    </button>
  </WrapPanel>
  <Grid Grid.Row="1">
    <canvas x:Name="cvsMain">
      <Path
        x:Name="path1"
        Data="M100,100 L300,100 300,200 400,200"
        Stroke="LightGreen"
        StrokeThickness="20"
        StrokeLineJoin="Round"
      ></Path>
      <Path
        x:Name="path2"
        Data="M200,300 L350,300 350,200"
        Stroke="LightGreen"
        StrokeThickness="12"
        StrokeLineJoin="Round"
      ></Path>
      <Path
        x:Name="path3"
        Data="M450,223 L550,223 650,100 750,100 800,150"
        Stroke="LightGreen"
        StrokeThickness="16"
        StrokeLineJoin="Round"
      ></Path>
      <image
        Source="fan.png"
        Width="50"
        Height="50"
        Canvas.Left="400"
        Canvas.Top="185"
      ></image>
      <image
        x:Name="imgFan"
        Source="fan-inner.png"
        Width="24"
        Height="24"
        Canvas.Left="410"
        Canvas.Top="197"
        RenderTransformOrigin="0.5,0.5"
      ></image>
    </canvas>
  </Grid>
</Grid>
后台代码修改为:
/// <summary>
/// 正转
/// </summary>
/// <param name="sender"></param>
/// <param name="e"></param>
private void btnAnimo_Click(object sender, RoutedEventArgs e)
{
    // 原文第三个参数传的是this.path[x].Width,其实应该是this.path[x].StrokeThickness
    AnimationByPath(this.cvsMain, this.path1, this.path1.StrokeThickness,false, 3);
    AnimationByPath(this.cvsMain, this.path2, this.path2.StrokeThickness,false, 3);
    AnimationByPath(this.cvsMain, this.path3, this.path3.StrokeThickness,false, 3);

    StoryByOrient(this.imgFan,0, 3);
}
/// <summary>
/// 反转
/// </summary>
/// <param name="sender"></param>
/// <param name="e"></param>
private void btnReback_Click(object sender, RoutedEventArgs e)
{
    // 原文第三个参数传的是this.path[x].Width,其实应该是this.path[x].StrokeThickness
    AnimationByPath(this.cvsMain, this.path1, this.path1.StrokeThickness, true, 3);
    AnimationByPath(this.cvsMain, this.path2, this.path2.StrokeThickness, true, 3);
    AnimationByPath(this.cvsMain, this.path3, this.path3.StrokeThickness, true, 3);

    StoryByOrient(this.imgFan, 1, 3);
}

/// <summary>
/// 旋转动画
/// </summary>
/// <param name="img">动画对象</param>
/// <param name="orientation">顺时针/逆时针</param>
/// <param name="duration"></param>
private void StoryByOrient(Image img, int orientation, int duration = 5)
{
    Storyboard storyboard = new Storyboard();//创建故事板
    DoubleAnimation doubleAnimation = new DoubleAnimation();//实例化一个Double类型的动画
    RotateTransform rotate = new RotateTransform();//旋转转换实例
    img.RenderTransform = rotate;//给图片空间一个转换的实例
    storyboard.RepeatBehavior = RepeatBehavior.Forever;//设置重复为 一直重复
    storyboard.SpeedRatio = 2;//播放的数度
    //设置从0 旋转360度
    doubleAnimation.From = 0;
    if (orientation==0)//顺时针
    {
        doubleAnimation.To = 360;
    }
    else//逆时针
    {
        doubleAnimation.To = -360;
    }
    doubleAnimation.Duration = new Duration(TimeSpan.FromSeconds(duration));//播放时间长度为2秒
    Storyboard.SetTarget(doubleAnimation, img);//给动画指定对象
    Storyboard.SetTargetProperty(doubleAnimation,
new PropertyPath("RenderTransform.Angle"));//给动画指定依赖的属性
    storyboard.Children.Add(doubleAnimation);//将动画添加到动画板中
    storyboard.Begin(img);//启动动画
}
来看看最终的效果:
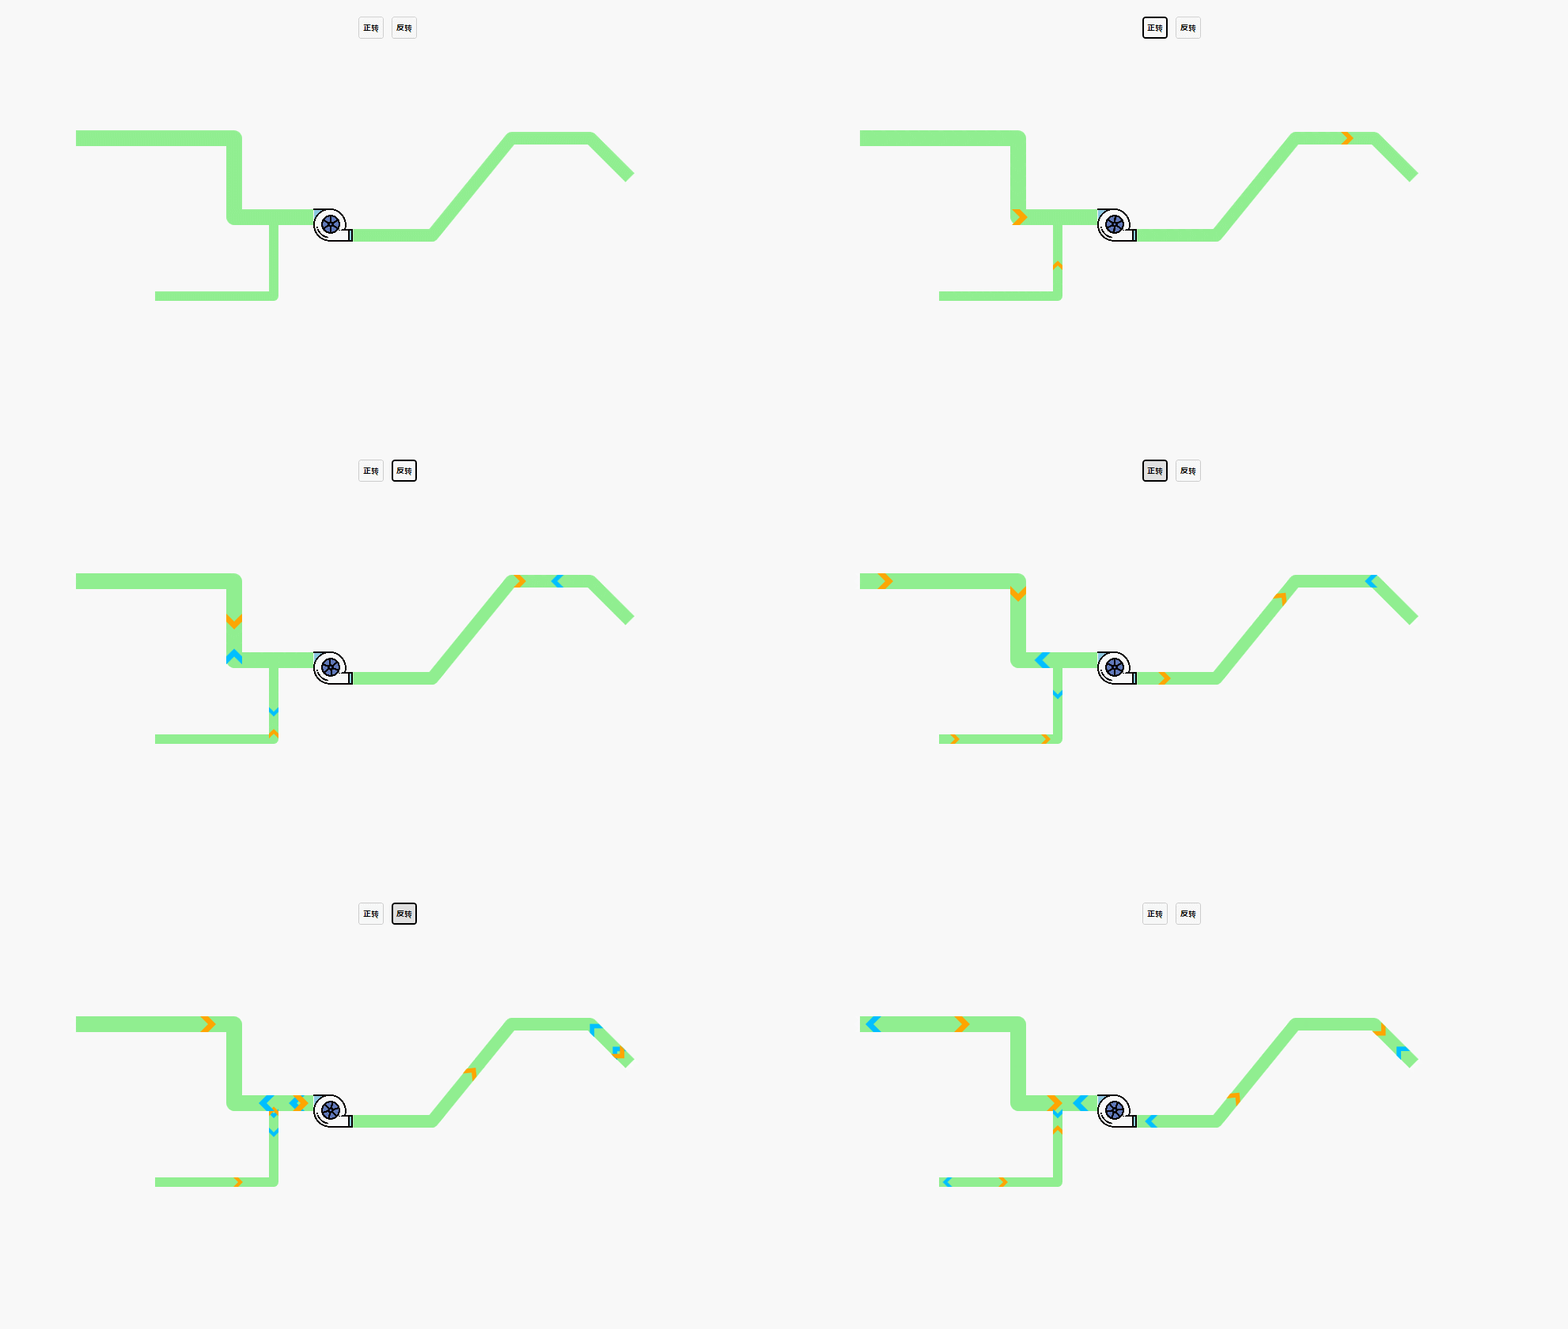
还挺像那么回事的。
注:第三个案例代码缺少图片,站长根据原文 Gif 图截取了部分并设置了参数,能运行出上图效果:https://github.com/dotnet9/TerminalMACS.ManagerForWPF/tree/master/src/Demo/PathAnimationDemo
编程很有趣,一刻不放弃。
本文转载。
作者:ludewig
原文标题:WPF 随笔(九)--使用路径动画模拟管道流体流向
原文链接:https://blog.csdn.net/lordwish/article/details/85007867