
1. 准备工作:在 NuGet 上创建并获取 API Keys
网址:https://www.nuget.org/
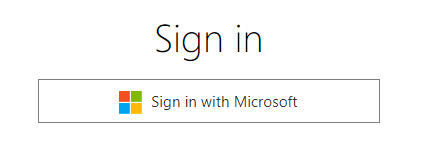
1.1. 首先需要登录,直接用微软账户登录即可
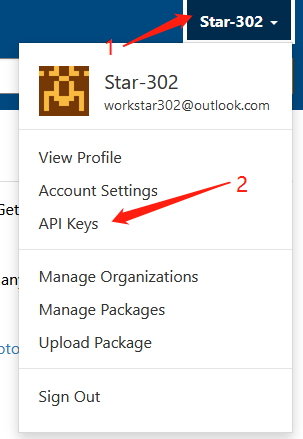
1.2. 点击右上角菜单 API Keys,创建 Key
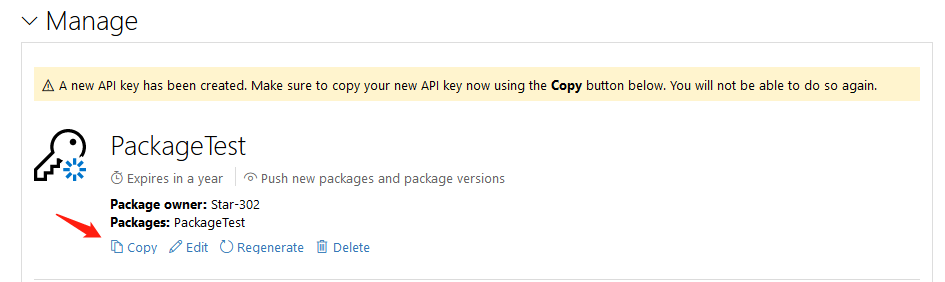
1.3. 填写信息并创建
这里写你要上传 NuGet 程序包的名称 【每个 NuGet 程序包(对应一个名称)可以上传多个版本】

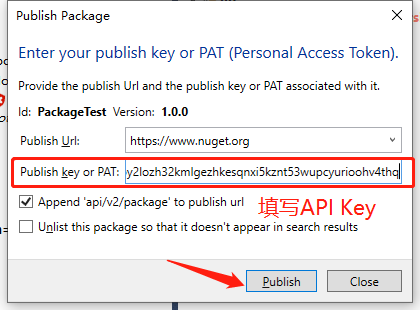
1.4. 复制 API Key
2. 制作一个简单的 dll
新建一个“库”项目,代码如下:
using System;
using System.Collections.Generic;
using System.Linq;
using System.Text;
using System.Threading.Tasks;

namespace ClassLibrary1
{
    public class Class1
    {
        public static int Add(int a, int b)
        {
            return a + b;
        }
        public static int Sub(int a, int b)
        {
            return a -b;
        }
    }
}
框架使用.NET Framework 4.6.1,这个在后面也会使用到,输出类型使用类库:
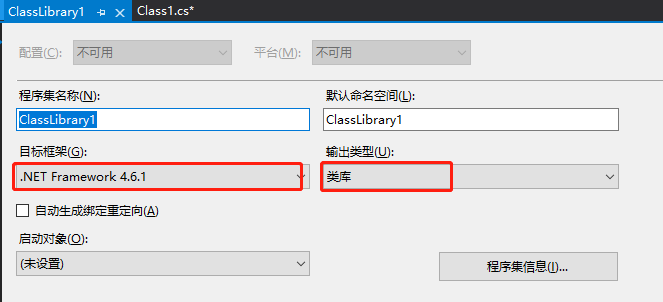
生成如下 dll:

3. 创建发布文件夹
为了更好管理文件,在E:\nuget新建MyPackage_Star302Test文件夹,存放所需的文件

4. 上传 NuGet 程序包并发布
4.1. 方法一:使用命令行上传,需要下载nuget.exe
4.1.1. 到https://www.nuget.org/downloads下载nuget.exe

4.1.2. 配置 nuget 环境变量
把下载的 nuget.exe 放到
E:\nuget打开电脑属性–高级系统设置–环境变量–系统变量,选择 Path–编辑–新建–填写
E:\nuget,确定
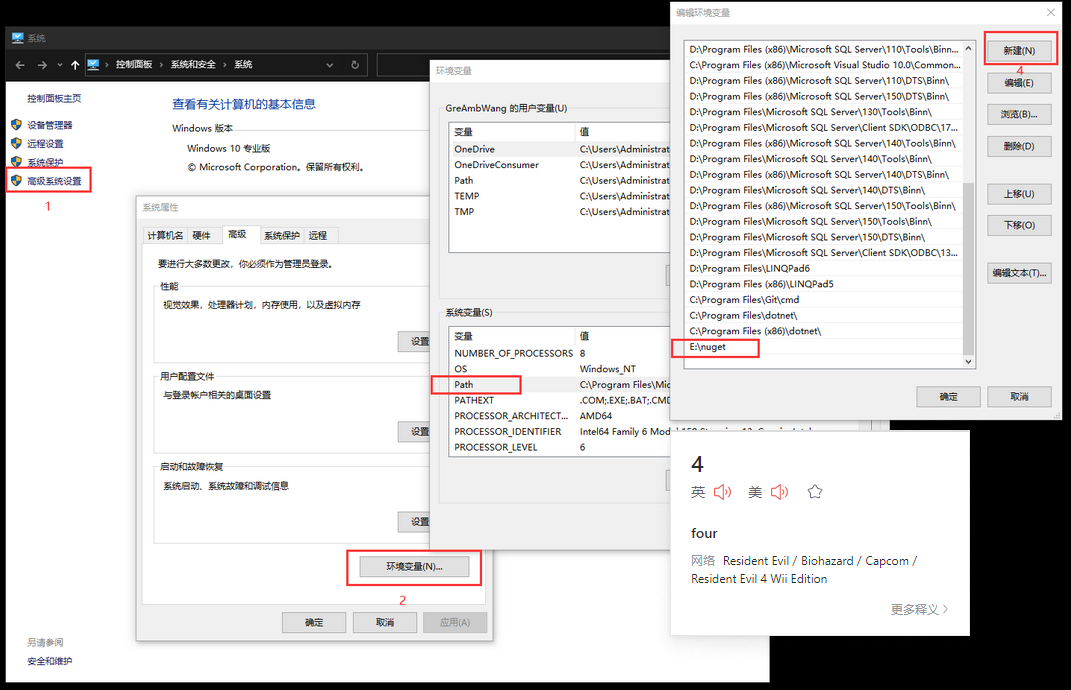
环境变量配置好,就可以使用 nuget 指令了
4.1.3. 生成 nuspec 文件
使用 nuget spec 命令生产.nuspec 文件
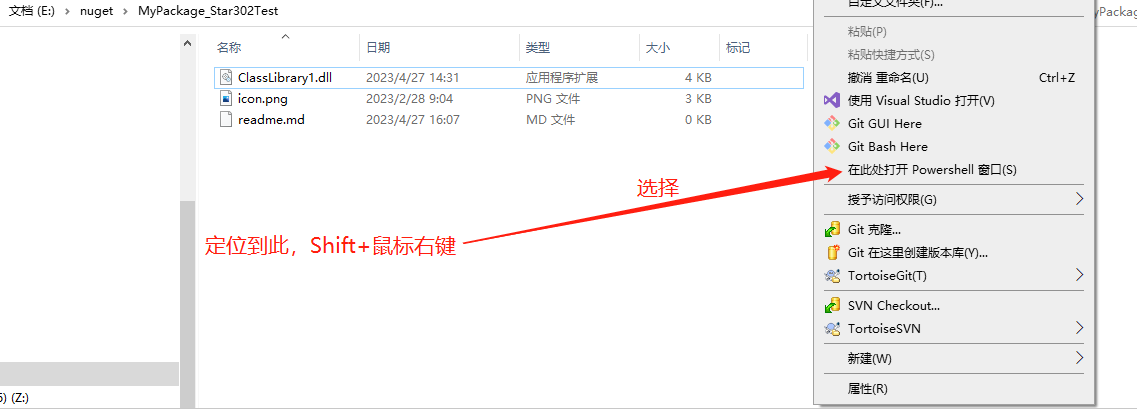

.nuspec 文件中的内容为xml格式,如下,可以简单了解:
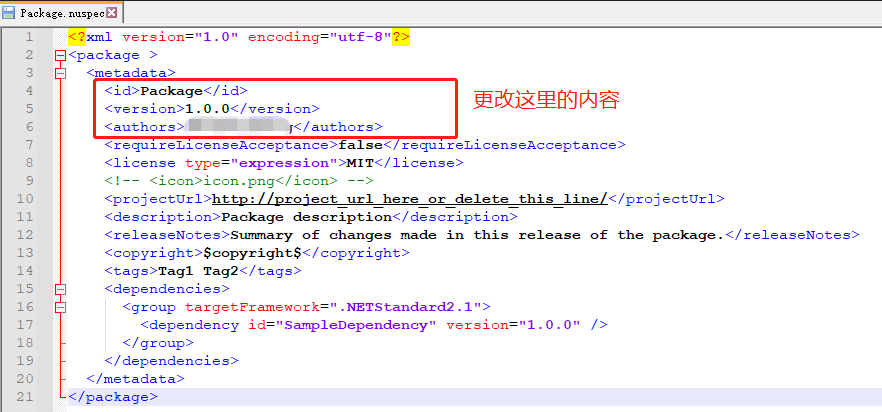
更改后的内容为:
<?xml version="1.0" encoding="utf-8"?>
<package >
  <metadata>
    <id>PackageTest</id>
    <version>1.0.0</version>
    <authors>Star302</authors>
    <requireLicenseAcceptance>false</requireLicenseAcceptance>
    <license type="expression">MIT</license>
    <!-- <icon>icon.png</icon> -->
    <projectUrl>http://project_url_here_or_delete_this_line/</projectUrl>
    <description>Package description</description>
    <releaseNotes>Summary of changes made in this release of the package.</releaseNotes>
    <copyright>$copyright$</copyright>
    <tags>Tag1 Tag2</tags>
    <dependencies>
      <group targetFramework=".NETStandard2.1">
        <dependency id="SampleDependency" version="1.0.0" />
      </group>
    </dependencies>
  </metadata>
</package>
4.1.4. 生成 nupkg 文件
使用nuget pack命令生产.nupkg 文件
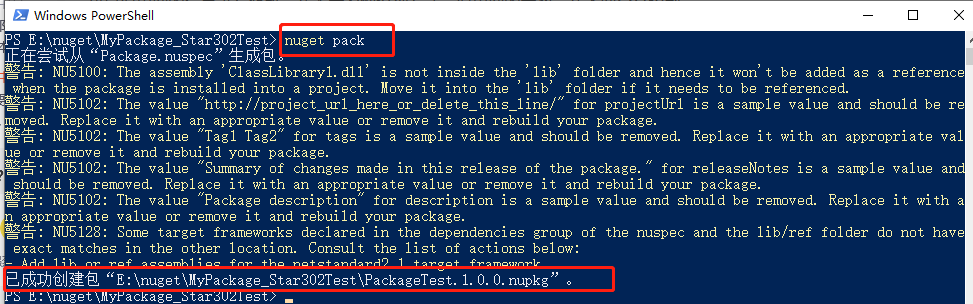

4.1.5. 复制 1.4 的 API Key,上传到 NuGet
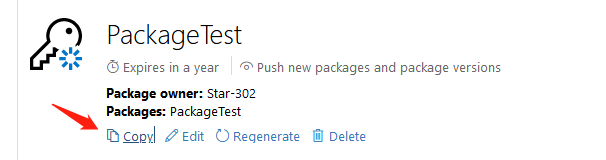
运行如下指令:
nuget push PackageTest.1.0.0.nupkg xxxkey -Source https://api.nuget.org/v3/index.json
【我试了几次都没成功,不知道为什么】

4.2. 方法二:使用界面工具上传,需要下载 NuGet Package Explorer【推荐!】
4.2.1. 下载 NuGet Package Explorer
https://www.microsoft.com/zh-cn/p/nuget-package-explorer/9wzdncrdmdm3?activetab=pivot:overviewtab
4.2.2. 创建新 Package
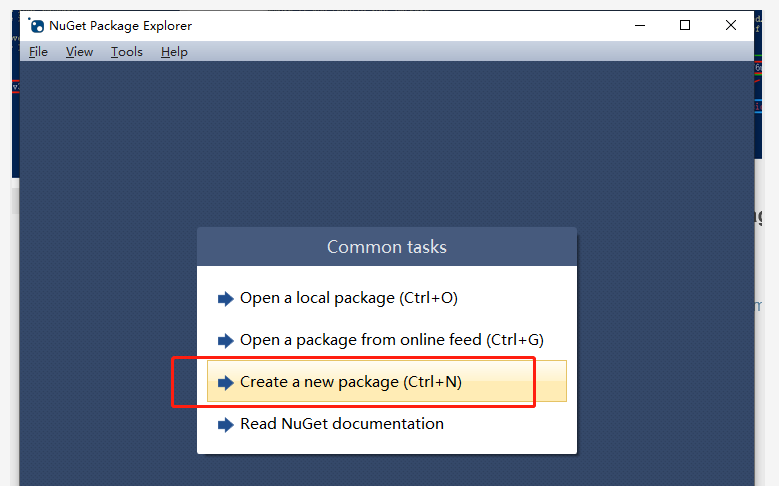
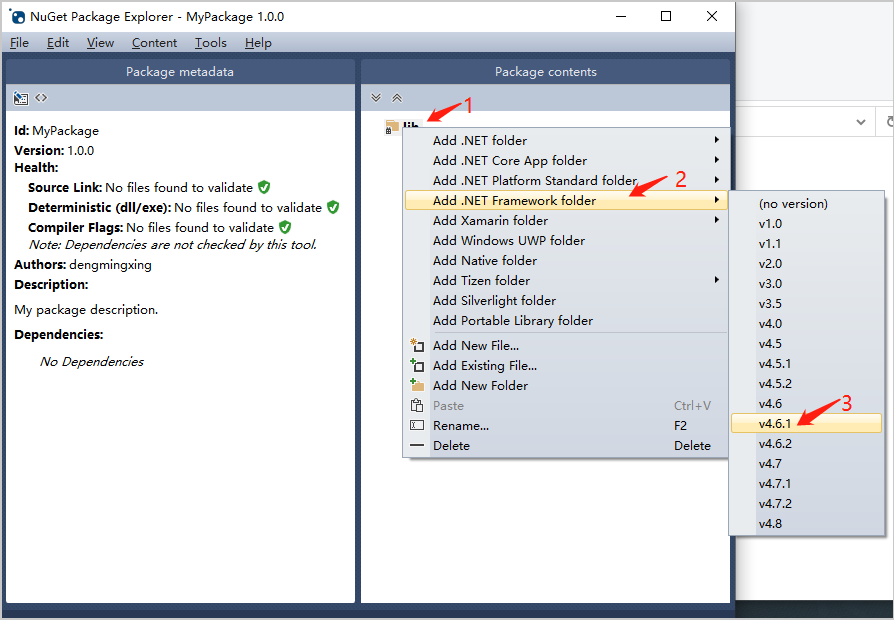
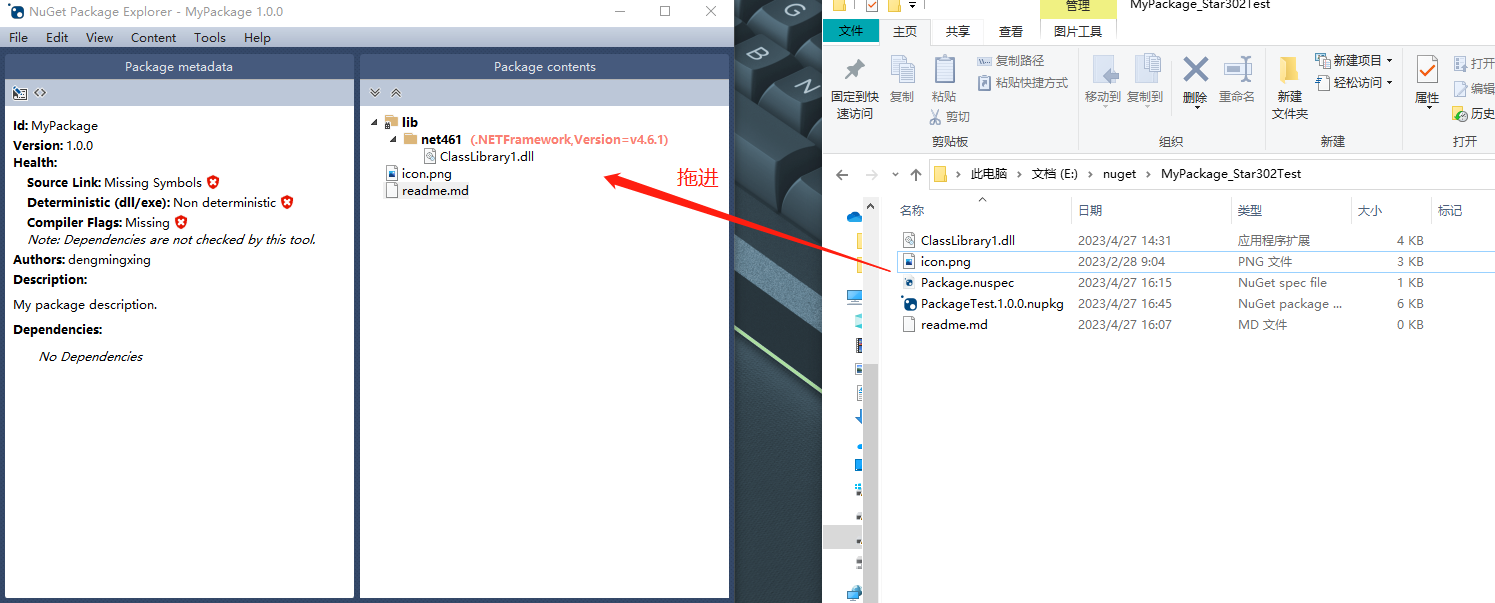
4.2.3. 新增 lib 文件夹、新增 net461 文件夹、添加已有文件
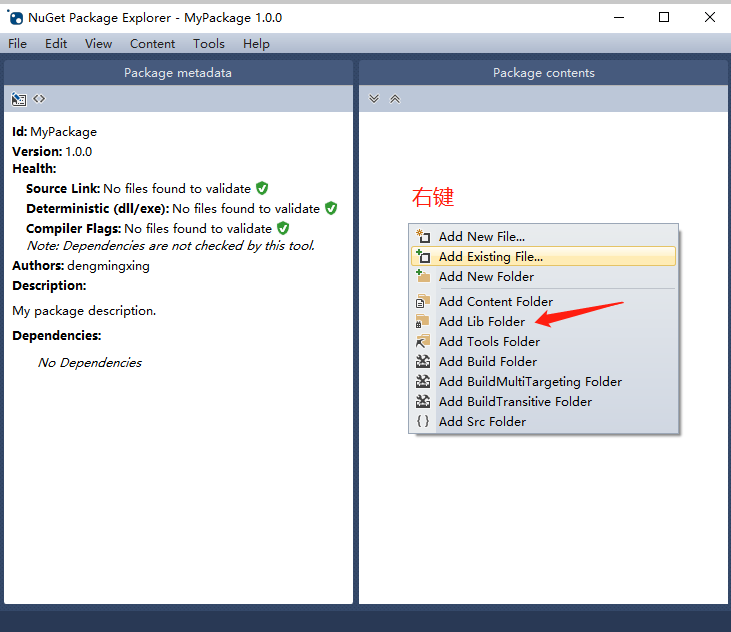
4.2.4. 编辑上传数据
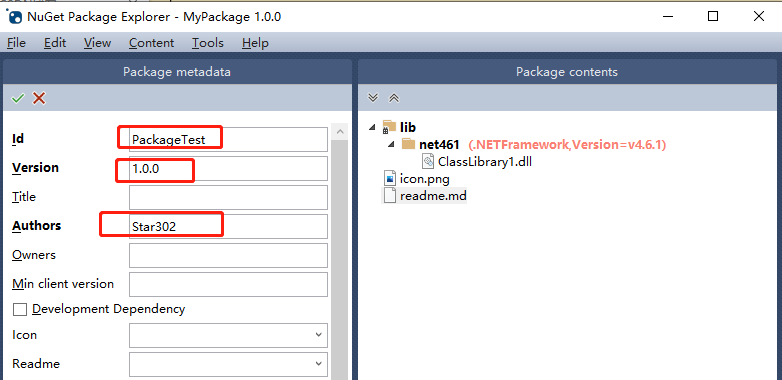
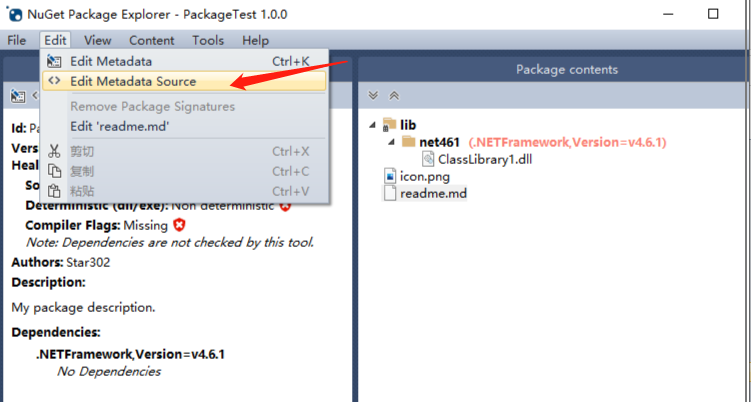
这里选择Edit Metadata,Edit Metadata Source 则是 xml 文件格式的

更改一些参数:
添加项目依赖,即依赖哪些框架。比如.NETFramework,.NETStandard 等

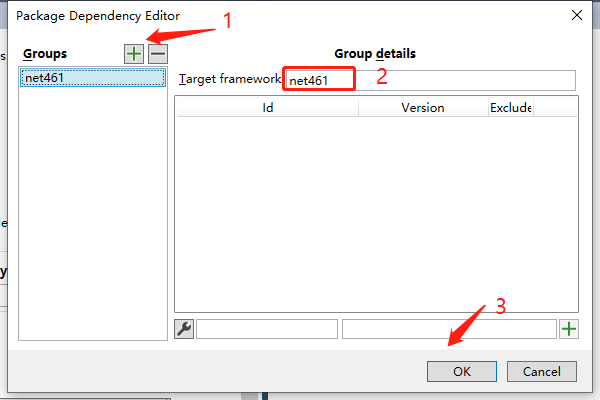
最后,点击确认

编辑完成,看下效果
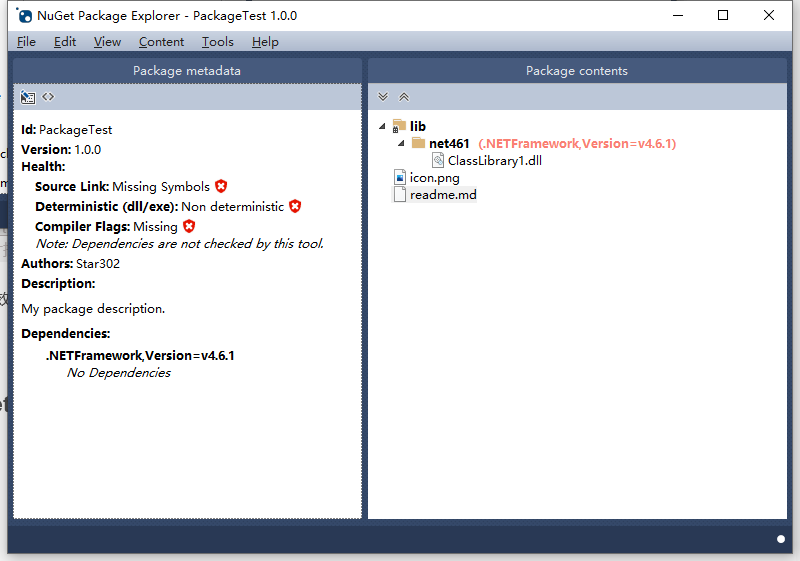
看一下 Metadata Source 对应的内容,其实和刚刚编辑的信息是一致的。

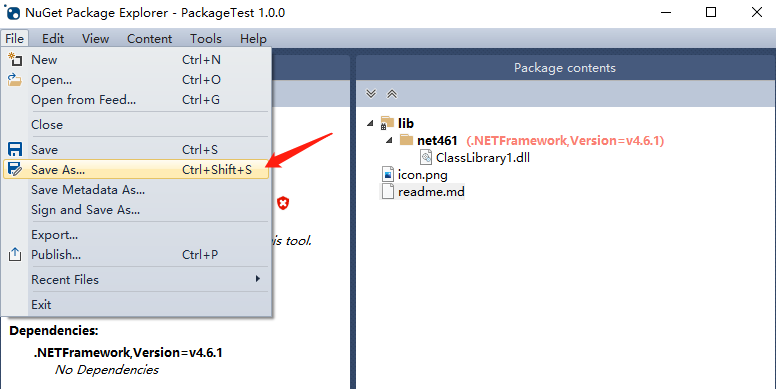
4.2.5. 保存 nupkg 文件

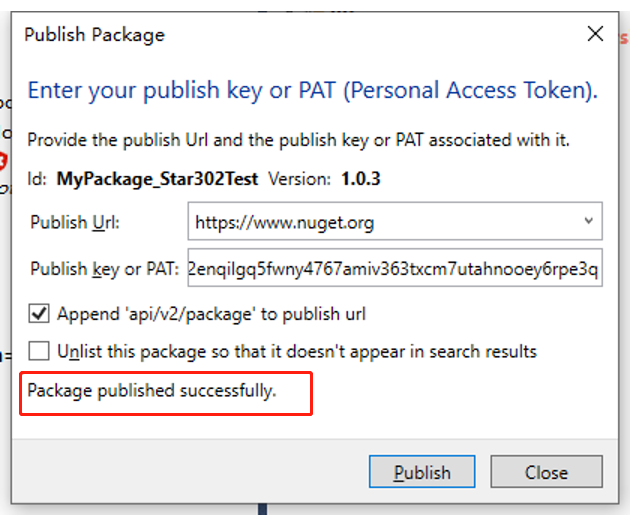
4.2.6. 发布到 NuGet

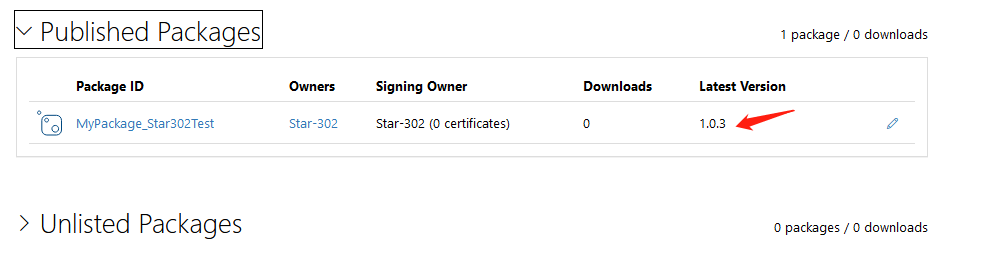
发布成功:
在 Visual Stuido 中查看:

5. NuGet 包的管理
自己到https://www.nuget.org/探索一下就好,很简单的。


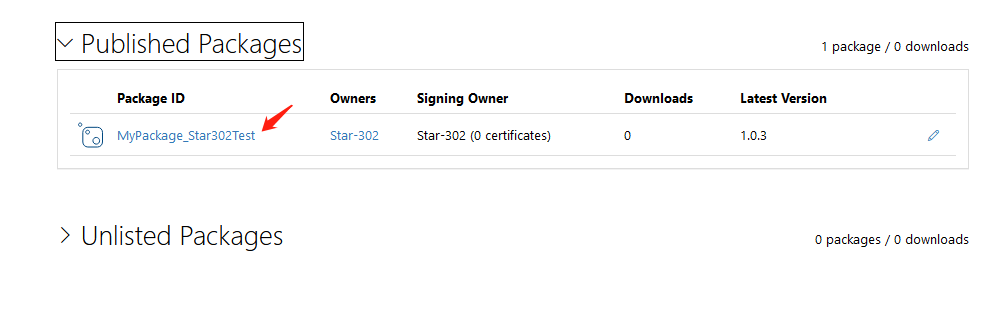
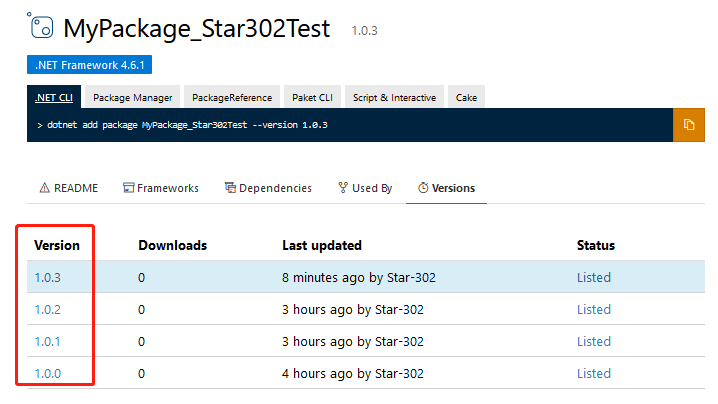
参考:https://blog.csdn.net/weixin_38211198/article/details/118438071
版权声明:本文为 CSDN 博主「明如正午」的原创文章,遵循 CC 4.0 BY-SA 版权协议,转载请附上原文出处链接及本声明。
原文链接:https://blog.csdn.net/sinat_40003796/article/details/130407108