Contributed by netizen [Sky.楚子航]
1. Understanding .NET Aspire
.NET Aspire is a technology stack released by Microsoft aimed at simplifying the development and management of cloud-native applications. The following is a detailed introduction to .NET Aspire:
Definition and Purpose:
- .NET Aspire is a curated, cloud-ready technology stack used to build observable and production-ready distributed applications.
- Its primary goal is to simplify the coordination and management of elements within cloud-native applications, helping developers more efficiently build cloud-native applications using .NET.
Features and Advantages:
- .NET Aspire provides a unified project format and a curated technology stack, which helps reduce complexity for developers when selecting and configuring technical components.
- It includes a set of curated components enhanced for cloud-native development, such as service discovery, telemetry, resilience, and health checks—key elements in cloud-native application development.
- .NET Aspire also offers rich APIs and tools that allow developers to express resources and dependencies in distributed applications, further simplifying the development and operation of cloud-native applications.
Relationship with .NET:
- .NET Aspire is built on the .NET platform, fully leveraging the power and ecosystem of .NET.
- As part of .NET, .NET Aspire is tightly integrated with .NET 8 and later versions, providing end-to-end support from development to deployment.
Release and Availability:
- Microsoft first introduced .NET Aspire in the preview version of .NET 8 and plans to release it as part of the official .NET 8 release.
- Developers can try .NET Aspire in the .NET 8 preview and experience the simplification and convenience it brings.
In summary, .NET Aspire is an important technology from Microsoft for simplifying cloud-native application development and management. It fully leverages the advantages of the .NET platform, providing developers with an efficient and unified solution.
2. Background of This Article
I have been using it from preview1 to preview6 (latest as of 2024/5/1). In the first version, I incorporated it into one of my microservices (https://gitee.com/SkyNingDuan/PublicActivityServices.git) and have been iterating on it ever since.
Throughout this process, I have been using external RabbitMQ to deliver messages to my microservices (using Zack.EventBus). However, there has always been a way to create a RabbitMQ container directly via Aspire for use in your project. I had been thinking about developing an EventBus for the Aspire environment, following the framework of Teacher Yang Zhongke as a guide, but kept putting it off (since there was already a ready-made solution, I was reluctant to step out of my comfort zone). After persistent self-struggle, the first version of simpleUseAspireRabbitmq was finally developed. Its functionality is relatively simple and easy to use. If the community shows high enthusiasm, I can add more features later. Everyone is welcome to embrace new technologies. If you have any issues, feel free to submit an issue or interact with me. The source code is at https://github.com/skyDuanXianBing/SimpleUseAspireRabbitMQ.git, and the NuGet package name is SimpleUseAspireRabbitMQ. (Currently, since Aspire is still in preview, this package is also in preview, and any future improvements will be updated accordingly.)
3. Tutorial
3.1. Create an Aspire Project
Install the Aspire.Hosting.RabbitMQ package in aspire.host, create a RabbitMQ container in program.cs, and then add a WithReference to the RabbitMQ container in the project where you want to use RabbitMQ:

3.2. Register Services
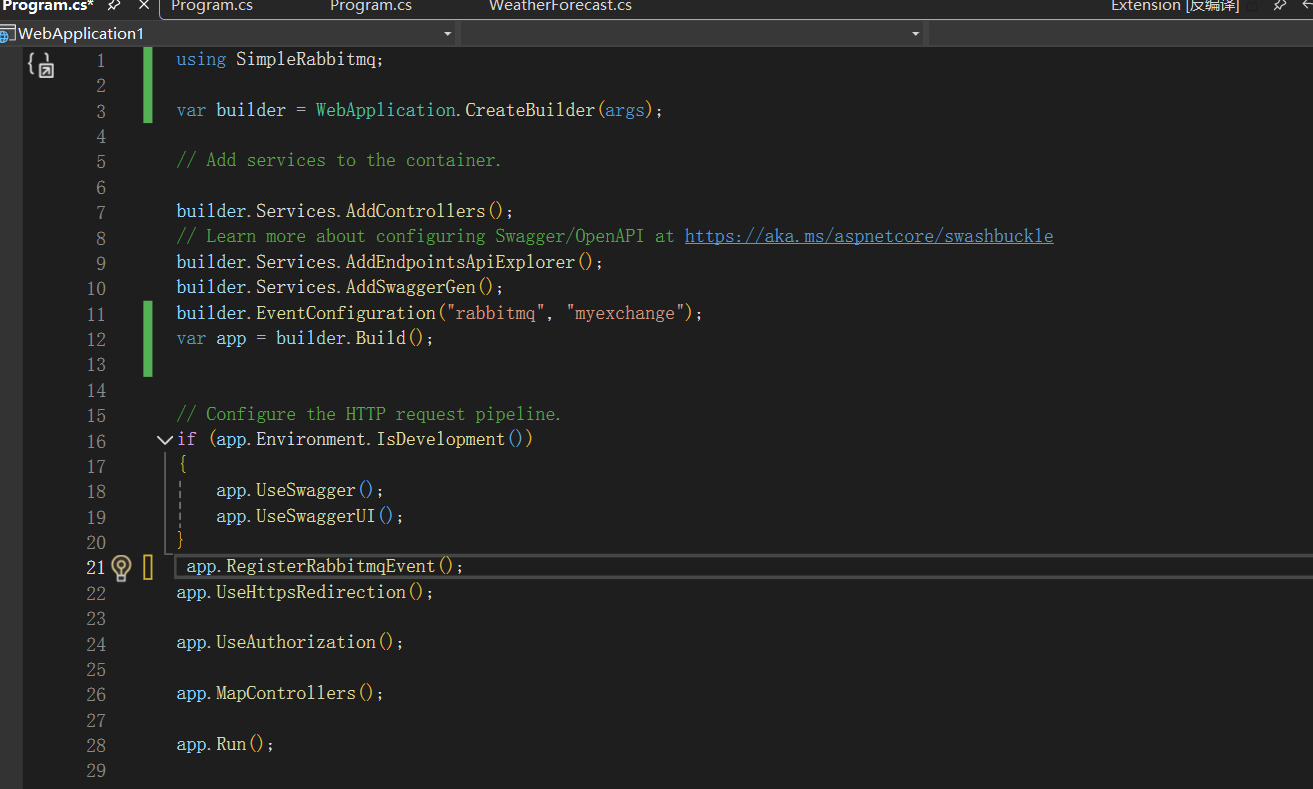
In the program.cs of the project where you want to use RabbitMQ, add builder.EventConfiguration("rabbitmq", "myexchange"); (the first parameter is the RabbitMQ container name, and the second is the exchange name) and app.RegisterRabbitmqEvent(); to register services:

3.3. Test Sending Messages
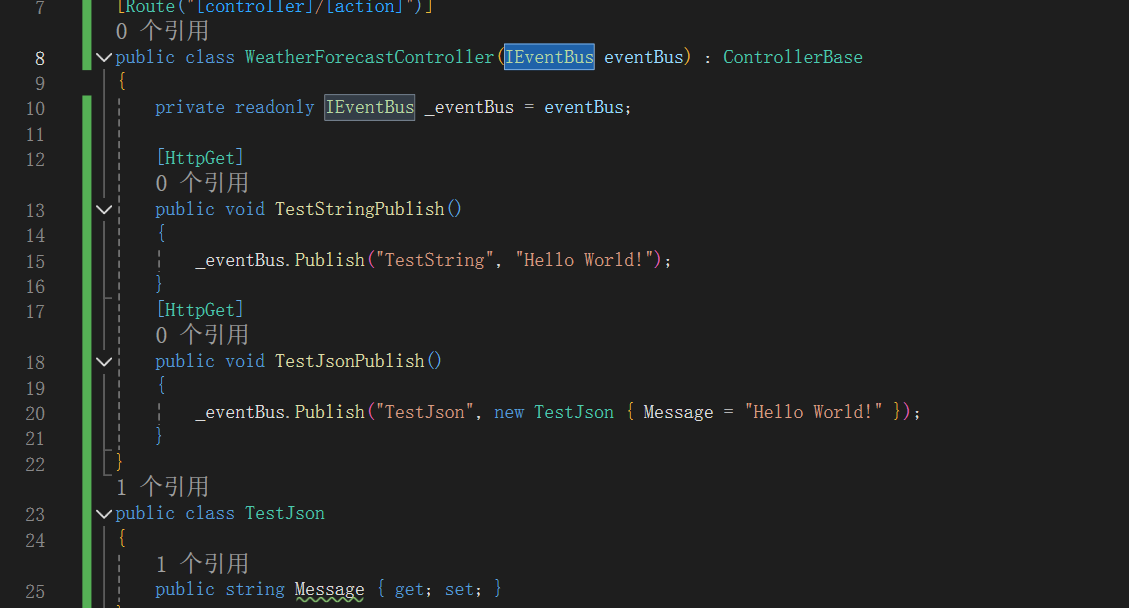
Use IEventBus to send messages. Currently, only string/generic data is supported (will be converted to JSON and then deserialized). The first parameter of publish is the queue name:

3.4. Define Handler Classes
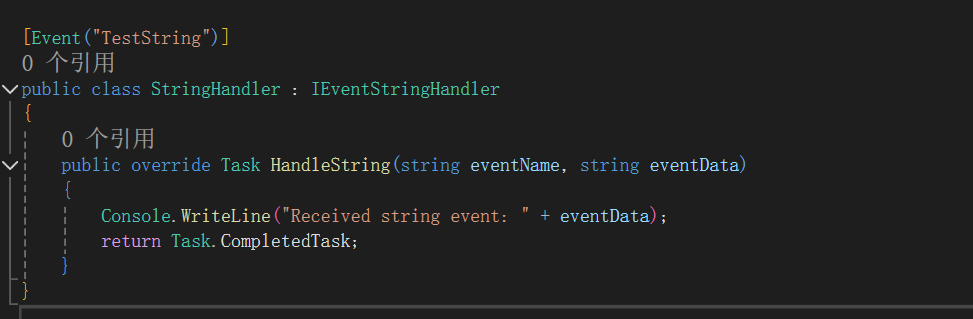
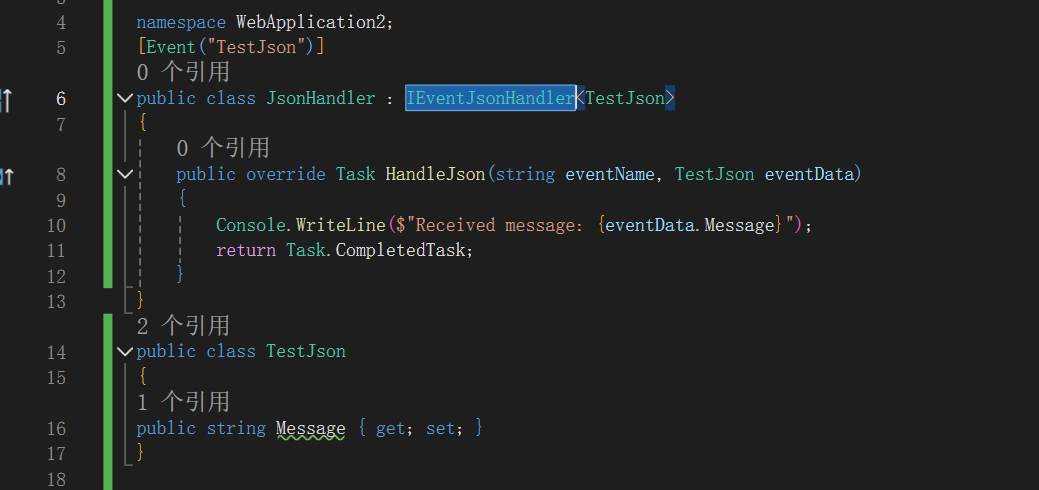
They must be defined in the web project (because the reflection of the web project retrieves all handler classes). Implement IEventJsonHandler or IEventStringHandler as needed.
Be sure to decorate the handler class with [event("XXX")]. This attribute indicates which queue information to receive:


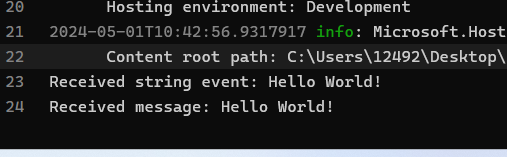
3.5. Perfectly Receive Messages

4. Summary
Usage is that simple. Feel free to leave comments and discuss.
- Blog link: https://www.cnblogs.com/SkyDuan/p/18169087