
一、需求分析与方案设计
在开发工作中,我们经常需要将图片转换为不同尺寸的 Icon 文件。无论是为网站制作 favicon.ico,还是为应用程序设计图标,这都是一个常见的需求。市面上虽然有许多图片转 Icon 的工具,但它们通常存在功能单一、广告多或操作复杂等问题。
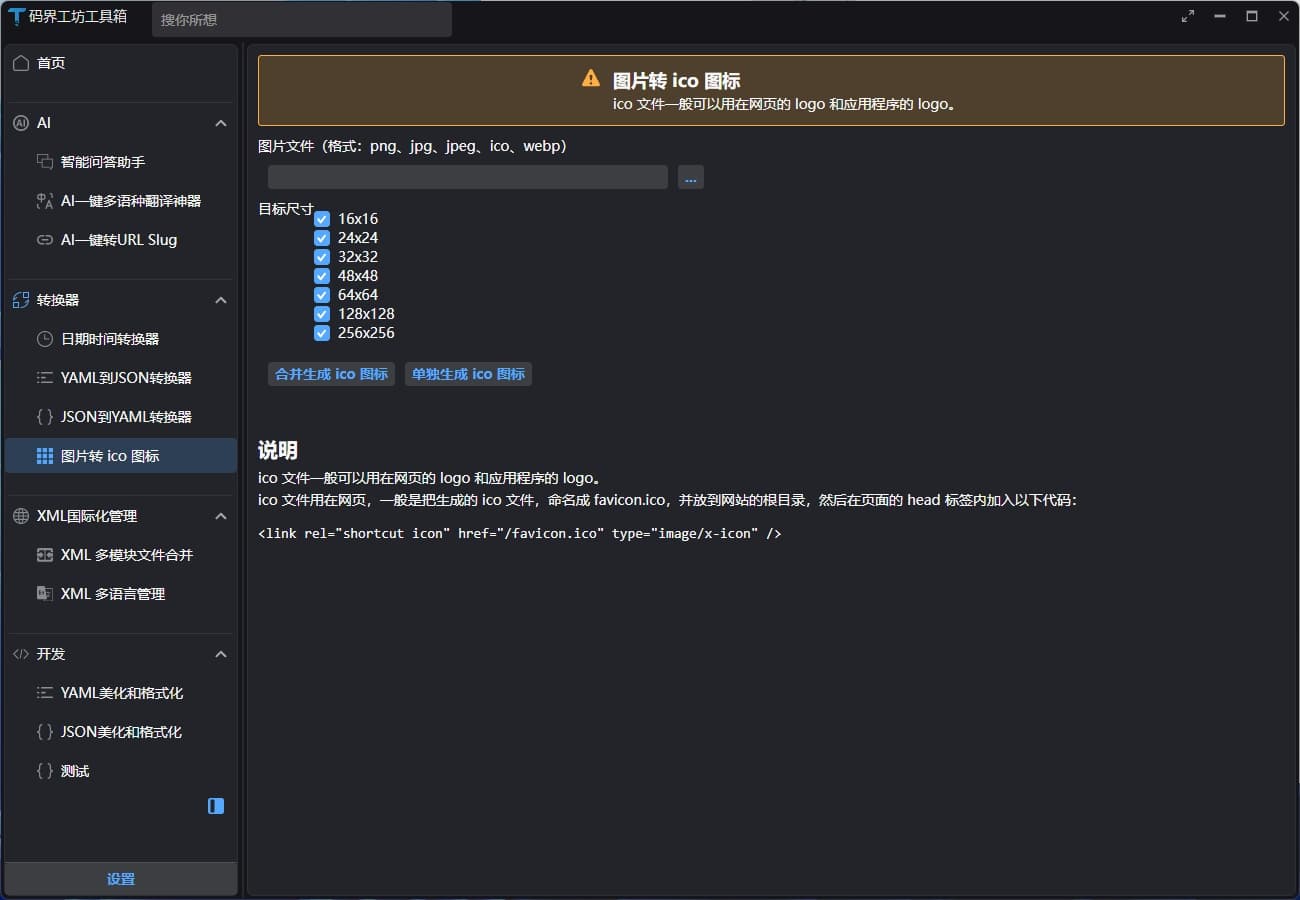
本文将介绍如何使用 C#和 Avalonia 开发一个简单高效的图片转 Icon 工具,实现以下功能:
- 支持将常见图片格式(如 PNG、JPG 等)转换为 ICO 格式
- 支持生成多种尺寸的图标(16x16、32x32、48x48、64x64、128x128、256x256)
- 提供两种转换模式:
- 合并模式:将多个尺寸的图标合并到一个 ICO 文件中
- 分离模式:为每个尺寸生成单独的 ICO 文件
- 支持拖拽操作,提升用户体验
二、核心转换代码
首先,我们来看核心的图片转 Icon 转换逻辑。这部分代码封装在ImageHelper类中:
using ImageMagick;
using System.IO;
using System.Threading.Tasks;

// ReSharper disable once CheckNamespace
namespace CodeWF.Tools;

public static class ImageHelper
{
    public static async Task MergeGenerateIcon(string sourceImagePath, string destIconPath, uint[] sizes)
    {
        var baseImage = new MagickImage(sourceImagePath);
        var collection = new MagickImageCollection();

        foreach (var size in sizes)
        {
            var resizedImage = baseImage.Clone();
            resizedImage.Resize(size, size);
            collection.Add(resizedImage);
        }

        await collection.WriteAsync(destIconPath);
    }

    public static async Task SeparateGenerateIcon(string sourceImagePath, string destIconFolder, uint[] sizes)
    {
        var fileName = Path.GetFileNameWithoutExtension(sourceImagePath);

        var baseImage = new MagickImage(sourceImagePath);

        foreach (var size in sizes)
        {
            var resizedImage = baseImage.Clone();
            resizedImage.Resize(size, size);

            var savePath = Path.Combine(destIconFolder, $"{fileName}-{size}x{size}.ico");
            await resizedImage.WriteAsync(savePath);
        }
    }
}
上面代码使用了 NuGet 包 Magick.NET-Q16-AnyCPU。Magick.NET 是 ImageMagick 的.NET 封装库,提供了强大的图像处理功能。Q16 表示图像处理时使用 16 位量化,AnyCPU 表示支持多种处理器架构。通过这个库,我们可以轻松地调整图片尺寸并保存为 ICO 格式。
核心代码提供了两个主要方法:
MergeGenerateIcon:将一张源图片转换为包含多个尺寸的单个 ICO 文件SeparateGenerateIcon:将一张源图片转换为多个不同尺寸的 ICO 文件
三、用户界面设计
1. 基础界面布局
使用 Avalonia 框架设计用户界面,界面定义在ImageToIconView.axaml文件中:
<UserControl xmlns="https://github.com/avaloniaui"
xmlns:x="http://schemas.microsoft.com/winfx/2006/xaml"
xmlns:d="http://schemas.microsoft.com/expression/blend/2008"
xmlns:mc="http://schemas.openxmlformats.org/markup-compatibility/2006"
xmlns:prism="http://prismlibrary.com/"
xmlns:u="https://irihi.tech/ursa"
xmlns:i18n="https://codewf.com"
xmlns:vm="clr-namespace:CodeWF.Modules.Converter.ViewModels"
xmlns:language="clr-namespace:Localization"
xmlns:local="clr-namespace:CodeWF.Modules.Converter.Models"
prism:ViewModelLocator.AutoWireViewModel="True"
x:DataType="vm:ImageToIconViewModel"
x:CompileBindings="True"
mc:Ignorable="d" d:DesignWidth="800" d:DesignHeight="450"
x:Class="CodeWF.Modules.Converter.ImageToIconView">
<StackPanel>
<TextBlock Text="{i18n:I18n {x:Static language:ImageToIconView.ChoiceSourceImageDescription}}" />
<StackPanel Orientation="Horizontal" Margin="0 10">
<TextBox VerticalAlignment="Center" Margin="10 0" Width="400" Classes="Small"
Text="{Binding NeedConvertImagePath}"
DragDrop.AllowDrop="True" DragDrop.Drop="RaiseDropSourceImagePath"/>
<Button Content="..." Classes="Small" Command="{Binding RaiseChoiceNeedConvertImageHandler}" />
</StackPanel>
<StackPanel Orientation="Horizontal">
<TextBlock Text="{i18n:I18n {x:Static language:ImageToIconView.DestImageSize}}" />
<ItemsControl ItemsSource="{Binding IconSizes}" Margin="0 10">
<ItemsControl.ItemTemplate>
<DataTemplate>
<CheckBox IsChecked="{Binding IsSelected}" Content="{Binding Content}"
VerticalAlignment="Center" />
</DataTemplate>
</ItemsControl.ItemTemplate>
</ItemsControl>
</StackPanel>
<StackPanel Orientation="Horizontal" HorizontalAlignment="Left">
<Button Margin="10" Classes="Small"
Content="{i18n:I18n {x:Static language:ImageToIconView.MergeGenerateButtonContent}}"
Command="{Binding RaiseMergeGenerateIconHandler}" />
<Button Classes="Small"
Content="{i18n:I18n {x:Static language:ImageToIconView.SeparateGenerateButtonContent}}"
Command="{Binding RaiseSeparateGenerateIconHandler}" />
</StackPanel>
<TextBlock Margin="0 40 0 0" Classes="H4" Theme="{StaticResource TitleTextBlock}"
Text="{i18n:I18n {x:Static language:ImageToIconView.MemoTitle}}" />
<TextBlock Margin="0 5 0 3" Text="{i18n:I18n {x:Static language:ImageToIconView.MemoContent1}}" />
<TextBlock Text="{i18n:I18n {x:Static language:ImageToIconView.MemoContent2}}" />
<Border Margin="0,16" Classes="CodeBlock">
<SelectableTextBlock FontFamily="Consolas"
Text="<link rel="shortcut icon" href="/favicon.ico" type="image/x-icon" />" />
</Border>
</StackPanel>
</UserControl>
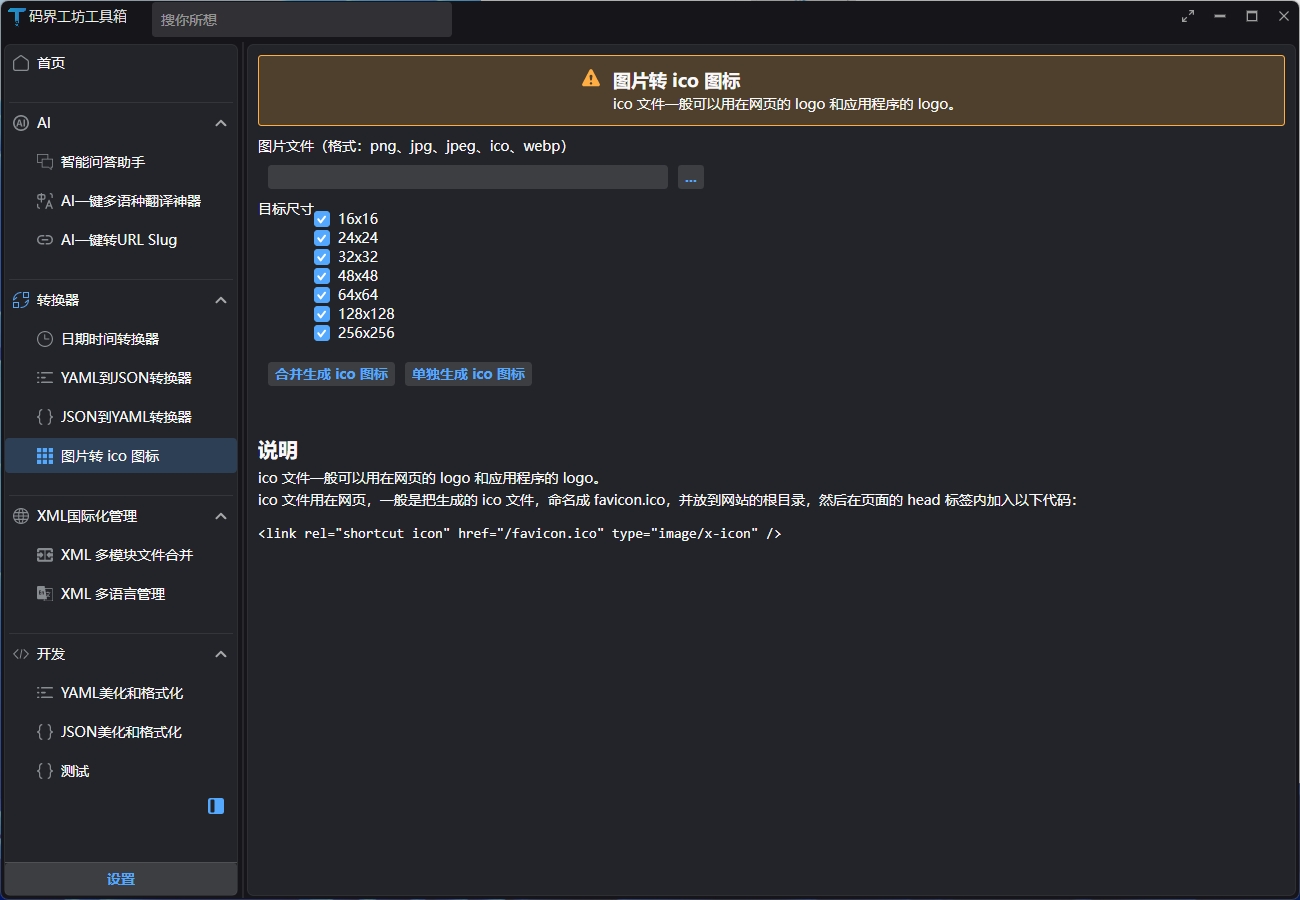
对上面的代码进行简短描述,我们的界面主要包括以下几个部分:
- 源图片选择区域(支持文本输入和文件选择)
- 目标图标尺寸选择区域(通过复选框选择)
- 两个操作按钮(合并生成和分离生成)
- 备注信息区域(提供使用说明和 HTML 引用示例)
实现效果如下:
2. 拖拽功能实现
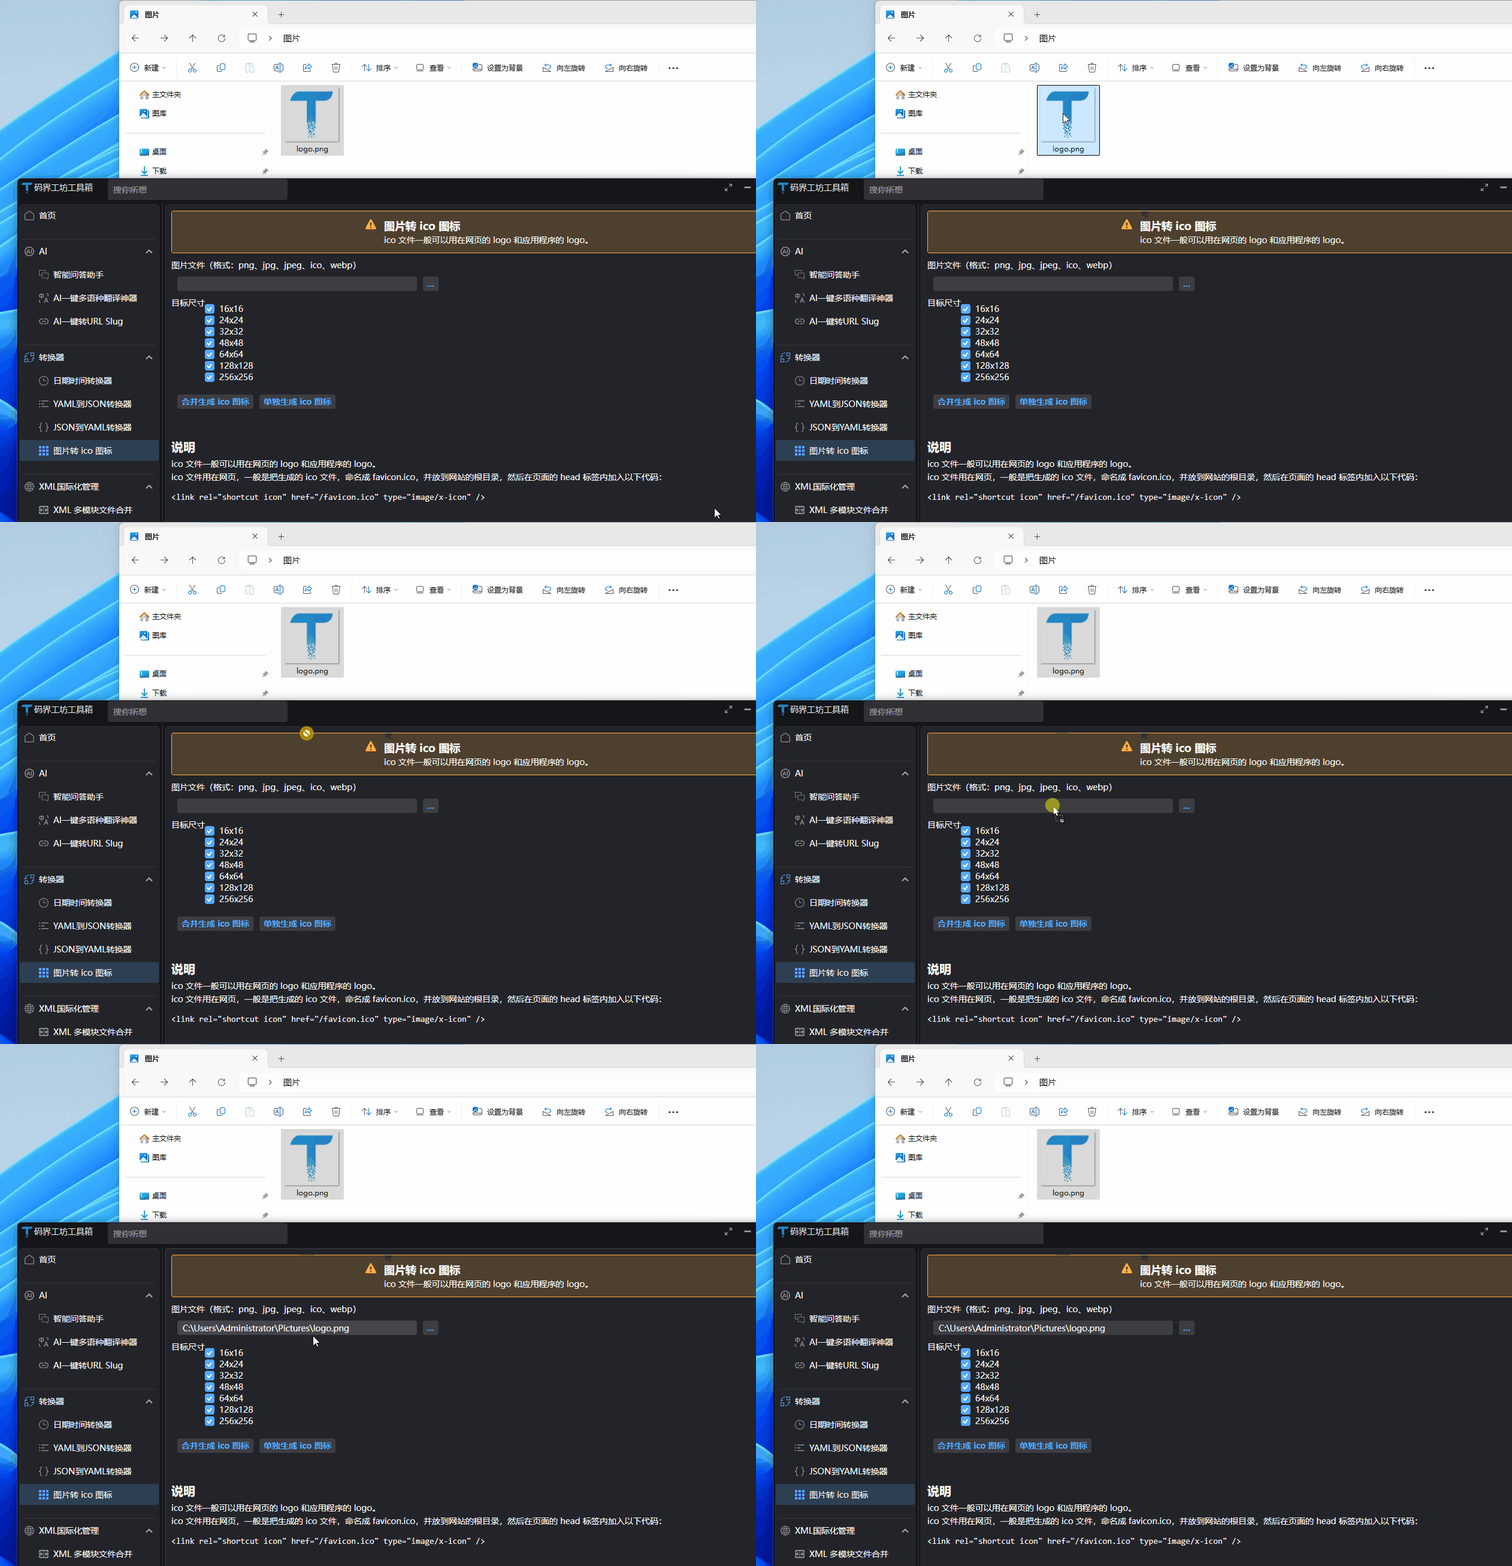
为了提升用户体验,我们支持两种选择源图片的方式:
- 点击"..."按钮从文件选择器选择
- 直接将图片文件拖拽到输入框
在ImageToIconView.axaml.cs中实现拖拽处理:
using Avalonia.Controls;
using Avalonia.Input;
using Avalonia.Platform.Storage;
using CodeWF.Modules.Converter.ViewModels;

namespace CodeWF.Modules.Converter;

public partial class ImageToIconView : UserControl
{
    public ImageToIconView()
    {
        InitializeComponent();
    }

    public void RaiseDropSourceImagePath(object? sender, DragEventArgs e)
    {
        if (this.DataContext is not ImageToIconViewModel vm)
        {
            return;
        }

        var files = e.Data.GetFiles();
        var file = files?.FirstOrDefault();
        if (file == null)
        {
            return;
        }

        vm.NeedConvertImagePath = file.TryGetLocalPath();
        e.Handled = true;
    }
}
通过以上代码,实现了将文件拖拽到文本框时自动获取文件路径的功能:
四、视图模型实现
在ImageToIconViewModel.cs中实现业务逻辑:
using Avalonia.Platform.Storage;
using AvaloniaXmlTranslator;
using CodeWF.Core.IServices;
using CodeWF.Modules.Converter.Models;
using CodeWF.Tools;
using CodeWF.Tools.FileExtensions;
using ReactiveUI;
using System.Collections.ObjectModel;
using Ursa.Controls;

namespace CodeWF.Modules.Converter.ViewModels;

public class ImageToIconViewModel : ReactiveObject
{
    private readonly IFileChooserService _fileChooserService;
    private readonly INotificationService _notificationService;

    private readonly FilePickerFileType _icoFilePickerFileType =
        new("Icon file") { Patterns = ["*.ico"] };

    public ImageToIconViewModel(IFileChooserService fileChooserService, INotificationService notificationService)
    {
        _fileChooserService = fileChooserService;
        _notificationService = notificationService;
        IconSizes.AddRange(Enum.GetValues<IconSize>()
            .Select(size => new IconSizeItem(size)));
    }

    #region Properties

    public ObservableCollection<IconSizeItem> IconSizes { get; } = new();

    private string? _needConvertImagePath;

    public string? NeedConvertImagePath
    {
        get => _needConvertImagePath;
        set => this.RaiseAndSetIfChanged(ref _needConvertImagePath, value);
    }

    #endregion

    #region Command's handler

    public async Task RaiseChoiceNeedConvertImageHandler()
    {
        var files = await _fileChooserService.OpenFileAsync(
            I18nManager.Instance.GetResource(Localization.ImageToIconView.ChoiceSourceImageDescription)!,
            true,
            [FilePickerFileTypes.All]);
        if (!(files?.Count > 0))
        {
            return;
        }

        NeedConvertImagePath = files[0];
    }

    public async Task RaiseMergeGenerateIconHandler()
    {
        (bool isSuccess, uint[]? sizes) = await GetGenerateInfo();
        if (!isSuccess)
        {
            return;
        }

        var folder = Path.GetDirectoryName(NeedConvertImagePath);
        var fileName = Path.GetFileNameWithoutExtension(NeedConvertImagePath);
        var saveIconPath = Path.Combine(folder, $"{fileName}.ico");
        try
        {
            await ImageHelper.MergeGenerateIcon(NeedConvertImagePath, saveIconPath, sizes);
        }
        catch (Exception ex)
        {
            await MessageBox.ShowOverlayAsync(ex.Message);
        }

        FileHelper.OpenFolderAndSelectFile(saveIconPath);
    }

    public async Task RaiseSeparateGenerateIconHandler()
    {
        (bool isSuccess, uint[]? sizes) = await GetGenerateInfo();
        if (!isSuccess)
        {
            return;
        }

        var saveIconFolder = Path.GetDirectoryName(NeedConvertImagePath);
        try
        {
            await ImageHelper.SeparateGenerateIcon(NeedConvertImagePath, saveIconFolder, sizes);
        }
        catch (Exception ex)
        {
            await MessageBox.ShowOverlayAsync(ex.Message);
        }

        FileHelper.OpenFolder(saveIconFolder);
    }

    private async Task<(bool IsSuccess, uint[]? Sizes)> GetGenerateInfo()
    {
        if (string.IsNullOrWhiteSpace(NeedConvertImagePath)
            || !File.Exists(NeedConvertImagePath))
        {
            await MessageBox.ShowOverlayAsync(
                I18nManager.Instance.GetResource(Localization.ImageToIconView.ChoiceSourceImageDialogTitle)!);
            return (false, null);
        }

        var selectedSize = IconSizes.Where(item => item.IsSelected).ToList();
        if (selectedSize.Count <= 0)
        {
            await MessageBox.ShowOverlayAsync(
                I18nManager.Instance.GetResource(Localization.ImageToIconView.DestImageSize)!);
            return (false, null);
        }

        var destSizes = selectedSize.Select(size => (uint)(size.Size)).ToArray();

        return (true, destSizes);
    }

    #endregion
}
视图模型遵循 MVVM 设计模式,主要负责:
- 管理 UI 数据和状态
- 处理用户操作(选择文件、执行转换等)
- 验证输入数据
- 调用核心业务逻辑
- 处理异常情况
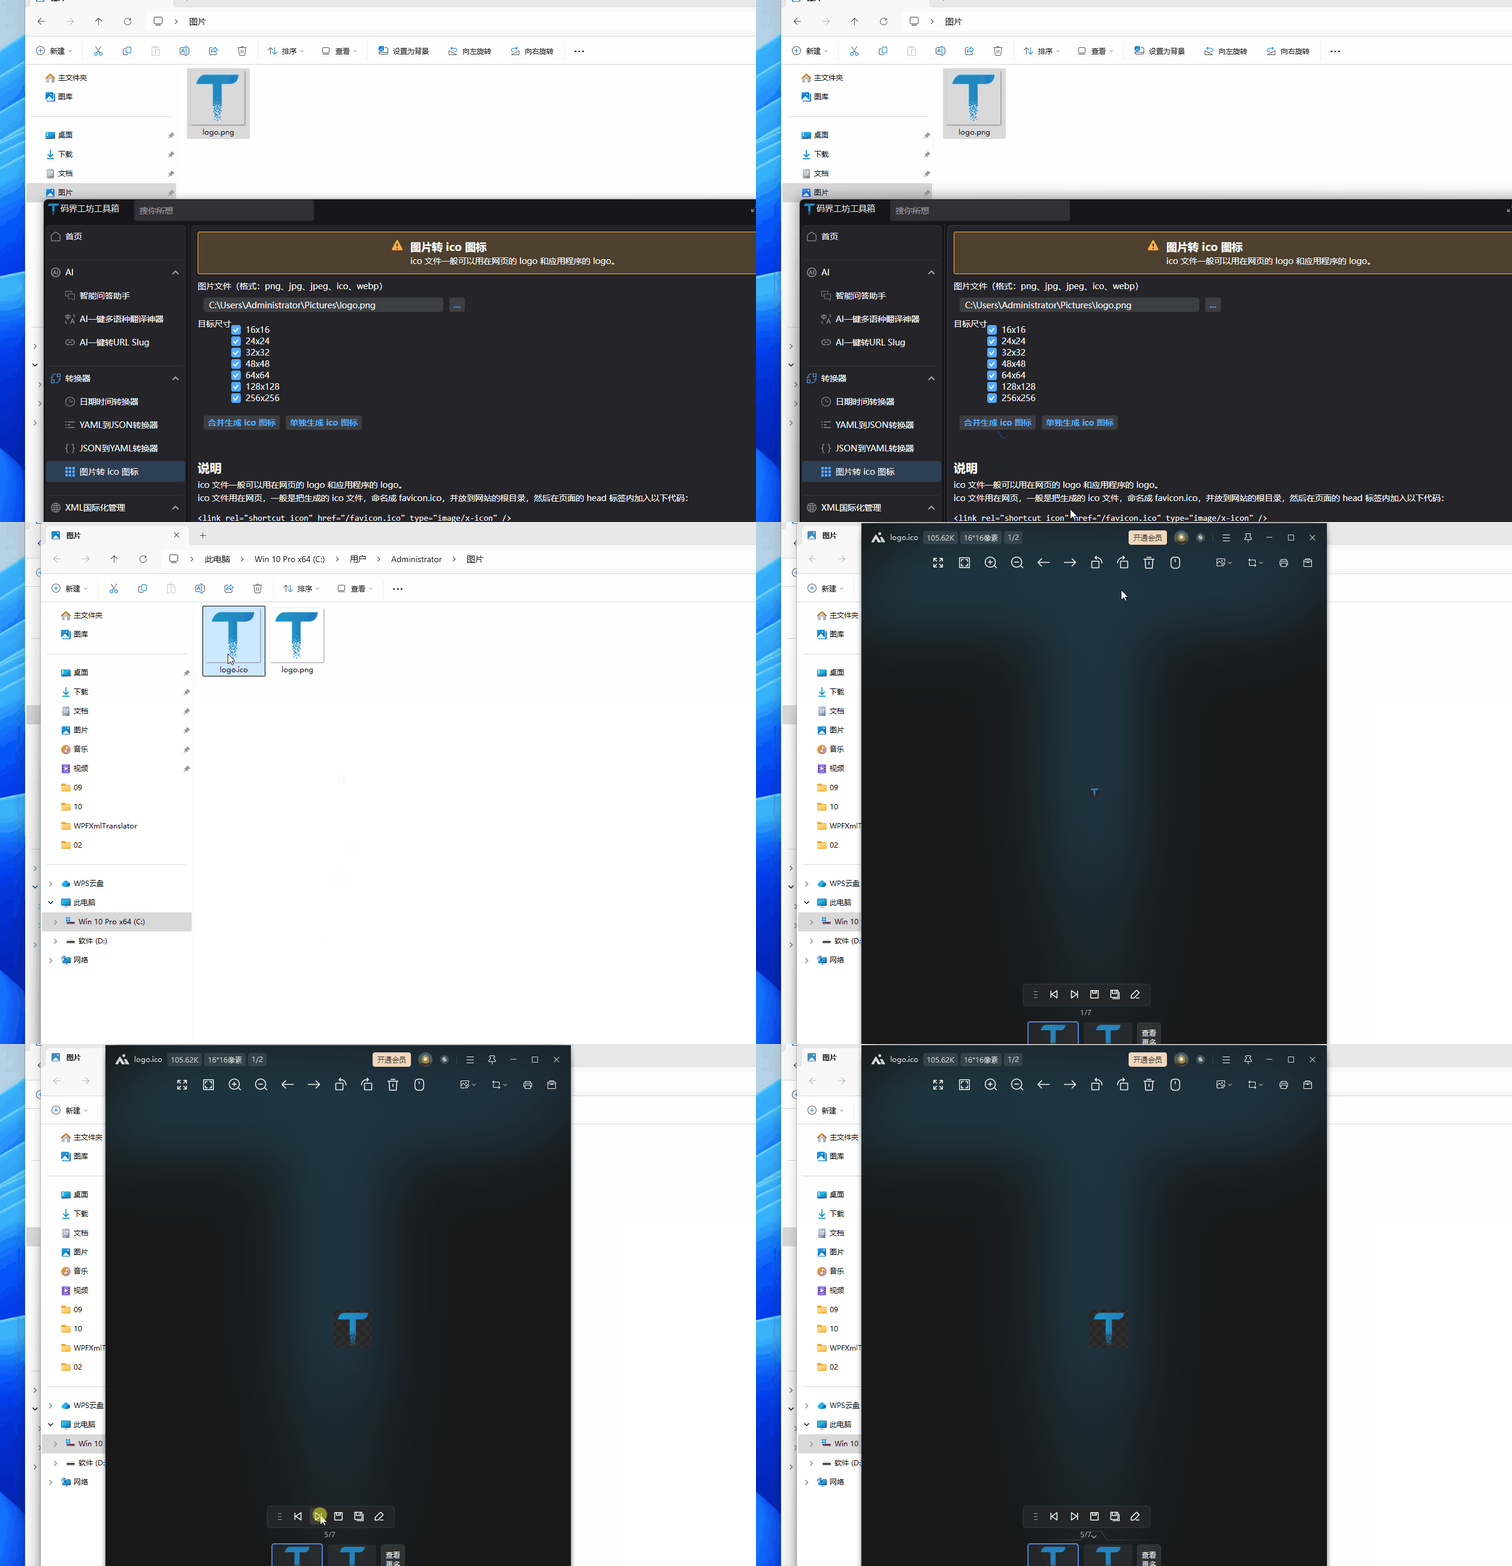
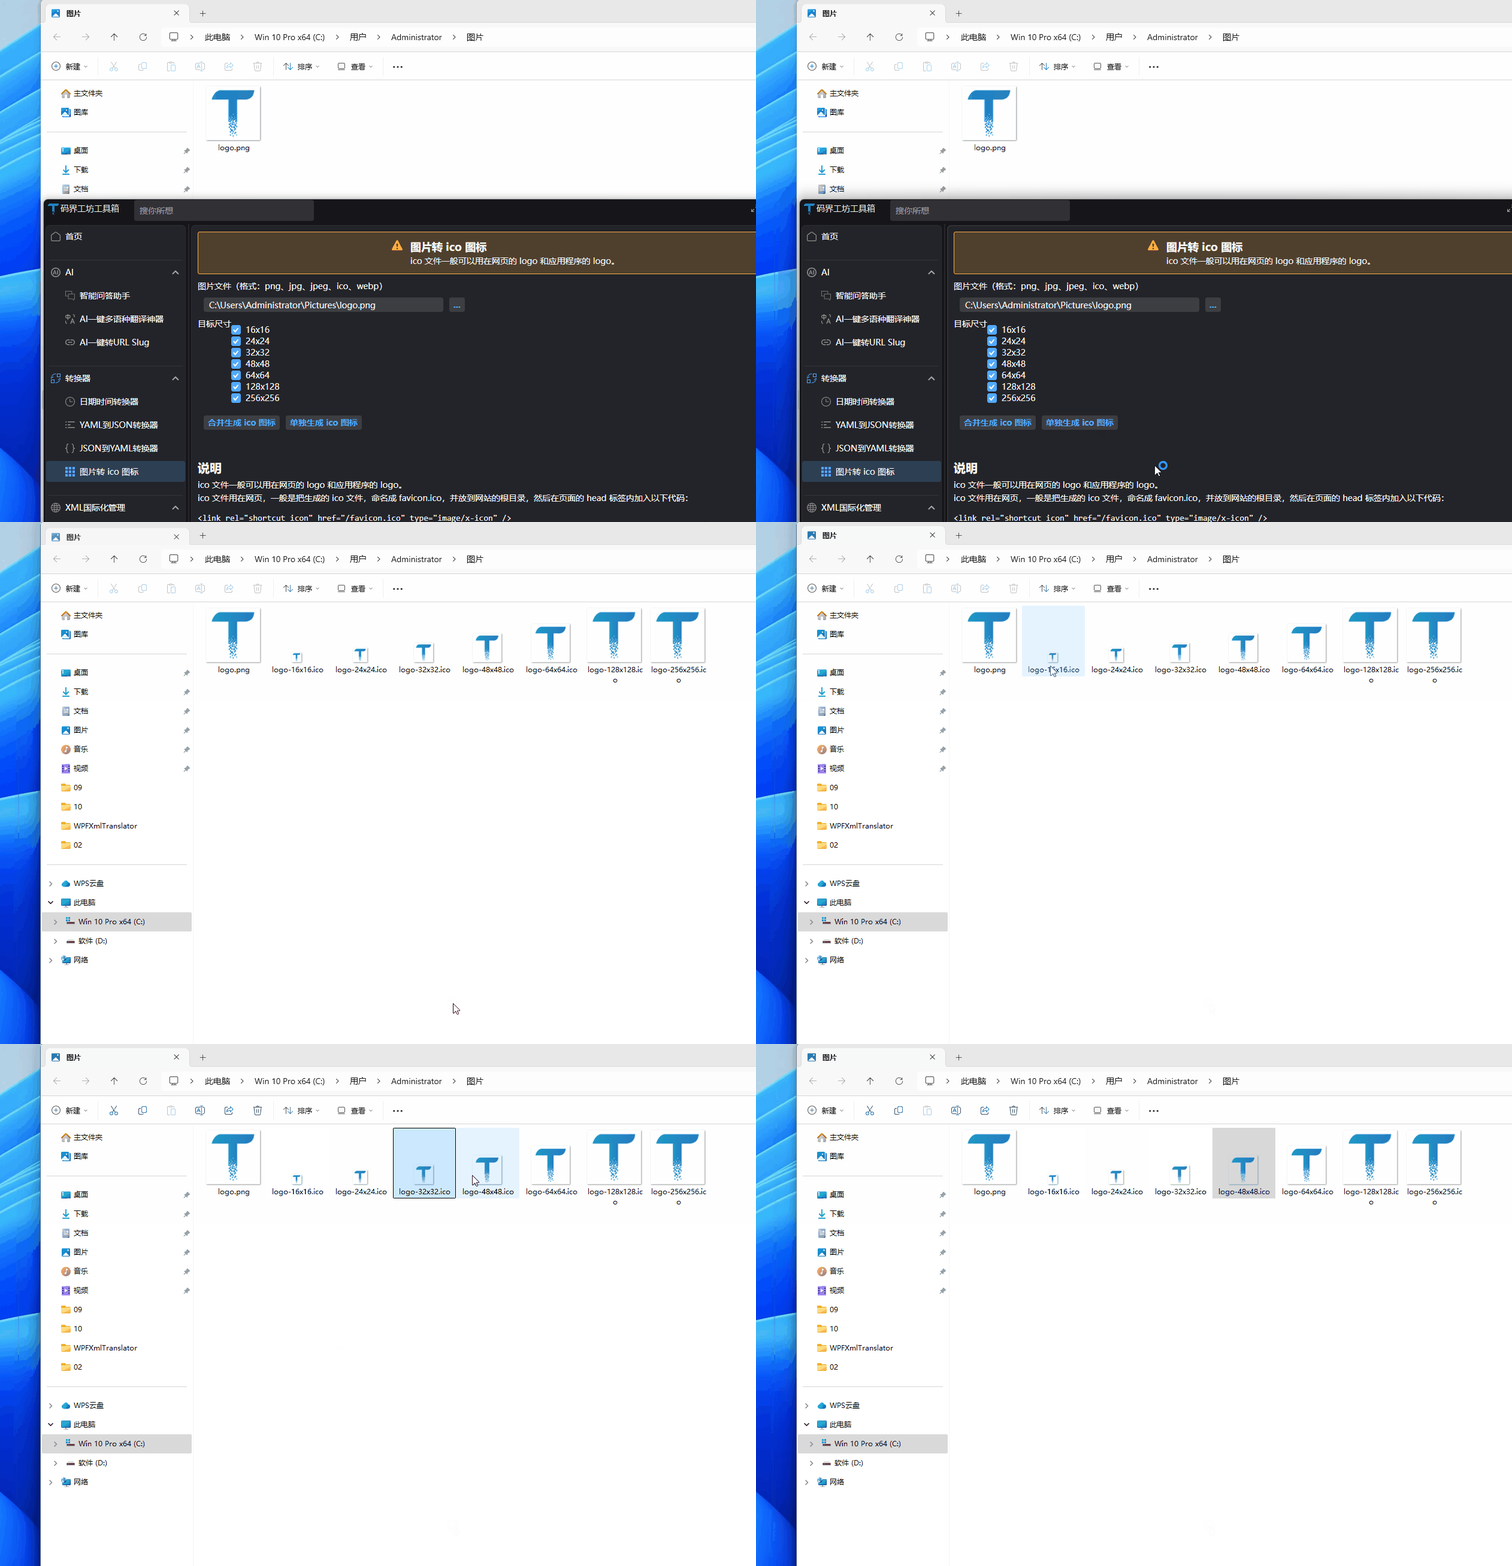
两种转换模式的效果如下:
五、数据模型设计
为了管理图标尺寸选项,我们定义了以下数据模型:
using CodeWF.Tools.Extensions;
using ReactiveUI;
using System.ComponentModel;

namespace CodeWF.Modules.Converter.Models;

public enum IconSize
{
    [Description("16x16")] Size16 = 16,
    [Description("24x24")] Size24 = 24,
    [Description("32x32")] Size32 = 32,
    [Description("48x48")] Size48 = 48,
    [Description("64x64")] Size64 = 64,
    [Description("128x128")] Size128 = 128,
    [Description("256x256")] Size256 = 256
}

public class IconSizeItem(IconSize size) : ReactiveObject
{
    private bool _isSelected = true;

    public bool IsSelected
    {
        get => _isSelected;
        set => this.RaiseAndSetIfChanged(ref _isSelected, value);
    }

    public string Content { get; set; } = size.GetDescription();
    public IconSize Size { get; set; } = size;
}
六、在线Icon转换功能
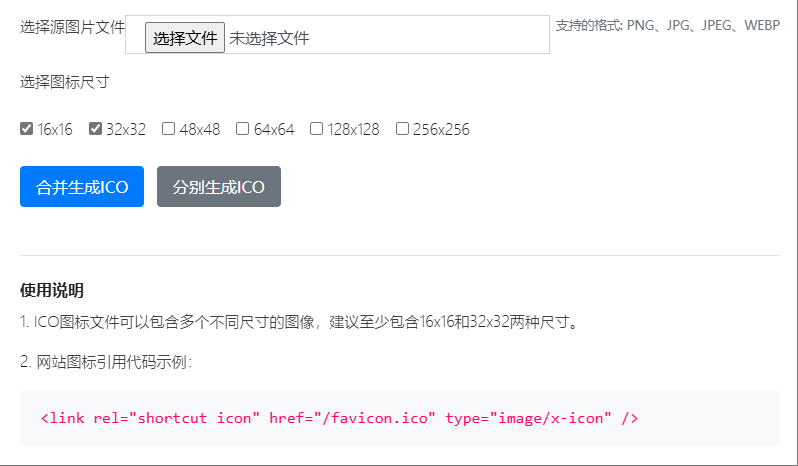
除了桌面应用版本外,我还开发了一个基于Blazor的在线Icon转换工具,方便用户无需安装软件即可实现图片到Icon的转换。
1. 在线转换器特点
在线访问地址:https://dotnet9.com/tool/ico
与桌面版相比,在线版本有以下特点:
- 无需安装:直接通过浏览器访问使用
- 跨平台兼容:支持任何现代浏览器,包括移动设备
- 临时文件存储:转换后的文件会在服务器上临时保存,用户需要及时下载
- 简化界面:针对网页使用体验优化,操作更加简洁
2. 转换流程
在线转换工具的工作流程简单直观:
- 选择一个图片文件(支持PNG、JPG、JPEG、WEBP格式)
- 选择需要转换的图标尺寸
- 选择转换模式(合并生成或分别生成)
- 点击按钮后,系统将图片上传至服务器进行转换
- 转换完成后,点击"下载"按钮获取生成的文件
在线版本同样使用了Magick.NET进行图像处理,核心转换逻辑与桌面版相同,但增加了文件上传处理、临时存储和清理等功能。有兴趣深入了解具体实现的读者,可以直接查看源代码:
七、总结与应用场景
通过本文,我们实现了桌面版和在线版两种图片转Icon工具,满足了不同用户的需求。它们具有以下特点:
- 简洁的用户界面:操作直观,支持拖拽操作
- 丰富的转换选项:支持多种尺寸,满足不同应用场景需求
- 灵活的转换模式:可以生成单个多尺寸 ICO 文件,也可以生成多个单尺寸 ICO 文件
- 良好的代码结构:采用 MVVM 设计模式,代码清晰,易于维护和扩展
这个工具可以应用于以下场景:
- 网站开发中生成 favicon.ico
- 应用程序开发中生成应用图标
- 设计师快速生成不同尺寸的图标文件
此外,本项目还展示了如何在 C#应用中使用强大的图像处理库 Magick.NET,以及如何使用 Avalonia 构建跨平台桌面应用,这些知识点都可以应用到其他类似的开发项目中。
希望本文对你有所帮助,如有问题欢迎在评论区留言讨论!
源码参考