
我们现在有了基本的日志,但是每次输入完重新加载页面数据都会重置,因为这些数据都只存在于浏览器,没有真正储存到数据库,为了保存下来,我们要跟数据库连接。
(注:Blazor WebAssembly 没有直接跟数据库交互的能力,不过微软有提供ASP.NET Core hosted 选项,可以在建立 Blazor WebAssembly 时一并建立 ASP.NET Core Web API 工程)
Entity Framework Core
首先在appsettings.json加入连接字串,因为测试用,所以 SqlServer 用本地数据库。
{
  "ConnectionStrings": {
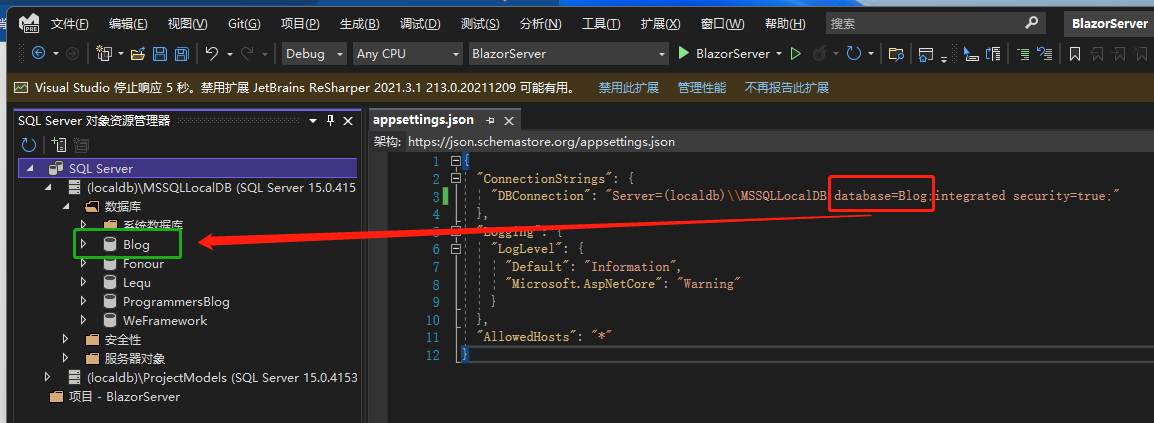
    "DBConnection": "Server=(localdb)\\MSSQLLocalDB;database=Blog;integrated security=true;"
  },
  "Logging": {
    "LogLevel": {
      "Default": "Information",
      "Microsoft.AspNetCore": "Warning"
    }
  },
  "AllowedHosts": "*"
}
接着 NuGet 下载两个组件,分别为Microsoft.EntityFrameworkCore.SqlServer 跟Microsoft.EntityFrameworkCore.Tools,这两个组件是跟 SqlServer 交互用的 ORM 组件,ORM 又是什么呢?
项目工程配置文件:BlazorServer.csproj
<Project Sdk="Microsoft.NET.Sdk.Web">

	<PropertyGroup>
		<TargetFramework>net6.0</TargetFramework>
		<Nullable>enable</Nullable>
		<ImplicitUsings>enable</ImplicitUsings>
	</PropertyGroup>

	<ItemGroup>
	  <PackageReference Include="Microsoft.EntityFrameworkCore.SqlServer" Version="6.0.1" />
	  <PackageReference Include="Microsoft.EntityFrameworkCore.Tools" Version="6.0.1">
	    <PrivateAssets>all</PrivateAssets>
	    <IncludeAssets>runtime; build; native; contentfiles; analyzers; buildtransitive</IncludeAssets>
	  </PackageReference>
	</ItemGroup>

</Project>
远古时代的程序开发者想从SqlServer 取数据回来,都必须学习SQL 语句,后来.NET 平台(包括VB、C#)开发了ADO.NET 这个取数据的好工具,将数据取回来后一一跟程序mapping,但ADO.NET 在数据映射上不如人意,微软便推出了Entity Framework,这就是初始的ORM(Object-Relational Mapper),让开发者可以把数据变成实体(entity),不用实际去接触SQL 语句,且有了设计工具(Designer) 让程序开发者更好操作。
但也有些人觉得Entity Framework 太笨重就转向另一个轻便的工具Dapper的怀抱,笔者也用过Dapper,如果是喜欢自己组SQL 语句的人确实会觉得方便。
而.NET Core 这个跨平台版本的ORM 就是用Entity Framework Core 去做数据映射的处理。
安装完组件后,新增一个类 AppDbContext,继承DbContext,里面的构造函数将DbContextOptions<AppDbContext> options传给基类 也就是DbContext。
AppDbContext.cs
using Microsoft.EntityFrameworkCore;

namespace BlazorServer.Models;

public class AppDbContext : DbContext
{
	public AppDbContext(DbContextOptions<AppDbContext> options) : base(options)
	{
	}

	public DbSet<BlogModel>? Blogs { get; set; }

	public DbSet<PostModel>? Posts { get; set; }
}
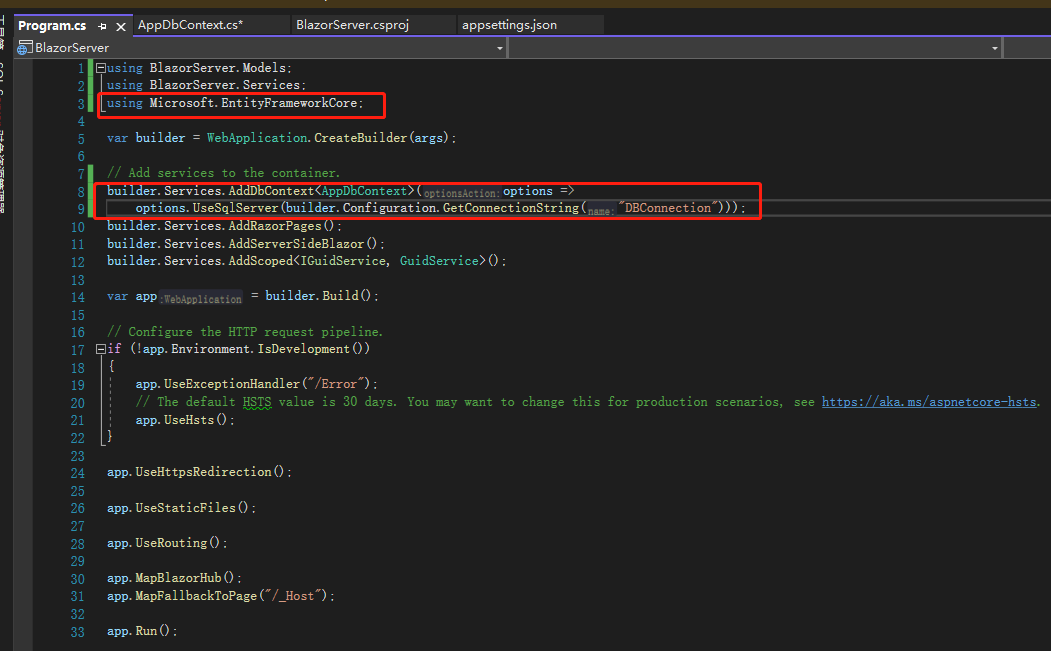
接着打开Program.cs,注册使用数据库,这边用的是UseSqlServer(),当然也有UseMysql()、UseOracle()可以用,只要安装相应的组件即可。
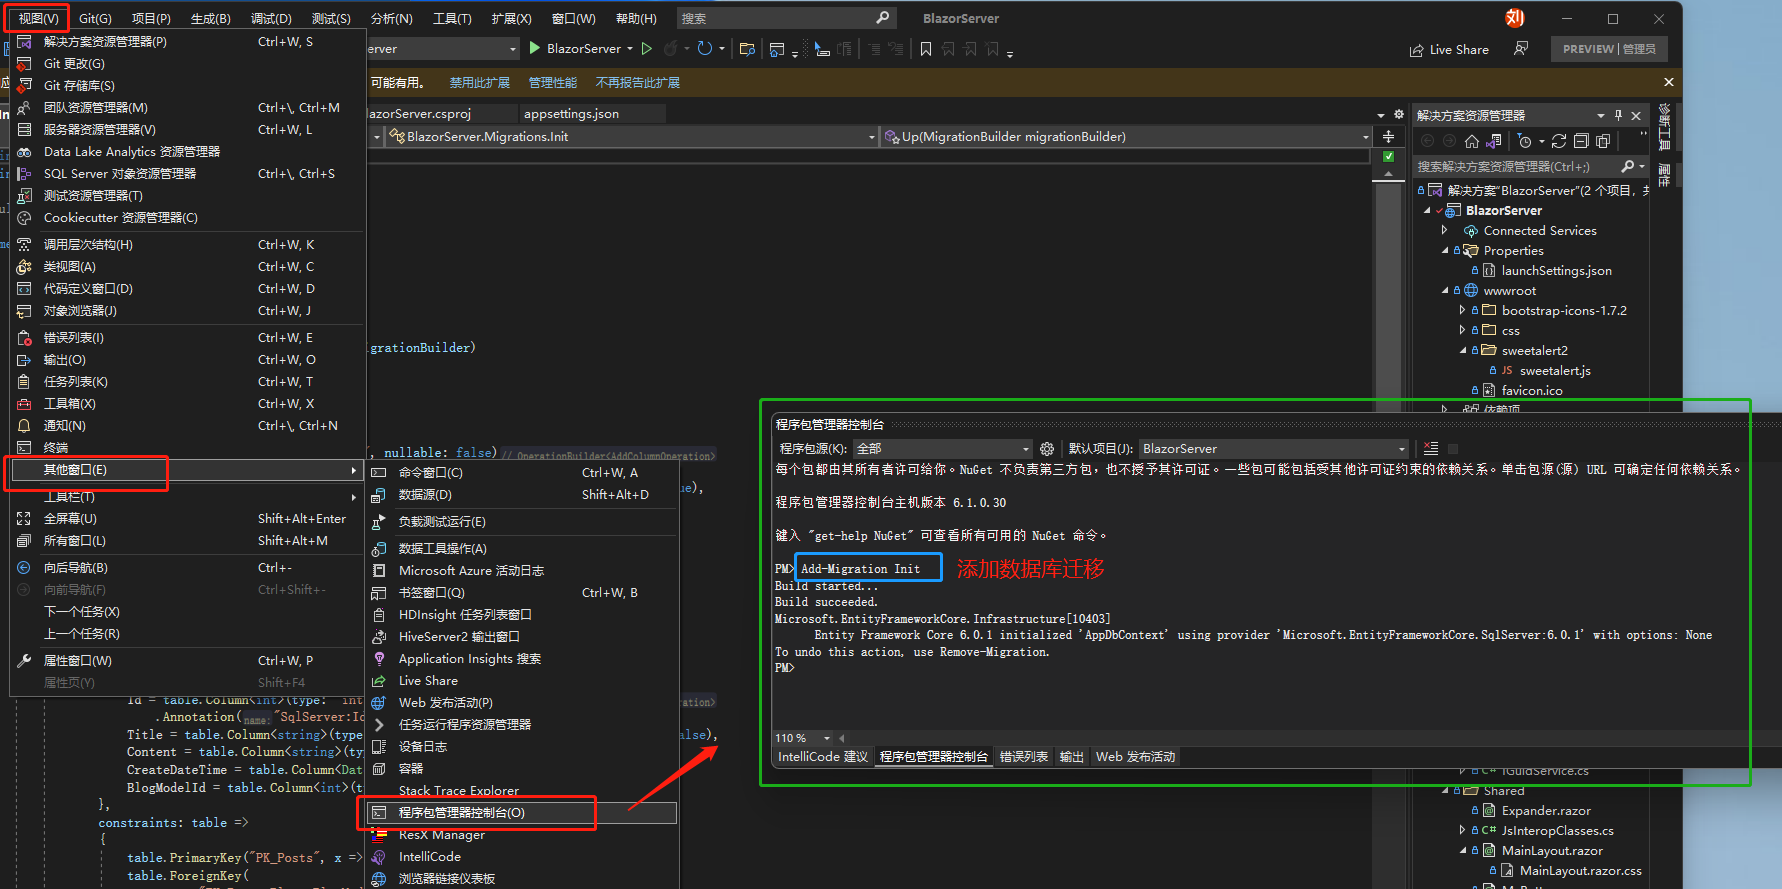
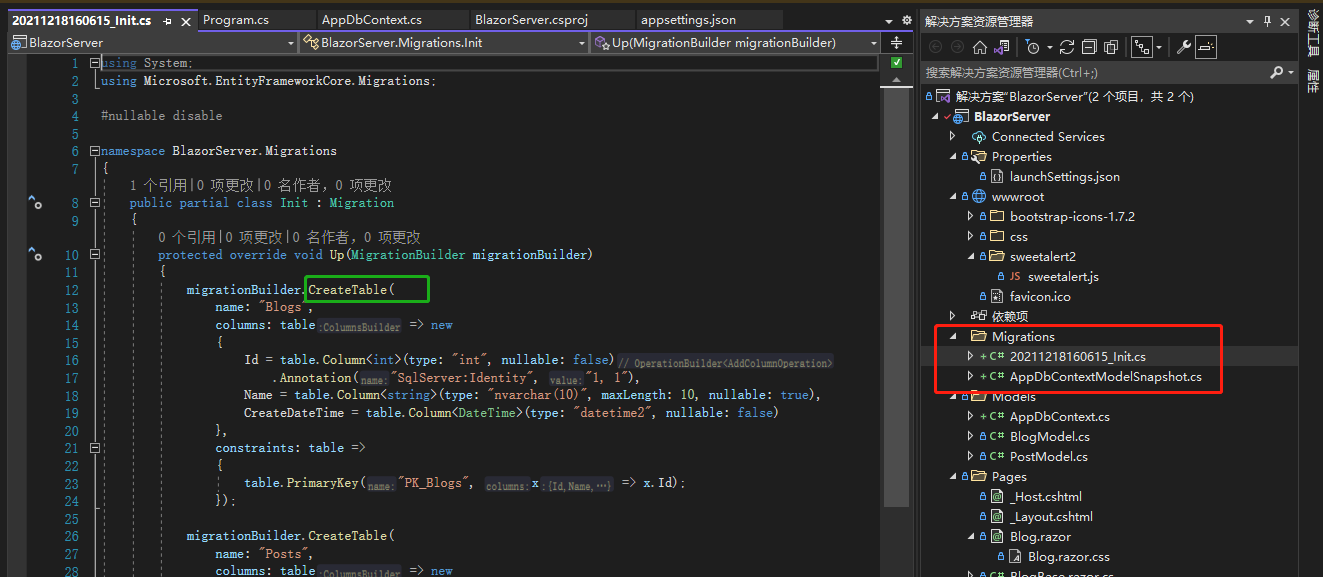
打开程序包管理器控制台,输入命令Add-Migration Init,告诉Entity Framework Core 要建立一个数据库迁移,接着就会产生迁移目录Migration,这是Entity Framework Core 的特点,在程序跟数据库之间产生中介Migration,另外Migration 一大好处就是在真正确定前,都可以不断修改,等确定后再更新数据库。
Relation between Blog and Post
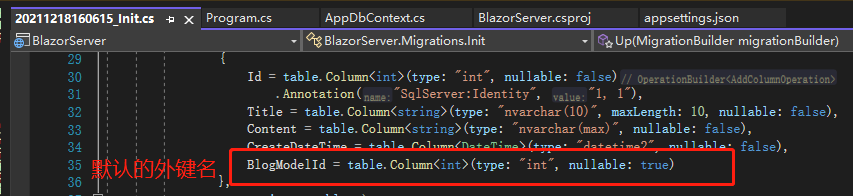
接下来要在Post 里面加上BlogId,Blog 对于Post 而言是主表之于子表,如果新增迁移的时候没有加入对主表的关联(也就是主表外键关联子表),EF Core 很聪明会主动加上,但字段名就会是Model+Key 的名称,变成BlogModelBlogId,我们来把名称简化。
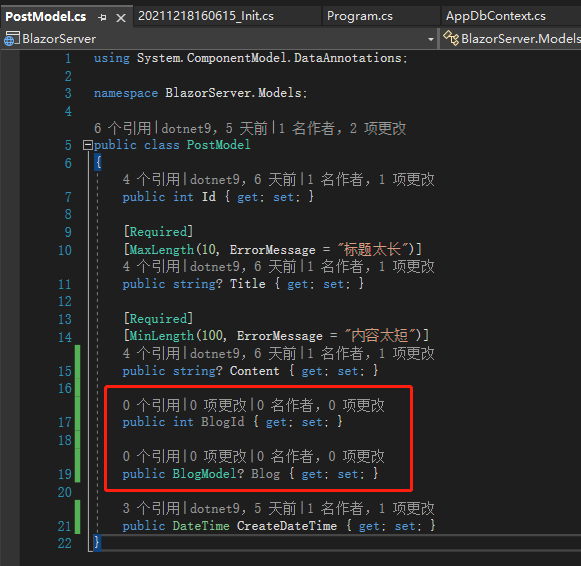
先在PostModel加上两个属性,BlogId跟Blog,切记一定要这样添加,BlogId是存在数据库用的,Blog则是在关联数据的时候有个实体可以用,让我们不用自己 join 数据表,后续会再说明。
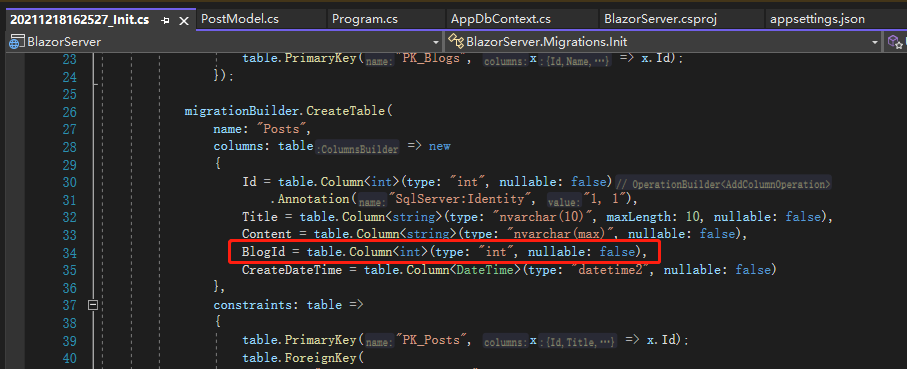
接着用Remove-Migration将原先的 Migration 清除,再新增一次 Migration,即执行命令Add-Migration Init,可以看到新的 Migration 有简化的名称BlogId了,这时候再去更新数据库。
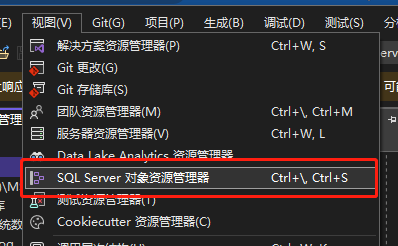
使用命令Update-Database去更新数据库,然后打开SQL Server 对象资源管理器,可以找到刚才建立的数据库Blog,数据库名来自连接字串database的名称,可以看到数据库已经建起来了,过程中没有用到 SQL 语句或是 SSMS 界面。
不过有一点要特别注意,中途如果换数据库的话,原先的 Migration 有很大机率产生问题,各家数据库的数据类型都有差异,所以最好一开始就规划好用哪个数据库。
除了AddDbContext<T>这种最常见的做法,还有AddDbContextFactory<T>这种在个别组件产生新的DbContext的方法,因为AddDbContext<T>的生命周期是scoped,对 Blazor Server 来说也就是除非关闭系统,否则DbContext都不会 dispose,有些人希望生命周期仅限于组件即可,就可以用AddDbContextFactory<T>。
引用:
注:本文代码通过 .NET 6 + Visual Studio 2022 重构,可点击原文链接与重构后代码比较学习,谢谢阅读,支持原作者