(4/30) Learning Blazor Together: Introduction to Components and Routing

(4/30) Learning Blazor Together: Introduction to Components and Routing

Since the author used ASP.NET Core API + Blazor Server initially, the demonstration will be based on Blazor Server. After researching Blazor WebAssembly, the insights will be supplemented later.

Last updated 12/10/2021 11:01 PM
StrayaWorker
6 min read
Category
Blazor
Topic
Learning Blazor Series
Tags
.NET C# ASP.NET Core Blazor

Since the author initially used ASP.NET Core API + Blazor Server, the examples will be demonstrated with Blazor Server. After studying Blazor WebAssembly, I will add my insights later.

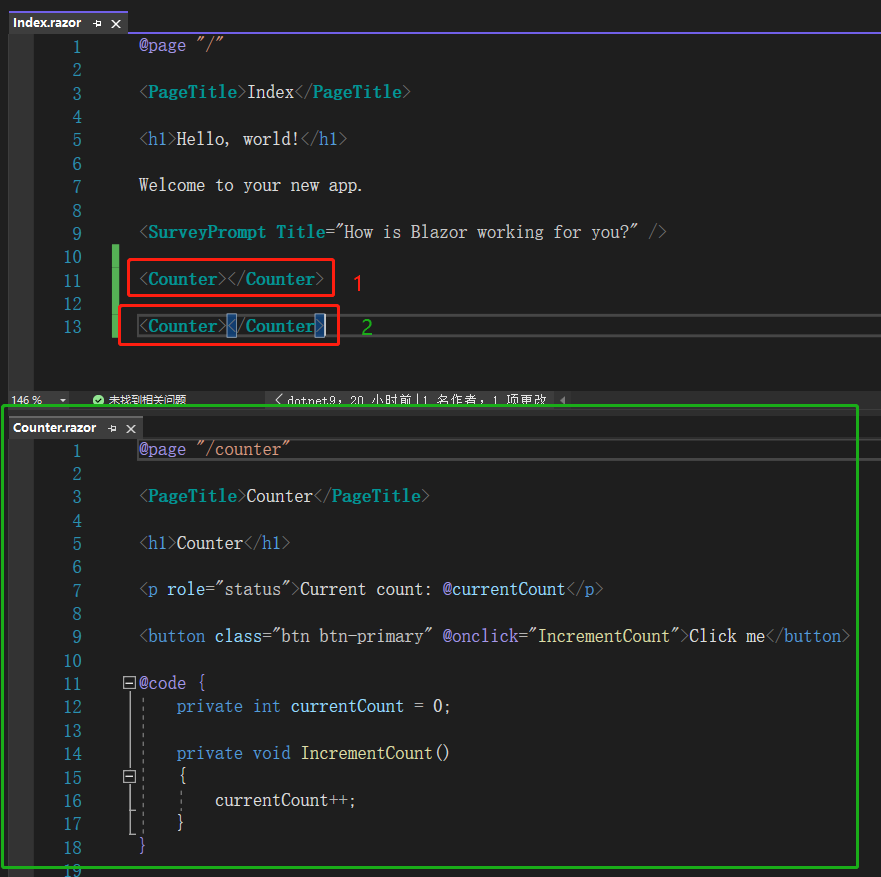
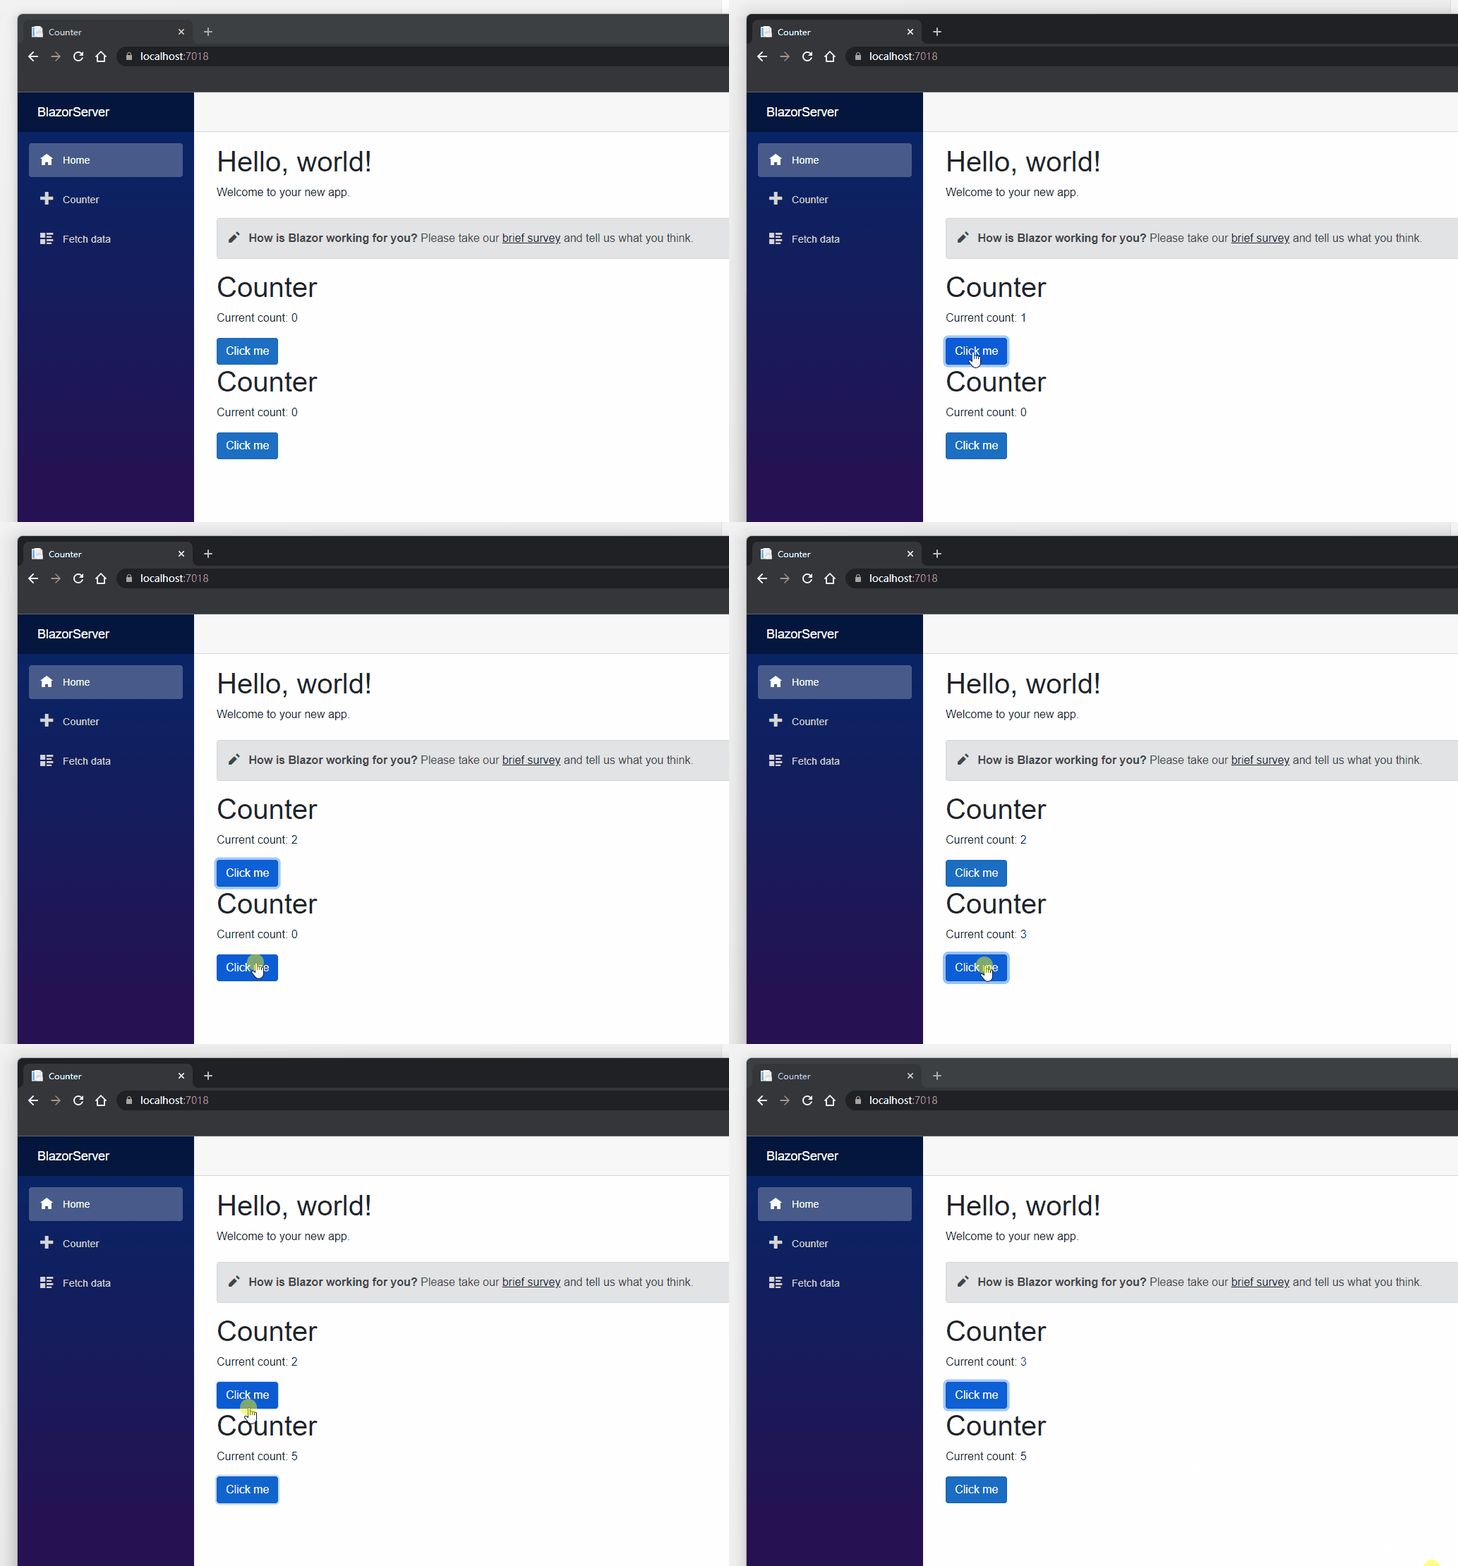
First, since Components are reusable, we place two Counters on Index.razor. Start the project (if you don't want full debugging, press Ctrl+F5 to start without debugging — it's faster, and Blazor will detect every file save, so the new program loads when the page reloads). In the browser, the two Counters each have their own "Click me" button. Clicking them shows the numbers incrementing independently, indicating they are different components. So where are these numbers defined?

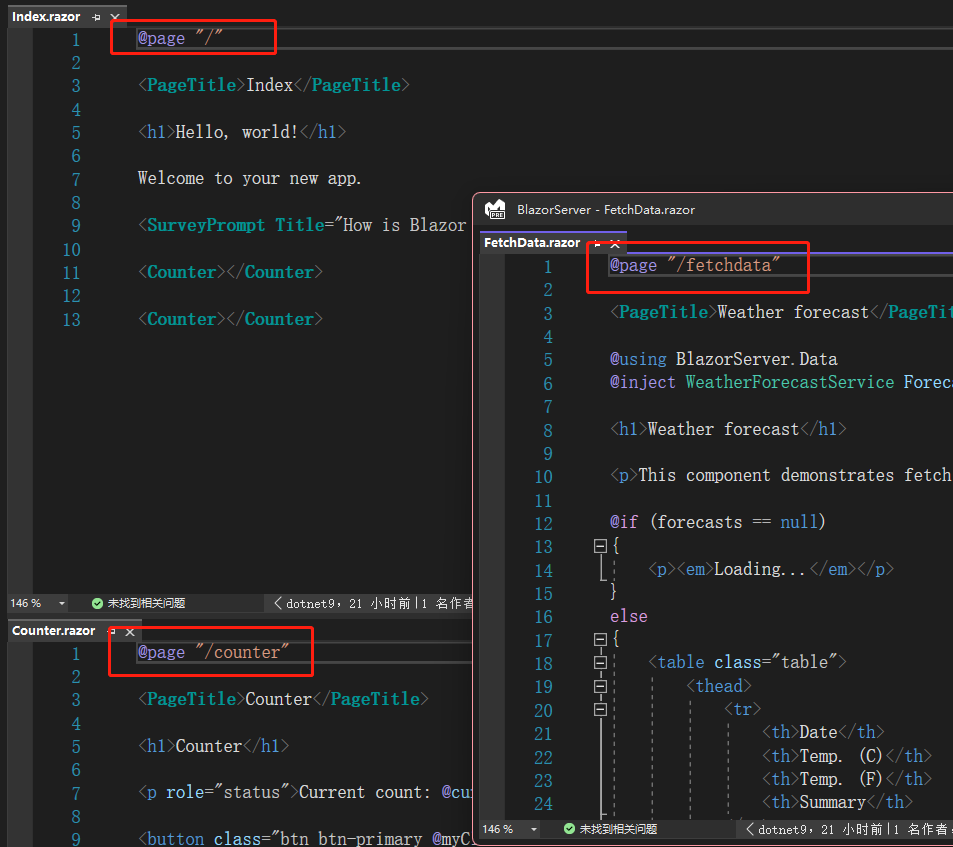
Open Counter.razor. At the top is the @page directive — more on that later. Next comes HTML and some C# code, followed by the @code block. This is where Blazor's magic lies: @code corresponds to what JavaScript typically does in a regular web page, such as defining variables, implementing methods, and sending requests to the backend or API. However, Blazor uses C#. Here we define a private variable currentCount and a method IncrementCount(). The method is invoked by the "Click me" button. Each click increments currentCount by 1, and the result is displayed inside the <p> element.

Index.razor and Counter.razor

Two independent Counters

The way currentCount is defined and rendered on the page is an example of model binding, meaning there is a binding relationship between the data and the page. In the .NET Framework’s View, @model or @Viewbag serve the same purpose; Angular's [(ngModel)] works similarly. They all aim to bind data to the page so that operations on the page affect the data.

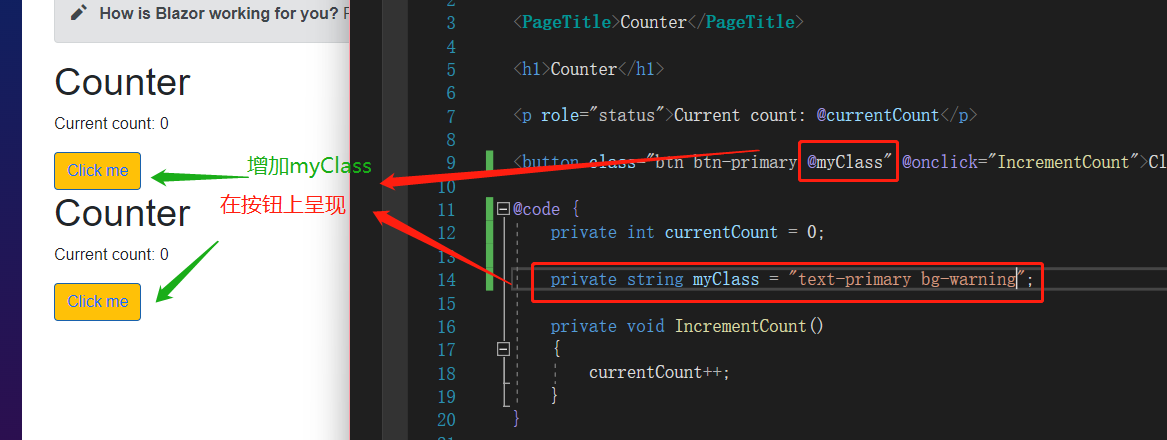
Let’s define another variable, myClass, assign some Bootstrap classes to it, and put the variable inside the class attribute of the button. Remember: in HTML, any C# code must be prefixed with @, otherwise Blazor won't know to compile it. After reloading the page, you'll see the button’s style has changed — Blazor has placed the value of myClass (text-primary bg-warning) into the button's class.

Add myClass to Counter button

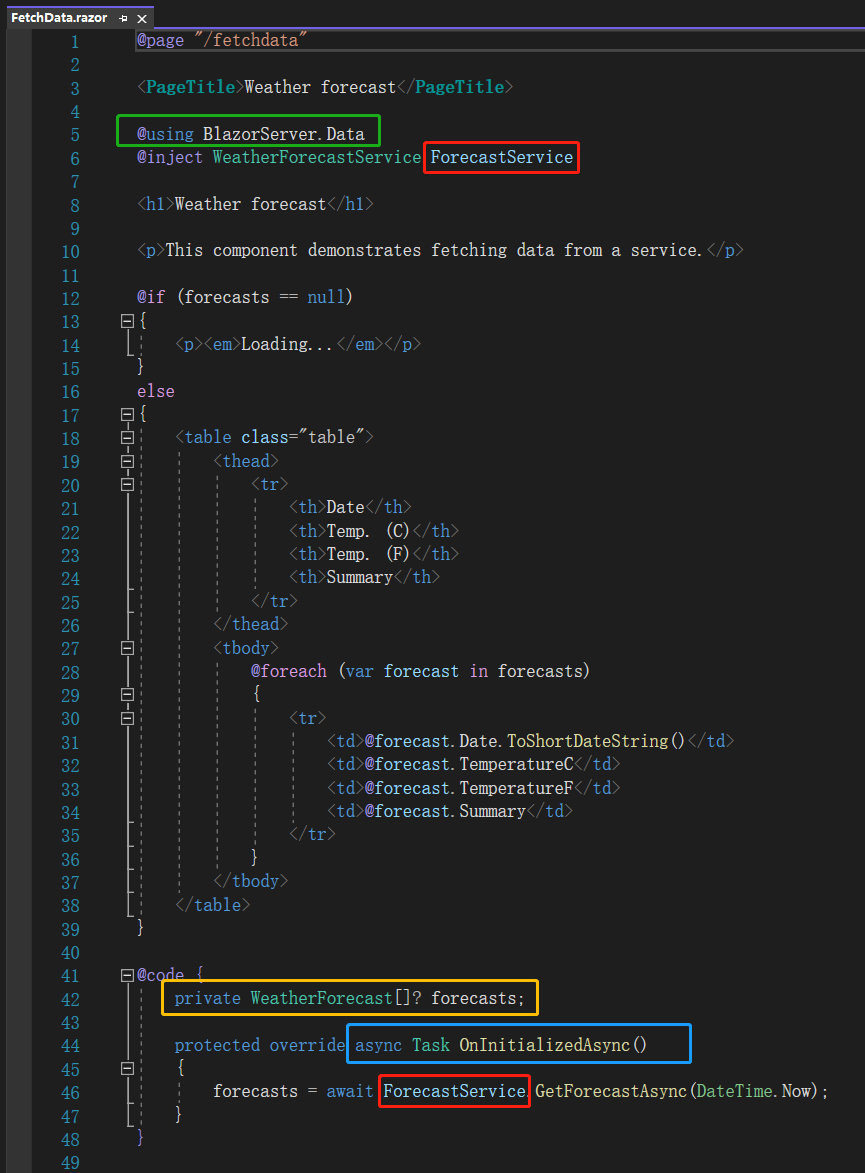
Next, look at FetchData.razor. Here we see @using BlazorServer.Data. We could move this using into _import.razor later. And what about @inject WeatherForecastService ForecastService? Let’s check the @code block. There we define a variable forecasts of type WeatherForecast[], and call ForecastService.GetForecastAsync(DateTime.Now) asynchronously in the OnInitializedAsync method, storing the result in forecasts. Sharp-eyed readers will notice that the ForecastService at the top is exactly the same as the one used in the @code block.

FetchData.razor

Click on the GetForecastAsync() method and press F12. You'll see that this method returns an array of five randomly generated weather data items. In the HTML section, there is a check for whether forecasts is null; if not, a table is generated that displays the date, Celsius, Fahrenheit, and weather summary for each forecast using foreach.

Service generates data and renders

As mentioned earlier, Blazor has only one page; all other content is composed of individual Components. Every time an event is triggered, the Server (or WebAssembly) re-renders the corresponding Component in the browser. But how does Blazor know which Component to render at a given moment?

The answer lies in the @page directive, which functions like traditional routing. In Index.razor, @page is set to "/", indicating it’s the home page. Counter.razor and FetchData.razor also have their respective @page directives. A single Component can have multiple @page directives, but each must start with a slash and be enclosed in double quotes. The author once considered using an enum to centrally manage the @page values for different Components, but unfortunately Blazor does not support this approach. Also, if two Components share the same @page, a compile-time error will occur, so you don’t have to worry about how Blazor would handle duplicate routes.

@page directive

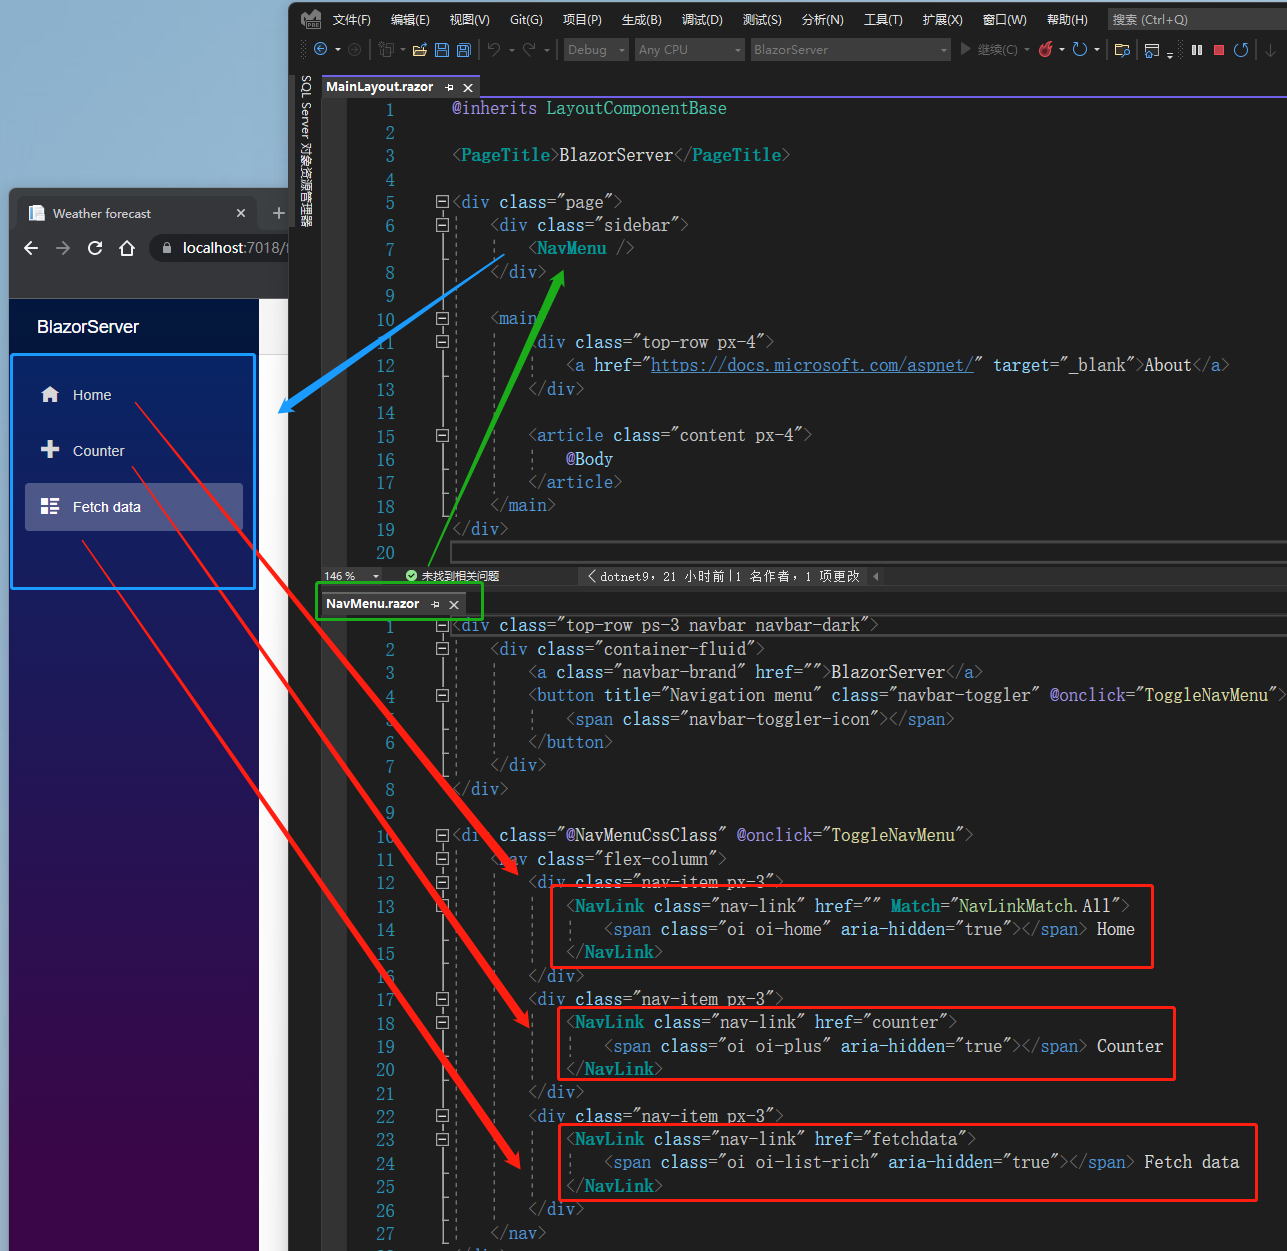
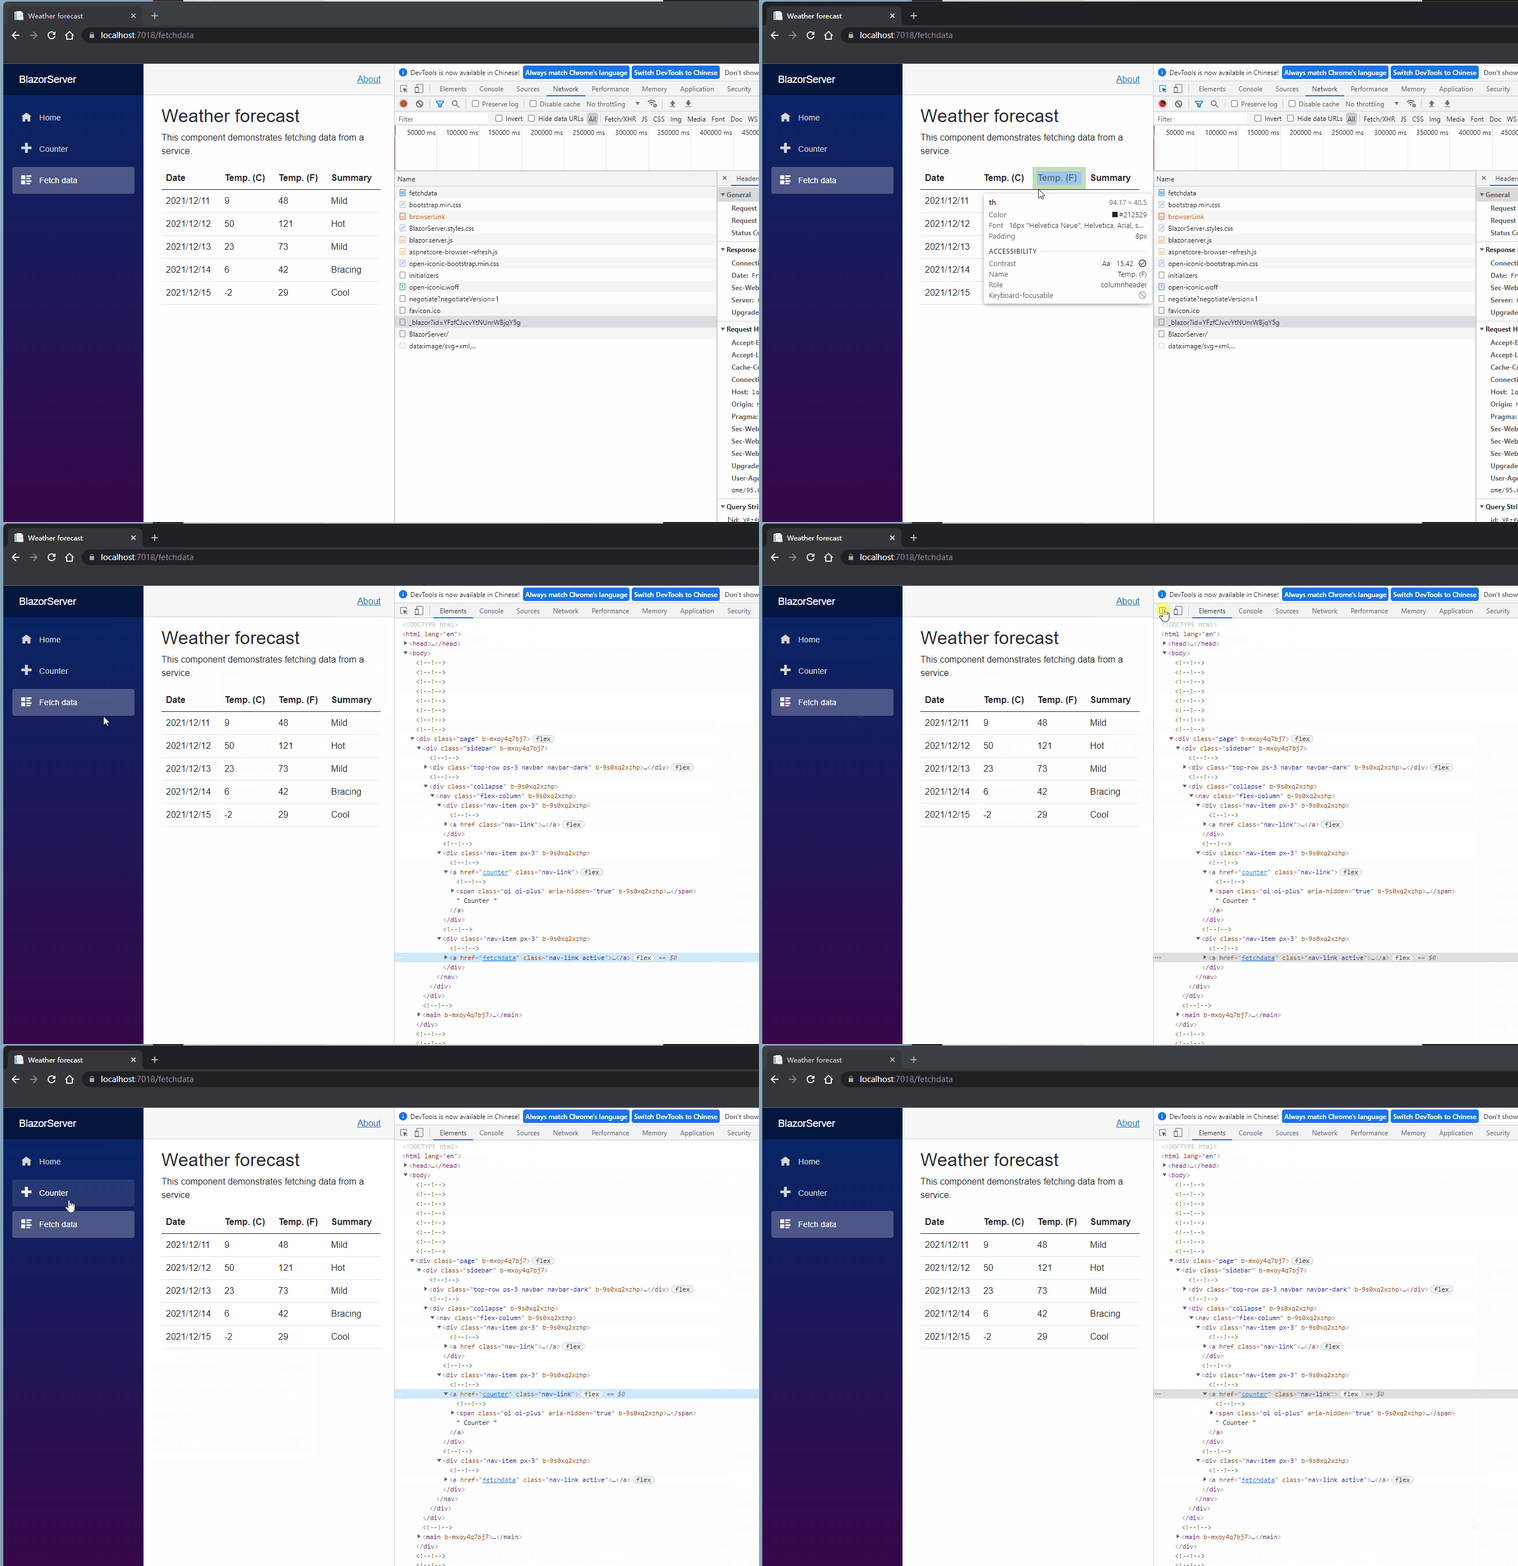
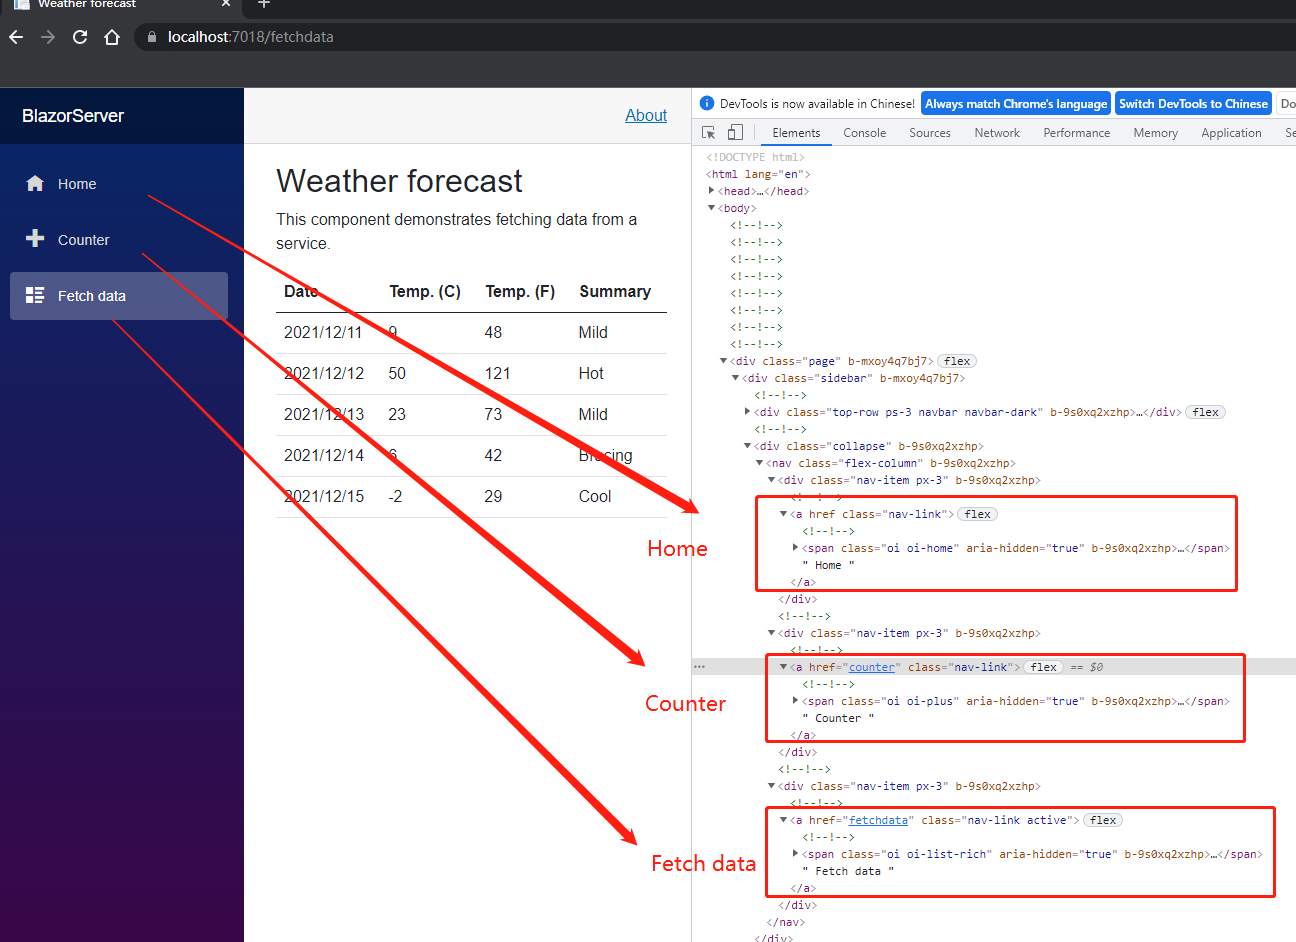
So where are the left‑hand menu items “Home”, “Counter”, and “Fetch data” defined? Open MainLayout.razor — you’ll see the <NavMenu> element. Then open NavMenu.razor to find three <NavLink> Components. These Components are translated by the server into <a> elements that browsers understand. Even if you open DevTools, you will only see <a> elements.

Left menu

Left menu rendered as  tag in HTML 1

Left menu rendered as  tag in HTML 2

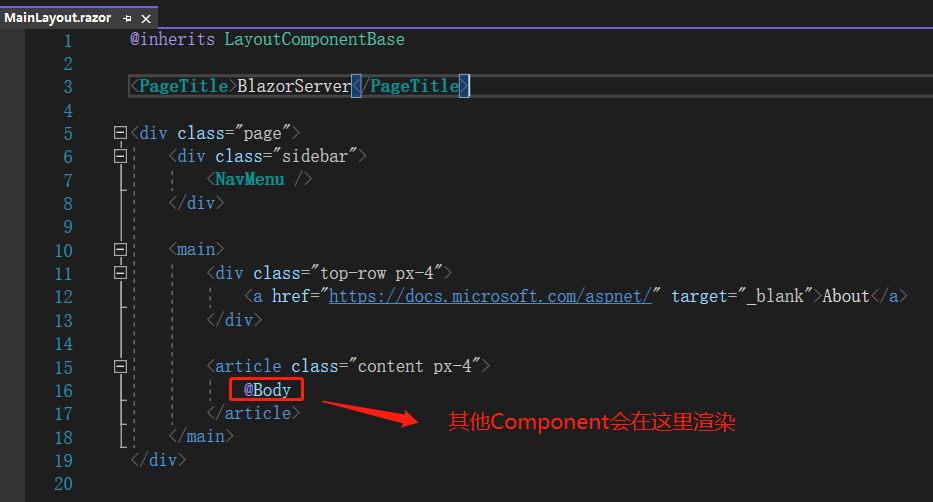
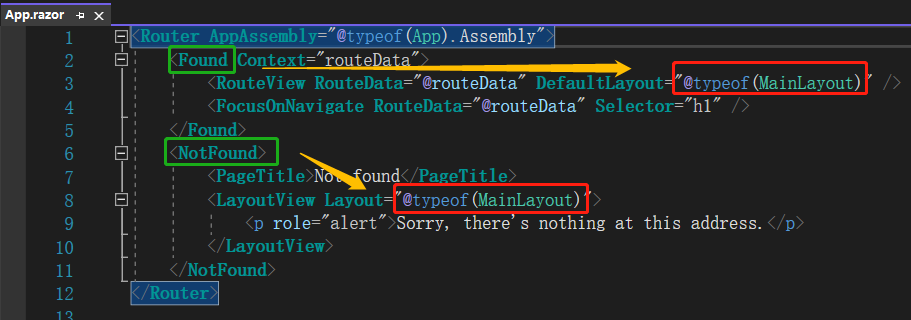
Back in MainLayout.razor, you'll find the @Body directive. This is where other Components are placed — a kind of placeholder. In App.razor, there are Found and NotFound Components. As the names suggest, the former is used when the entered URL matches a Component, and the latter when it doesn’t. Both of them use MainLayout. You can also define your own Layout if different pages need different layouts.

@Body

With that, let’s review how Blazor Server works. Similar to Angular, it goes layer by layer, making management easier. Blazor WebAssembly’s index.html is roughly equivalent to Blazor Server’s _Layout.cshtml. However, WebAssembly lacks an appsettings.json file — typically used to store the database connection string. This confirms that Blazor WebAssembly is indeed a passive data consumer and cannot actively connect to a database. The author tried referencing EF Core there, but it was not possible for Blazor WebAssembly to access the database. In the .NET Framework world, the configuration is stored in an XML‑formatted web.config; in .NET Core, it has been replaced by the JSON‑format appsettings.json.

Reference: ASP NET Core blazor project structure

Note: This article’s code has been refactored with .NET 6 + Visual Studio 2022. You can compare the original link and the refactored code for learning. Thank you for reading, and support the original author.

Keep Exploring

Related Reading

More Articles
Same category / Same tag 12/25/2021

(29/30)Learn Blazor Together: Blazor Unit Testing

The most boring part of developing a system is probably fixing bugs, especially errors like trying to access a null object (`Object reference not set to an instance of an object.`), which is the most common problem most people encounter when they first step into programming. To break free from the tedious bug-fixing process, this article introduces `unit testing`.

Continue Reading
Same category / Same tag 12/25/2021

(28/30) Learning Blazor Together: Policy-based Authorization

It was mentioned earlier that `ASP.NET Core Identity` uses `Claim`-based authentication. In fact, `ASP.NET Core Identity` has different types of authorization methods, the simplest being `Login Authorization`, `Role Authorization`, and `Claim Authorization`. However, all of the above are implemented in one way: Policy-based Authorization.

Continue Reading