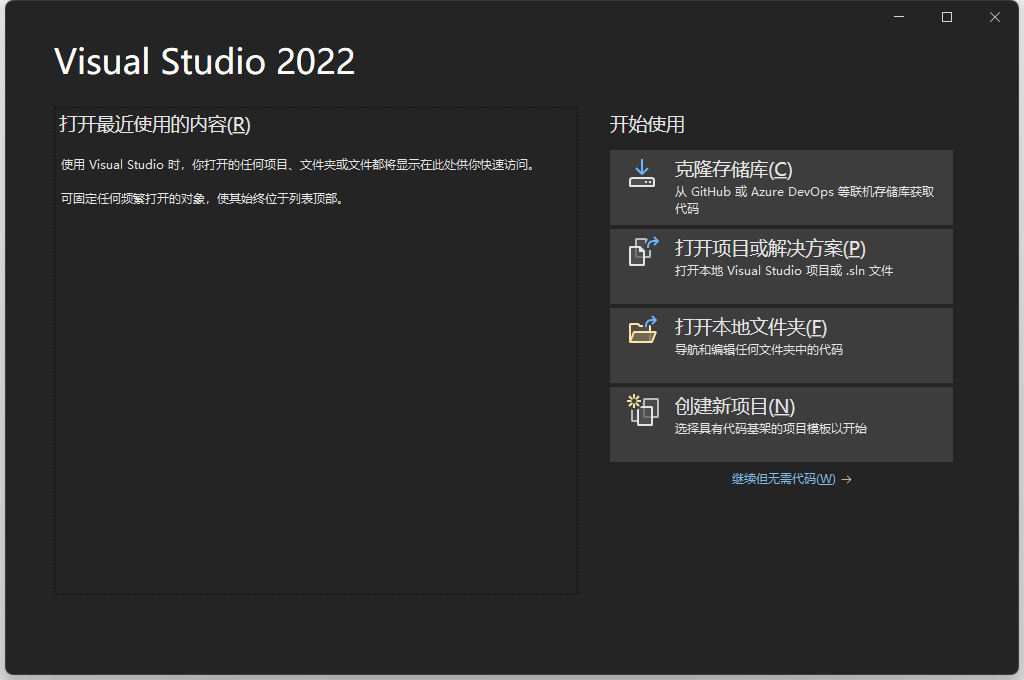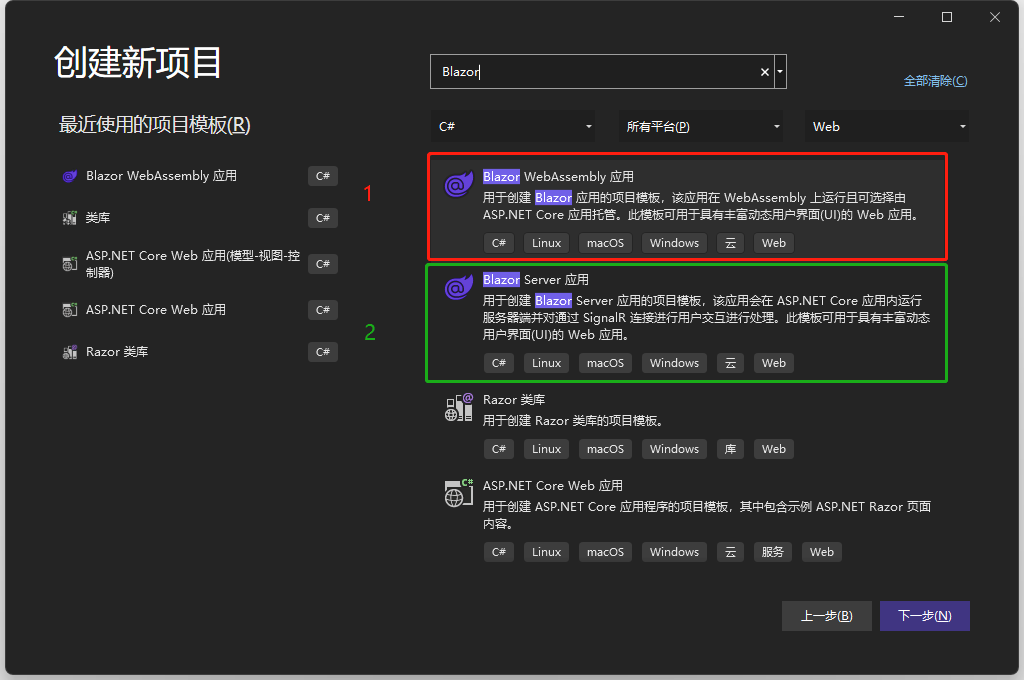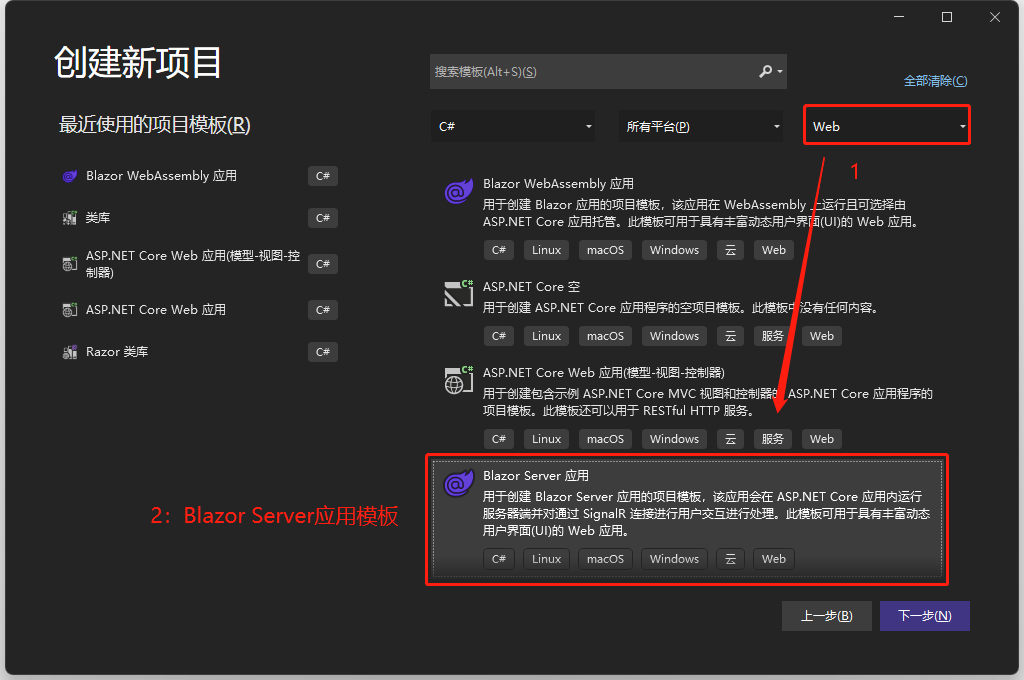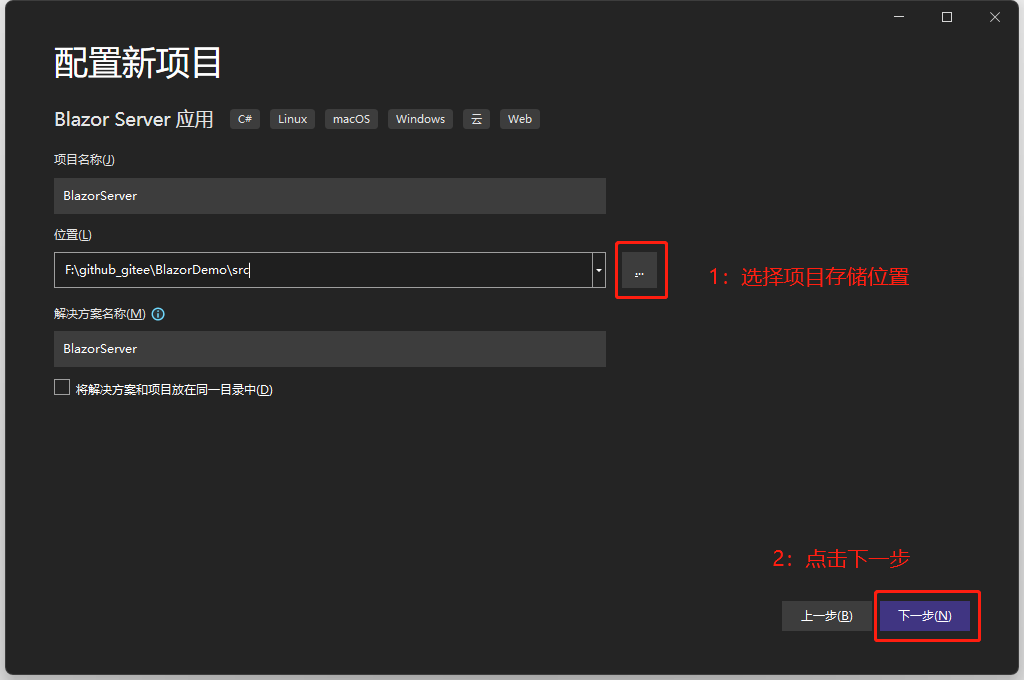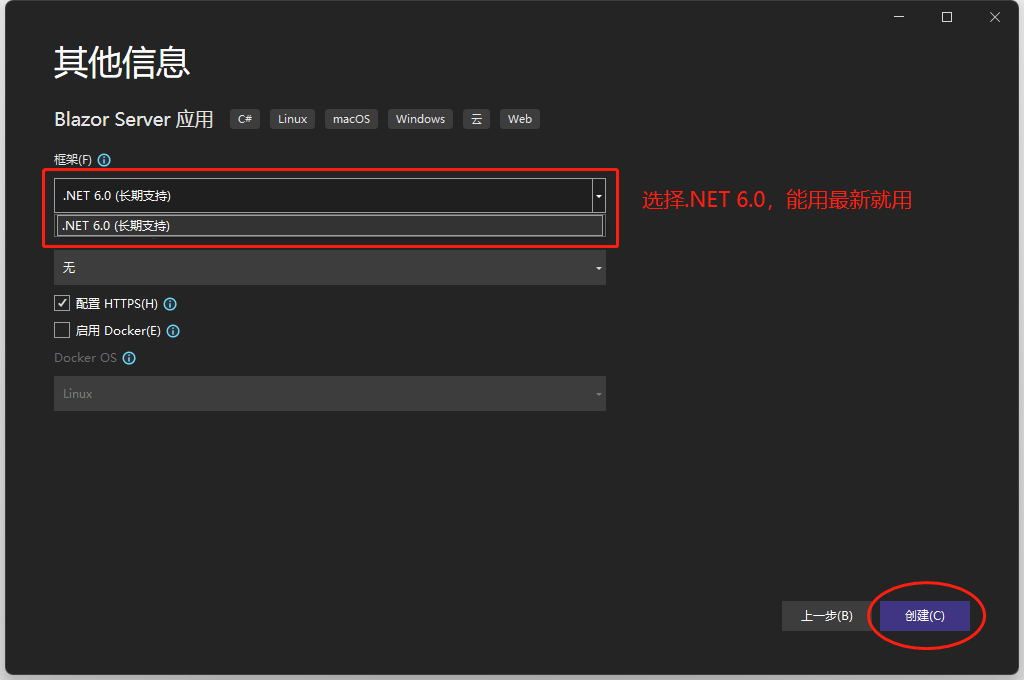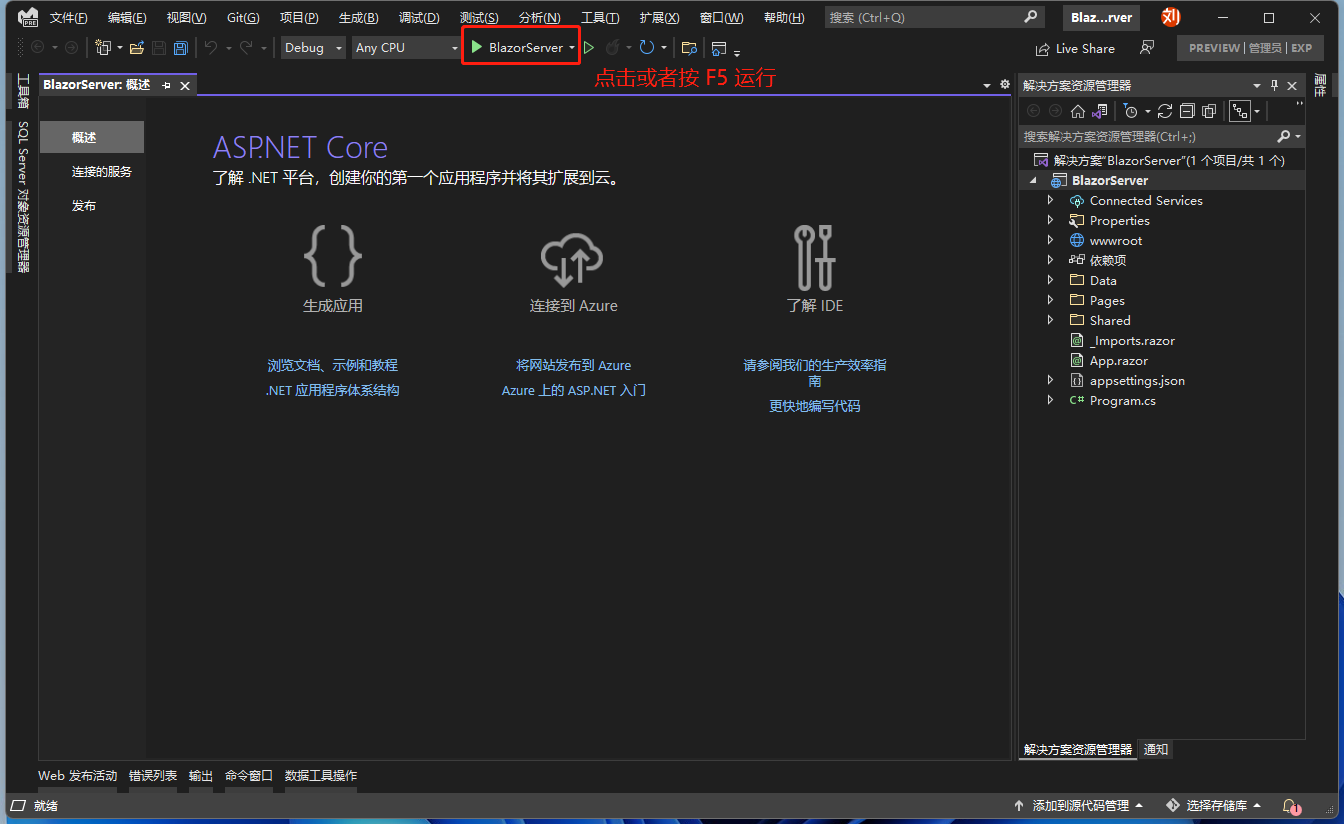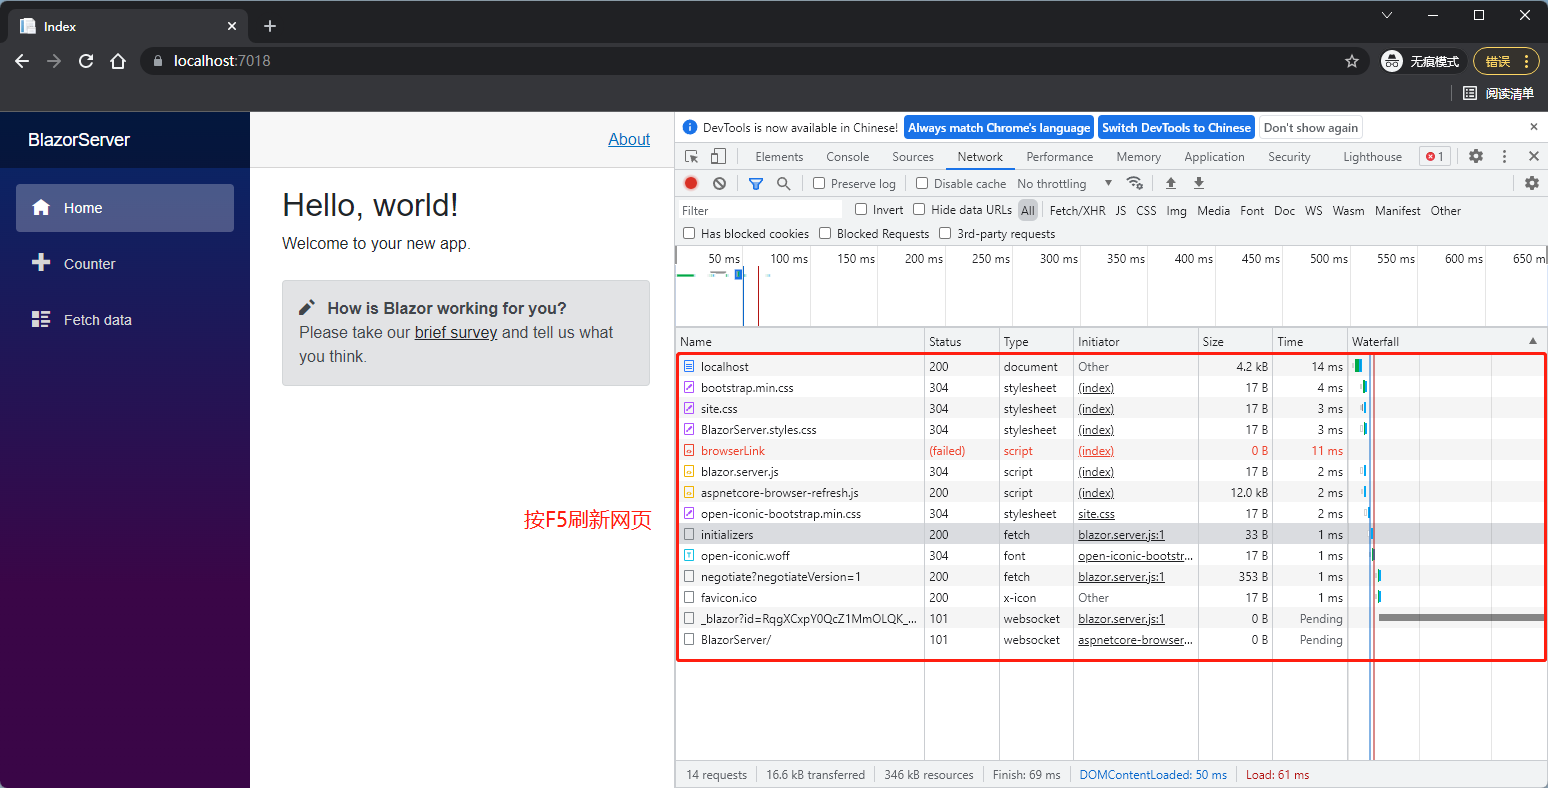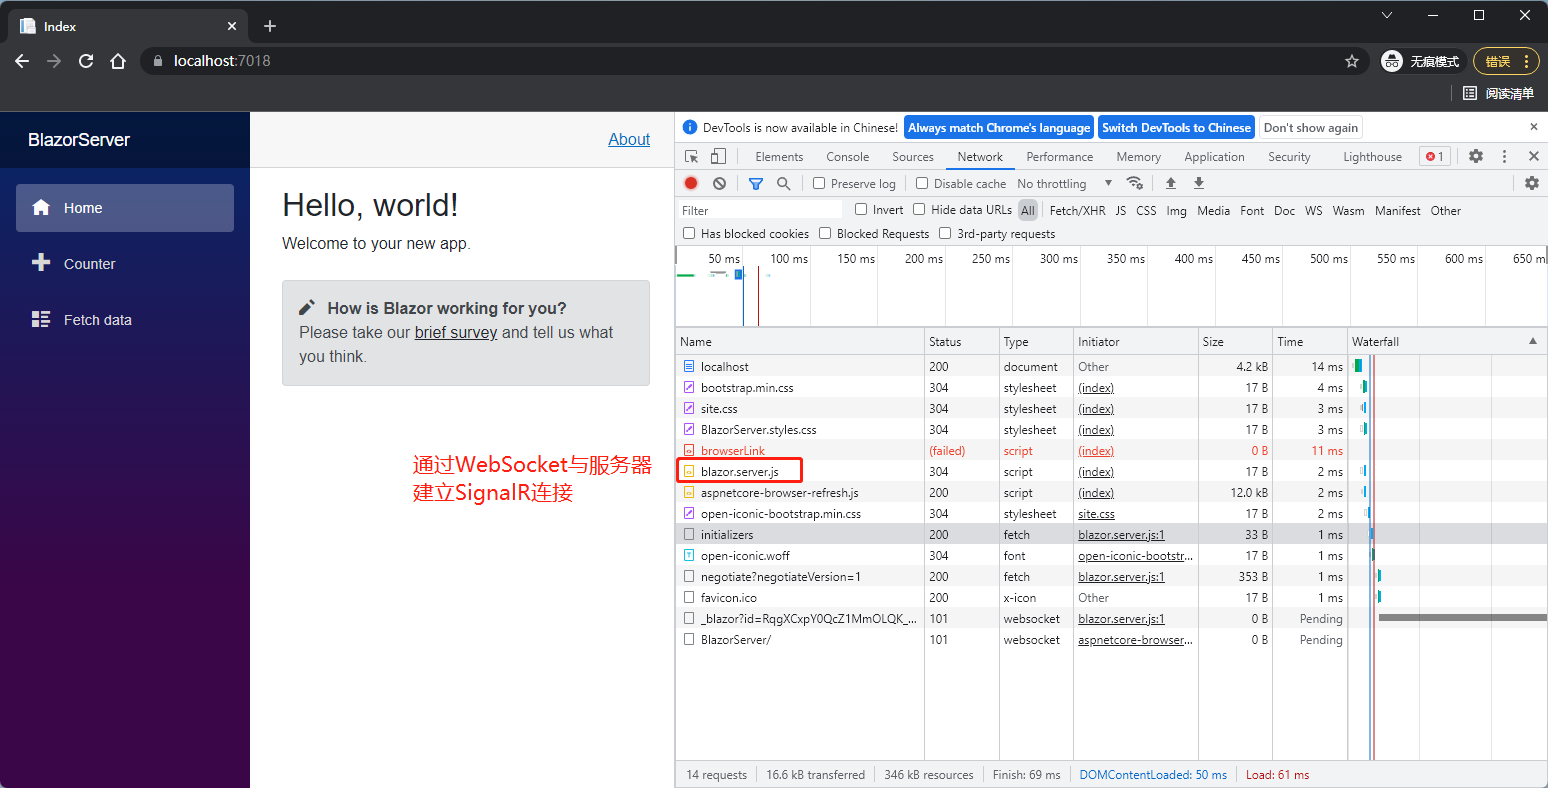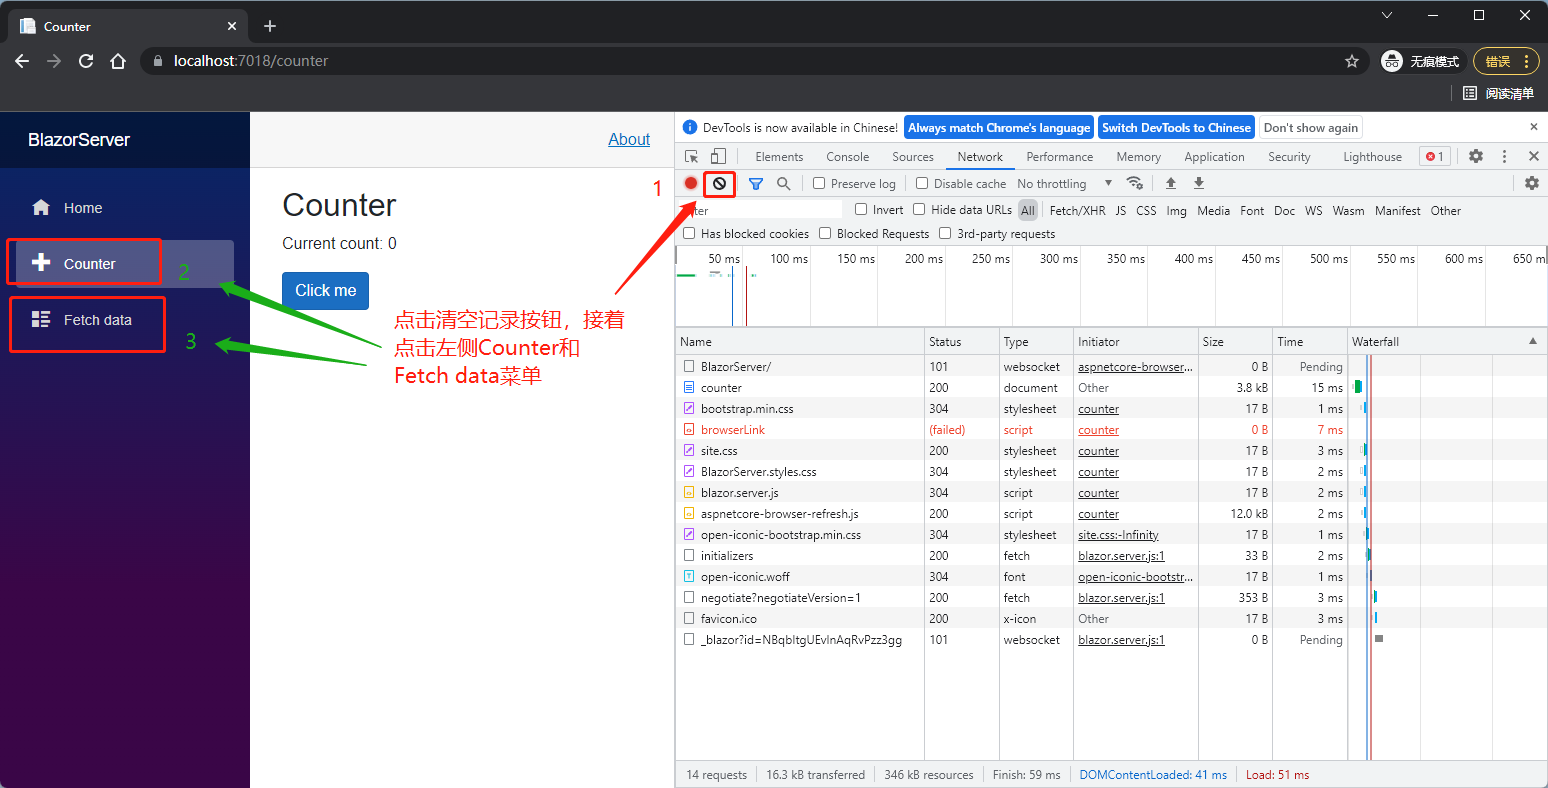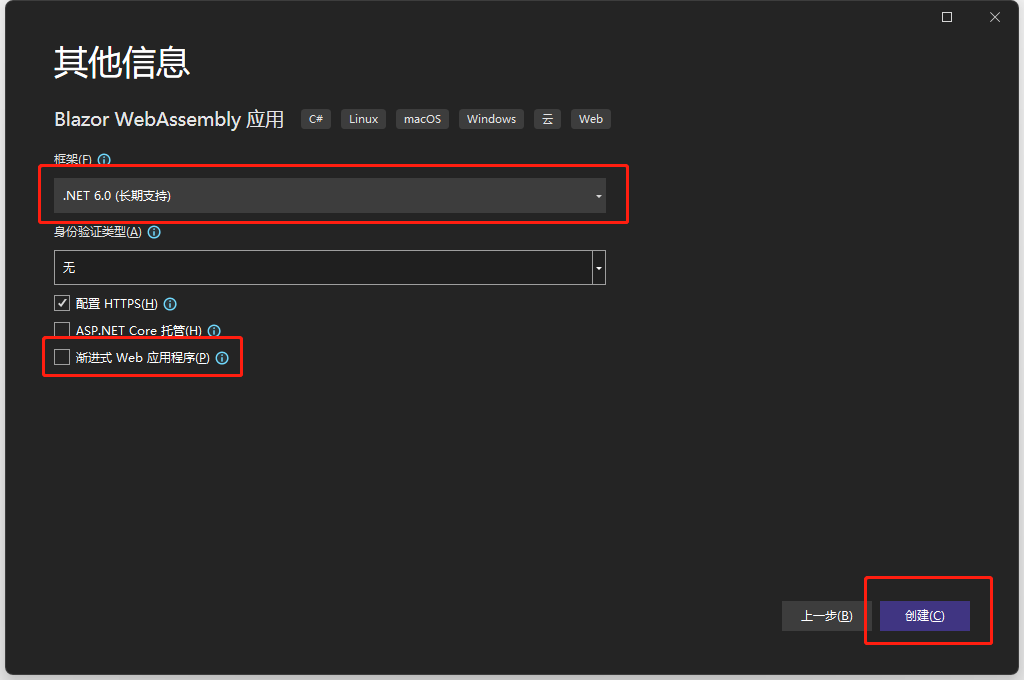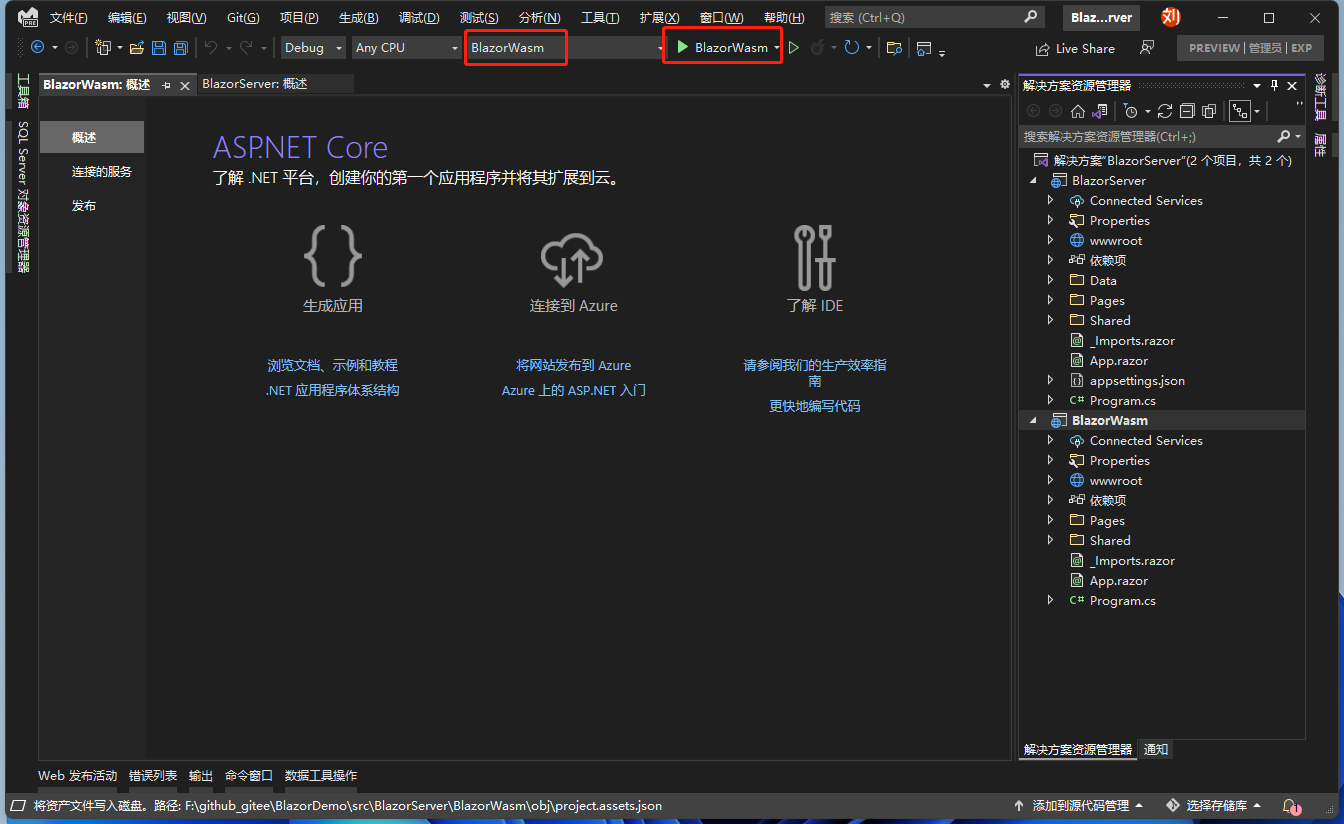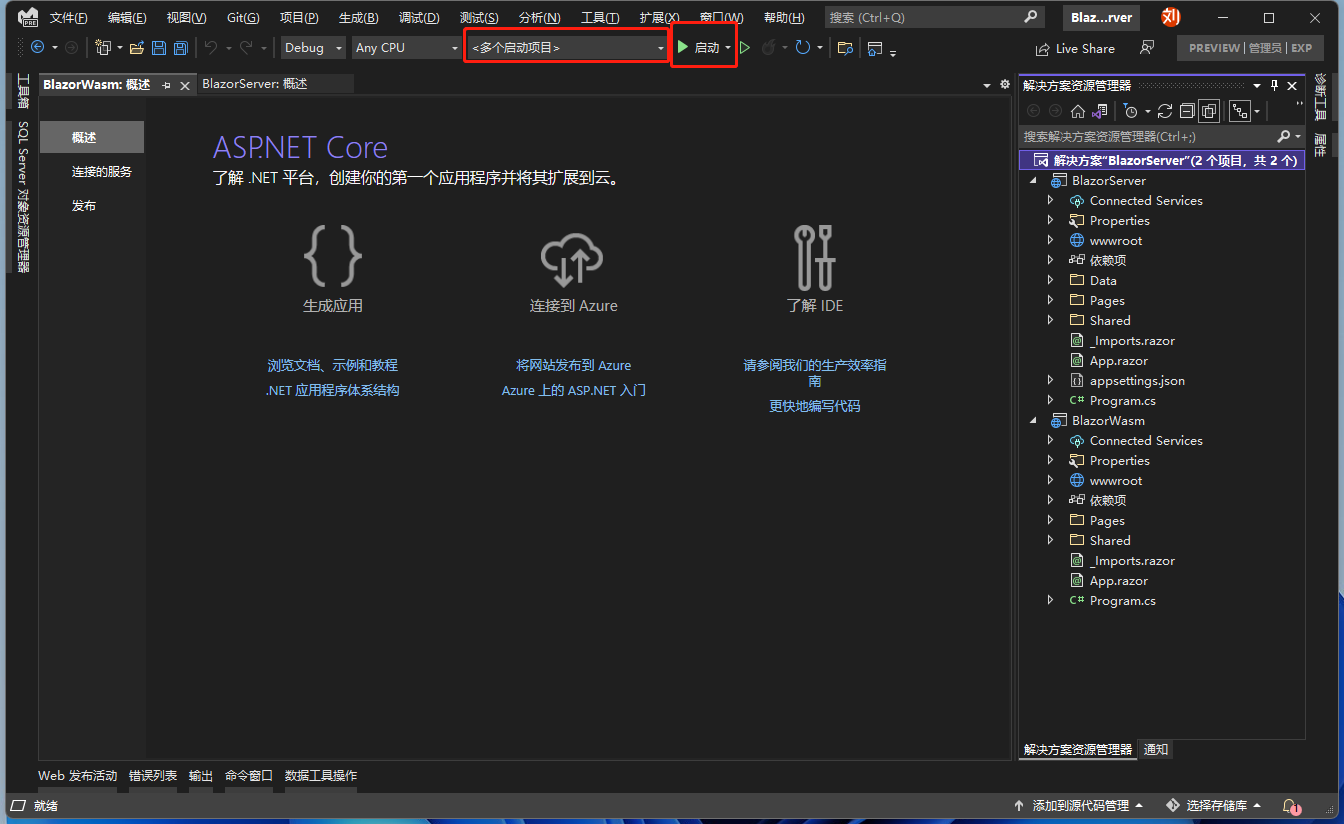
After downloading Visual Studio, first create a Blazor solution, and inside it create a Blazor Server project. You can choose the project location yourself (note: the new version of Visual Studio splits the templates for Blazor Server and Blazor WebAssembly into separate projects, which is more intuitive). Ignore the code inside for now. Press F5 to run, then in the webpage press F12 or Ctrl+Shift+I to open Developer Tools. Switch to the Network tab and reload the webpage. You will see several files, among which blazor.server.js is the file that establishes a WebSocket channel between the server and the browser via SignalR.


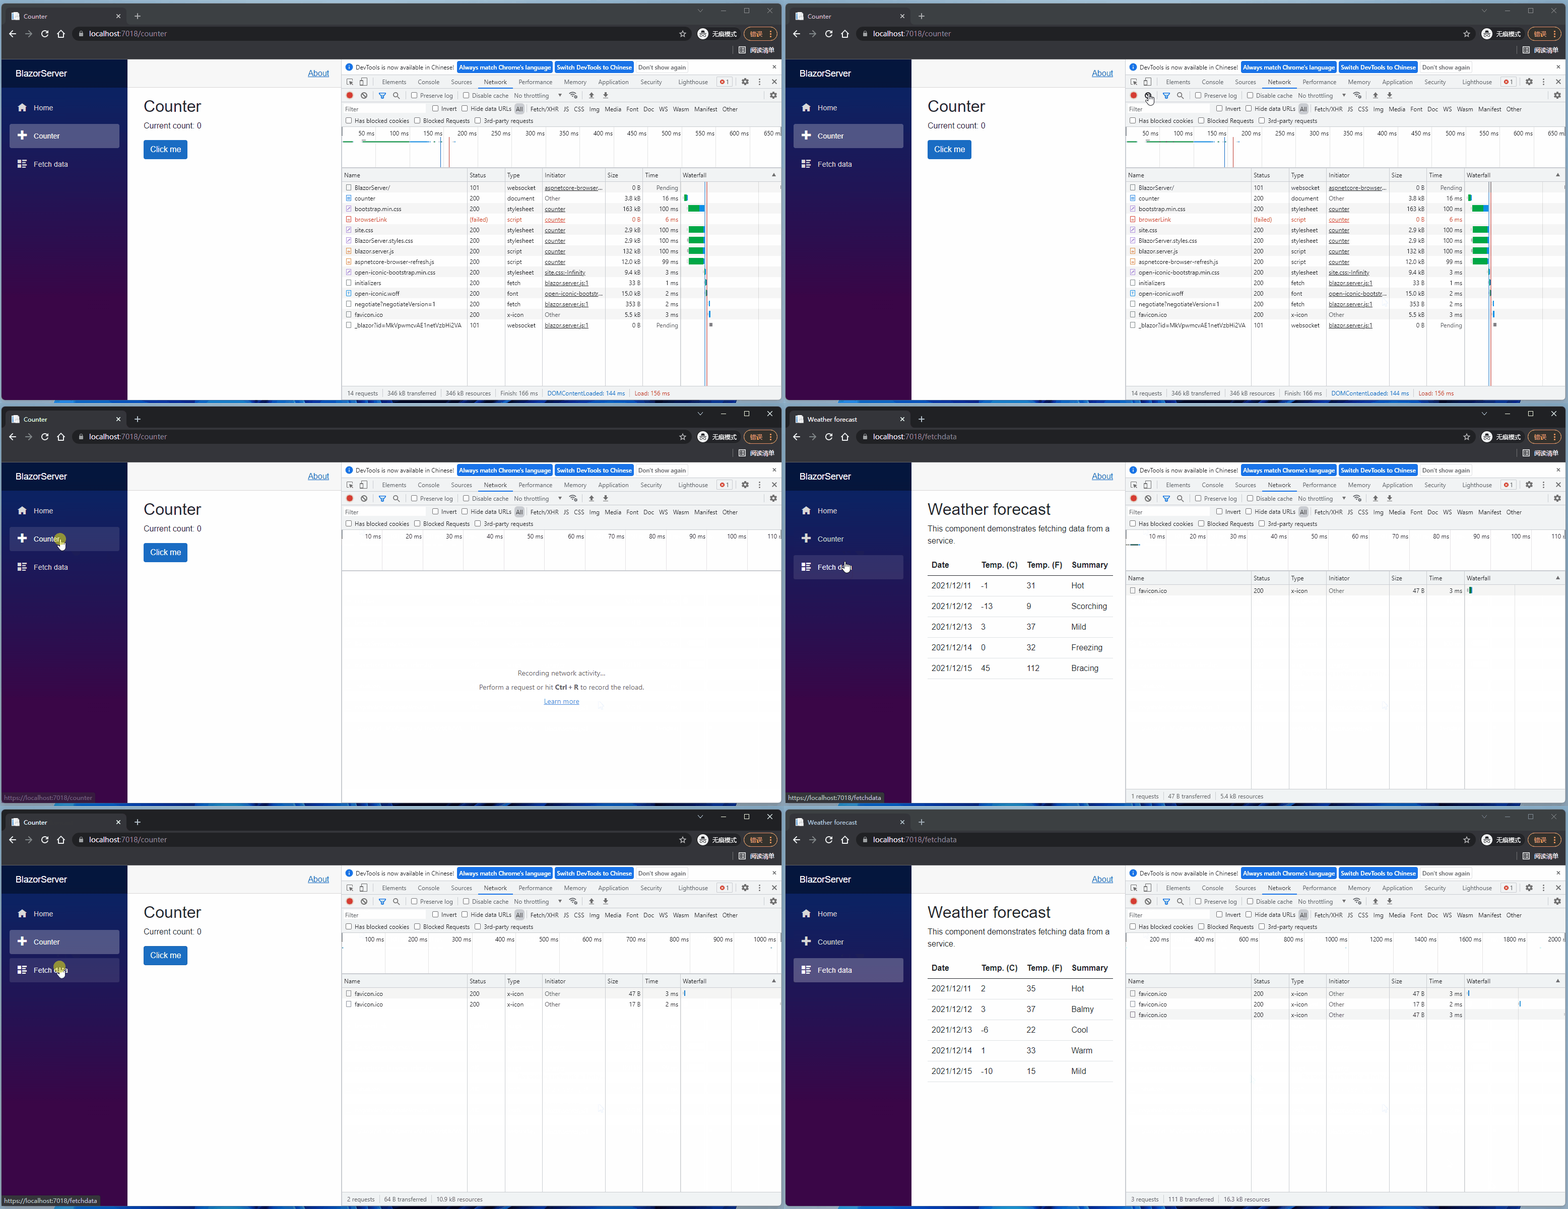
Next, clear the downloaded files in the browser, then click on the Counter and Fetch data pages. On a traditional website, this would refresh the page and re-download the necessary files, but you can see that neither of these pages downloads anything (except for favicon.ico – can you guess why?). This is because after the initial connection is established, all subsequent file transfers go through SignalR.


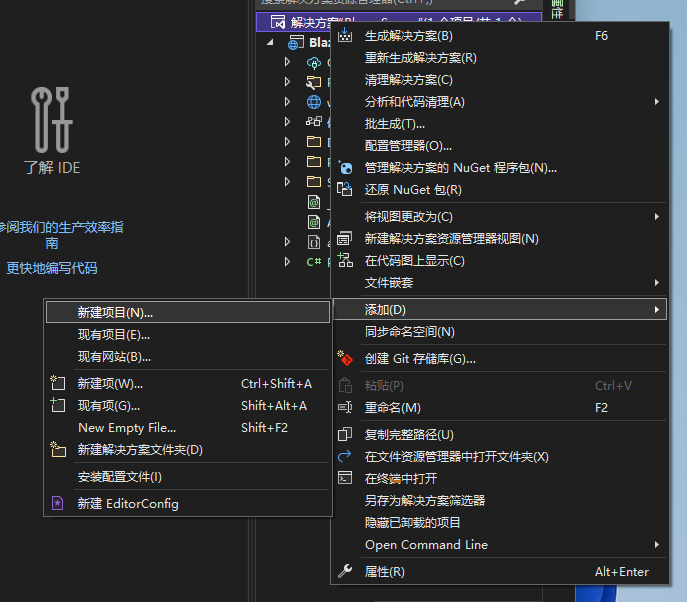
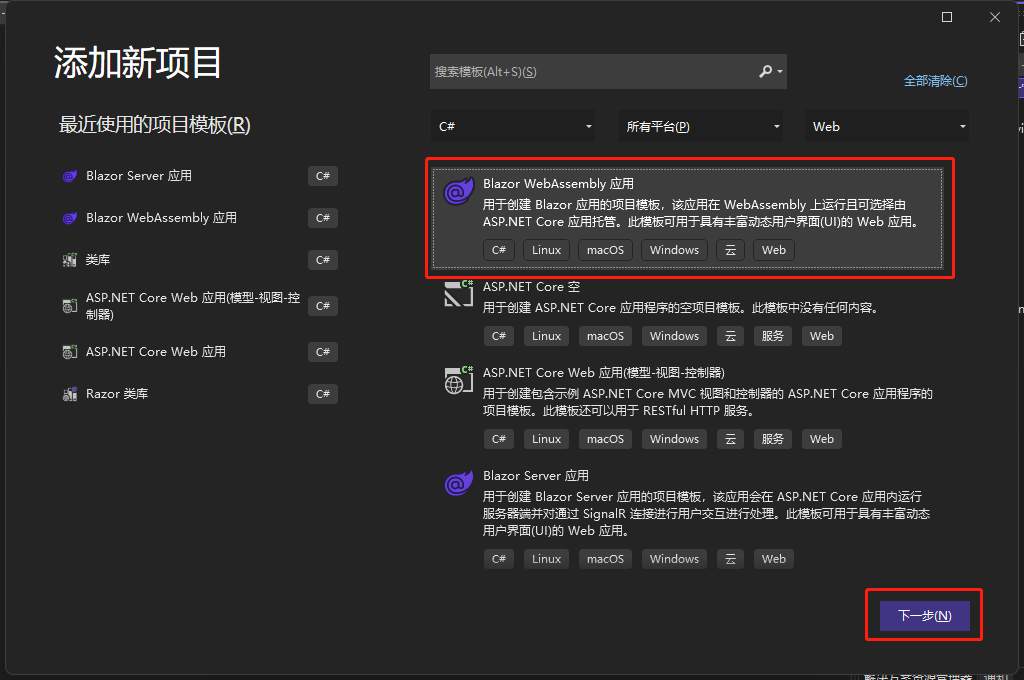
Next, create a Blazor WebAssembly project in the same solution. You'll notice there's a "Progressive Web Application" option. If selected, this website can be downloaded to the computer.


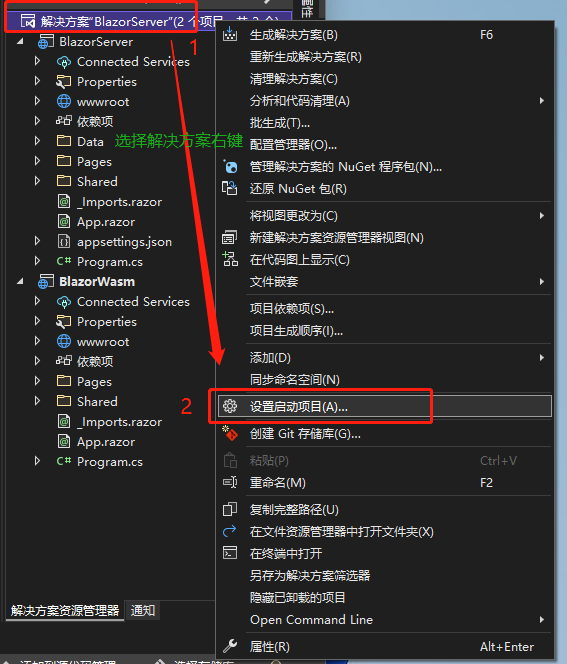
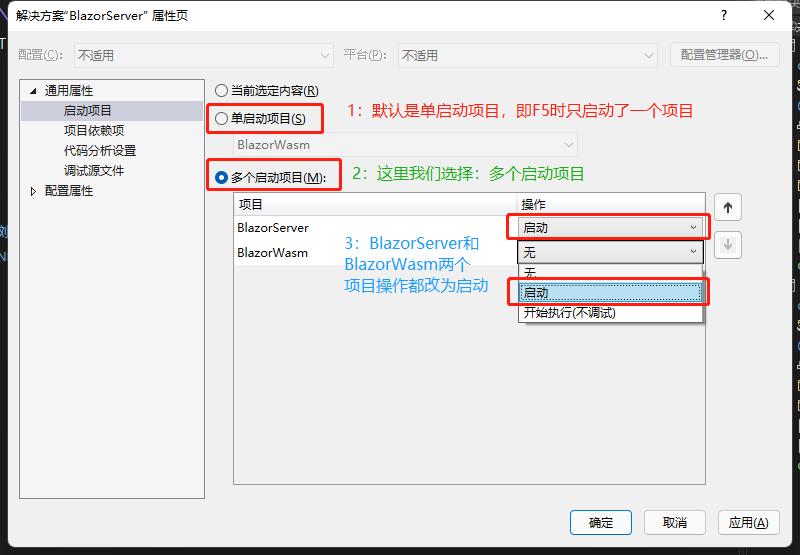
After the project is created, you can start it directly. But what if you want to see both Blazor Server and Blazor WebAssembly running simultaneously? You can set both projects as startup projects, then press F5 to start them.


A few months ago when the author was developing, many DLL files could be seen being downloaded. But now, the files sent to the browser by Blazor WebAssembly are not much different from Blazor Server, because Microsoft changed the rule for downloading DLLs in Blazor WebAssembly – now they are only downloaded when a Component makes a request, greatly reducing the browser's load.

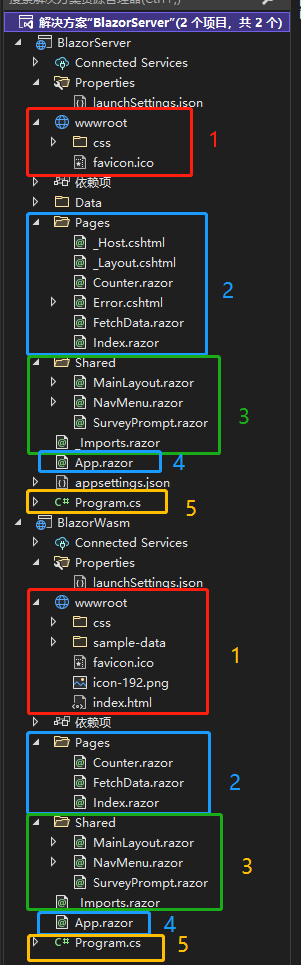
Now let's look at the project structure. For convenience, I've outlined the equivalent files in both projects with the same color and labeled them with numbers. Look at number 5: you can see that both Blazor Server and Blazor WebAssembly have a Program.cs file, and the entry point for both is Program.cs.

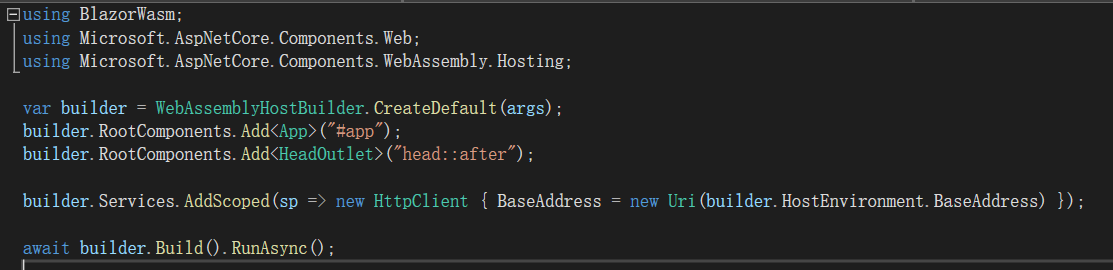
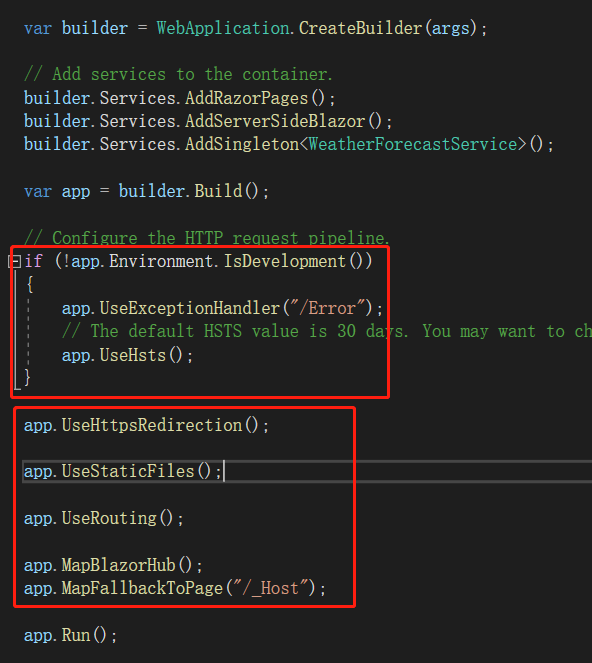
Blazor Server's Program.cs file:

Blazor Wasm's Program.cs file:

Both projects inject services via builder.Services. In .NET 6 preview or earlier versions, there was a Startup.cs file, where services were configured in the ConfigureServices method (if related services are needed, they must be injected here using Dependency Injection (DI); the benefits of DI will be explained later). The purpose is the same. With .NET 6, doesn't it look much cleaner?
The app instance obtained via var app = builder.Build(); has a similar role to the Configure method in the former Startup.cs. It is used to handle requests or register middleware. For example, if you want to use someone else's authentication package, you must register it here. Defining routes is also done here. MapBlazorHub() establishes a SignalR connection between the server and the browser; MapFallbackToPage("/_Host") means the entry point is _Host. Requests that are not for Controllers or Razor Pages (like the first connection, or when the connection fails) come in from here. Subsequent component triggers are handled by changes in App.razor (number 6).


Now look at number 2: you can see that Blazor Server has _Host.cshtml, _Layout.cshtml, and Error.cshtml. _Host.cshtml was mentioned before. _Layout.cshtml (Blazor Server) is similar to index.html (Blazor Wasm) and is the main page of the website. Error.cshtml is the page the user is directed to when a connection error occurs. Other files with a .razor extension are individual components.
Number 3 is common to both projects: MainLayout.razor, NavMenu.razor are the page layout and menu respectively. If a website uses the same sidebar and menu for every page, updating them (e.g., changing the company logo, adding contact information) would require editing every page, which is inefficient. So Blazor extracts these elements so that changing one file applies to all pages. SurveyPrompt.razor is a simple example provided by Blazor. _Imports.razor contains the namespaces used, such as @using System;. This way, each .razor page doesn't need to reference namespaces individually. If you want to differentiate namespaces for different components, you can create separate _Imports.razor files in different folders; they will only apply to components within that folder.
Finally, number 1 is the wwwroot folder. Blazor WebAssembly has an additional sample-data directory, icon-192.png, and index.html. The sample-data directory contains weather data downloaded to the browser. icon-192.png doesn't seem to be used anywhere? index.html is equivalent to _Host.cshtml in Blazor Server (mentioned in the previous paragraph).
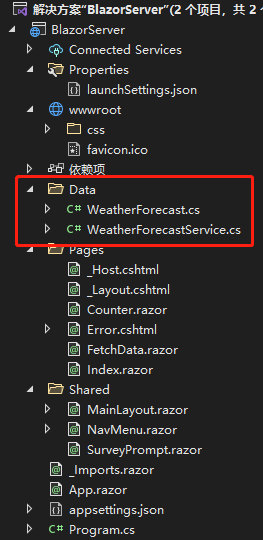
As for the Data folder in Blazor Server, what's inside it? It's the weather data sent from the server to the browser. Remember the term "WeatherForecastService"—it will be key for dependency injection later.

Lastly, there is appsettings.json in Blazor Server. This is a JSON format file where you can store frequently modified data, such as the connection string for a database. If it were hard-coded in the program, every change would require recompilation. Storing it in appsettings.json provides more flexibility.
- Reference: Lazy load assemblies in ASP.NET Core Blazor WebAssembly
- Reference: ASP NET Core blazor project structure
Note: The code in this article has been refactored using .NET 6 + Visual Studio 2022. You can click the original article link to compare with the refactored code. Thank you for reading and supporting the original author.