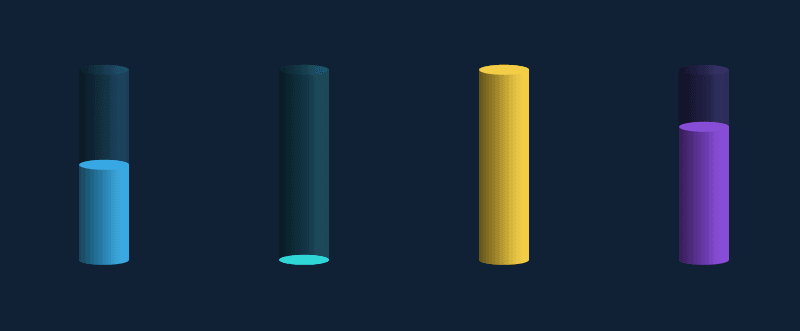
WPF Cylindrical Progress Bar Using Only Rectangle

WPF Cylindrical Progress Bar Using Only Rectangle

This article briefly introduces how to implement a cylindrical progress bar using only Rectangle

Last updated 2/21/2022 2:50 PM
dino.c
3 min read
Category
WPF
Tags
.NET WPF

This article briefly introduces how to implement a cylindrical progress bar using only Rectangle, as shown in the result above.

A cylindrical progress bar is not difficult to implement, but it's interesting that it's entirely composed of Rectangles, which is a bit counterintuitive.

First, we need to review some basics: Rectangle displays a rectangle with rounded corners. RadiusX and RadiusY specify the X-axis and Y-axis radii of the ellipse used to round the rectangle's corners.

In the following example, you can see that the rounded corners of a Rectangle with RadiusX="50" RadiusY="20" coincide exactly with an Ellipse of Width="100" Height="40" (X-axis radius 50, Y-axis radius 20).

<Rectangle
  Height="100"
  Width="100"
  Fill="#FF7E9EC0"
  Stroke="#FFFF0EC4"
  StrokeThickness="5"
  RadiusX="50"
  RadiusY="20"
/>
<Ellipse
  HorizontalAlignment="Left"
  VerticalAlignment="Top"
  StrokeThickness="5"
  Stroke="Yellow"
  Fill="Red"
  Width="100"
  Height="40"
  Opacity="0.5"
/>
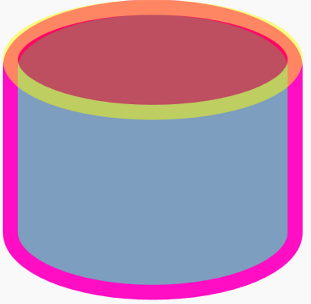
Now if we stretch the Rectangle vertically, it becomes the basic shape of a cylinder; conversely, if we squash it horizontally, it becomes the cross-section of the cylinder. Making them semi-transparent gives us the background of the cylindrical progress bar:

<Grid.Resources>
  <style TargetType="Rectangle">
    <Setter Property="Fill" Value="#36a8e2" />
    <Setter Property="RadiusX" Value="25" />
    <Setter Property="RadiusY" Value="5" />
  </style>
</Grid.Resources>
<Rectangle Opacity="0.2" />
<Rectangle Height="10" VerticalAlignment="Top" Opacity="0.1" />

Then add an opaque Rectangle at the bottom:

<Rectangle Height="100" VerticalAlignment="Bottom" />

This looks very much like a progress bar, but it lacks a three-dimensional effect. So we need to overlay another semi-transparent Rectangle with a gradient:

<Rectangle Opacity="0.6">
  <Rectangle.Fill>
    <LinearGradientBrush StartPoint="0,0.5" EndPoint="1,.5">
      <GradientStop Color="Black" />
      <GradientStop Offset="1" Color="Transparent" />
      <GradientStop Offset="0.6" Color="#41000000" />
    </LinearGradientBrush>
  </Rectangle.Fill>
</Rectangle>
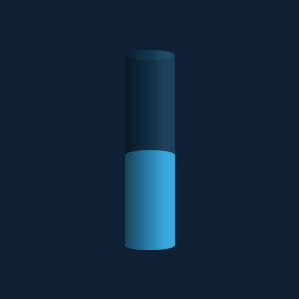
Getting close, but the top cross-section is not obvious. Finally, we need to add another Rectangle representing the cross-section:

<Grid Height="100" VerticalAlignment="Bottom">
  <Rectangle Height="10" VerticalAlignment="Top" />
</Grid>
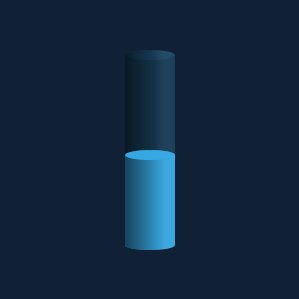
Now it looks the part. However, these are just basic UI concepts. To convert this into a ProgressBar requires a bit more complexity. The specific code can be found in this project:

Original author: dino.c

Original link: https://www.cnblogs.com/dino623/p/wpf_column_progress_bar.html

Keep Exploring

Related Reading

More Articles
Same category / Same tag 9/13/2025

Migration Series from WPF to Avalonia: Why I Must Migrate My WPF Application to Avalonia

In the past few years, our host computer software has mainly been developed using WPF and WinForm . These technologies work well on the Windows platform and have accompanied us from small-scale trial production to the current stage of large-scale delivery. However, with business development and changes in customer requirements, the single Windows technology stack has gradually become a hurdle we must overcome.

Continue Reading
Same category / Same tag 1/26/2025

Implementing Internationalization in WPF Using Custom XML Files

This article details the method of implementing internationalization in WPF applications using custom XML files, including installing the necessary NuGet packages, dynamically retrieving the language list, dynamically switching languages, using translated strings in code and XAML interfaces, and provides a source code link to help developers easily achieve internationalization in WPF applications.

Continue Reading