
本文由网友
蓝创精英团队投稿,欢迎转载、分享原文作者:蓝创精英团队
原文链接:https://blog.csdn.net/i2blue/article/details/125040323
其实,PAD,现在官方文档还没有对外组件式或者插件式开发接口。
但是,有一些志同道合的朋友,比如(潘淳),潘总大佬,在 RPA 领域,还是很牛逼的。
只要有一扇门,就会有一个世界,现在已经有了一扇门(毕竟是.NET Framework,那么,研究借鉴就容易多了)。
组件开发环境
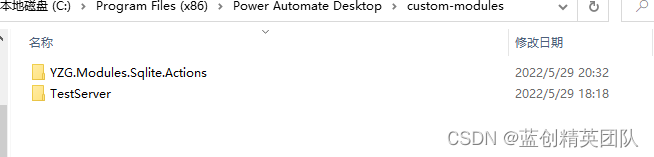
默认组件的位置是在当前应用下的这个目录
C:\Program Files (x86)\Power Automate Desktop\custom-modules
应用地址,按照你自己的来。
另外,插件的 DLL,是需要 DLL 代码签名了。
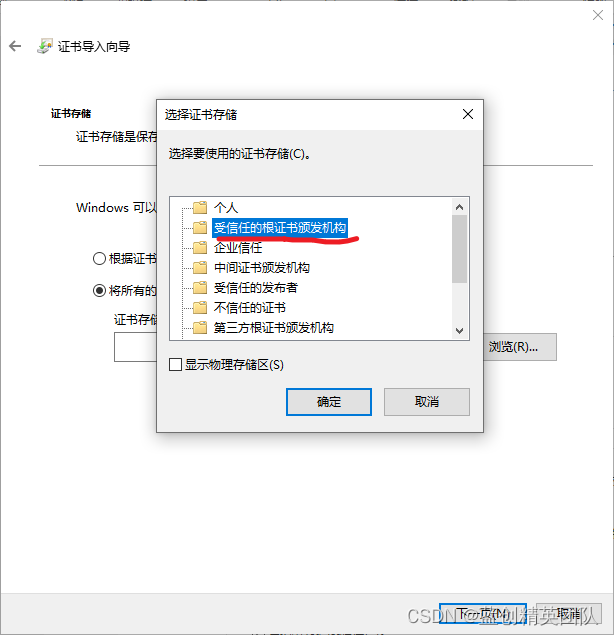
默认采用个人签名,放到系统 受信任的根证书颁发机构 即可。
如果有钱,可以买个代码签名。
目前,我这边还没别的好的方式,其中,签名大致分为两种,一种是域名证书 SSL,和 代码签名,它们之间是不一样的,不能混用。
大致目录如下:
最简单的 Demo
准备直接按照开发流程走一遍,最后,再总结。
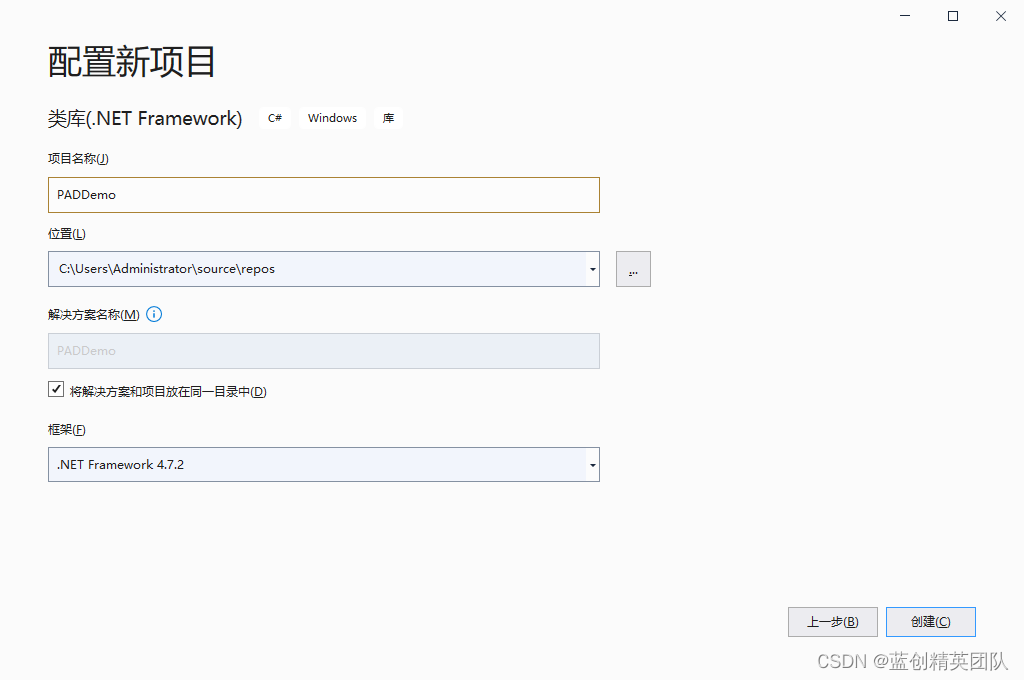
新建空白解决方案
默认新增一个解决方案(空的解决方案)
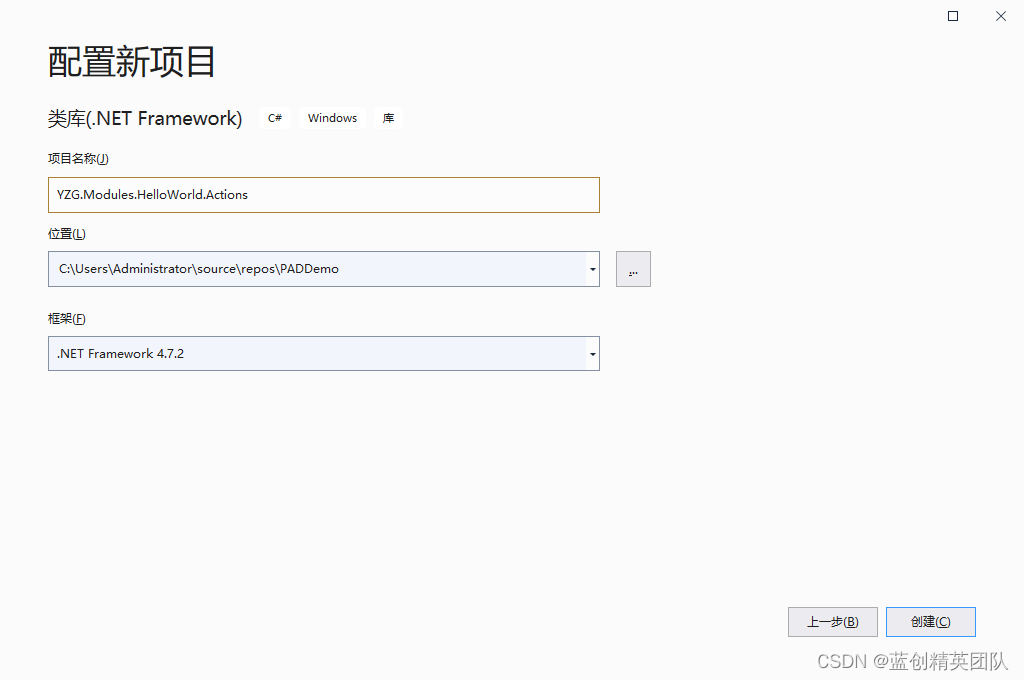
新增组件库
组件 DLL 名要满足以下 规则
"?*.Modules.?*.dll",
"Modules.?*.dll"
而,官方的组件包是这样子的
Microsoft.Flow.RPA.Desktop.Modules.System.Actions.dll
所以,我这边也按照官方的标准走。
就叫 YZG.Modules.HelloWorld.Actions(注:需要注意的是,像 demo,test 等名字,可能会导致识别不出来的问题,所以,建议起一些特殊的名字。)
打招呼组件项目
默认方案从打招呼开始
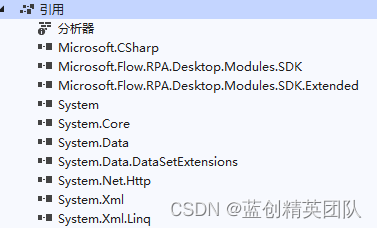
引用开发 DLL 包
然后,引用安装目录 C:\Program Files (x86)\Power Automate Desktop
下的这几个 DLL 包
Microsoft.Flow.RPA.Desktop.Modules.SDK.dll
 Microsoft.Flow.RPA.Desktop.Modules.SDK.Extended.dll
当然,如果你用的过程中,提示,需要哪个包,你也可以引入进来。
引入完,效果如下:
增加打招呼逻辑
以下就是全部逻辑代码
[Action(Id = "SayHello")]
[Icon(Code = "EFF7")]
[Throws("MyError")]
public class SayHello : ActionBase
{
    [InputArgument]
    public string UserName { get; set; }

    [OutputArgument]
    public string Result { get; set; }
    public override void Execute(ActionContext context)
    {
        try
        {
            this.Result = $"{UserName} 你好,中国欢迎你! -{DateTime.Now}";
        }
        catch (ActionException ex)
        {
            throw new ActionException("MyError", ex.Message, ex.InnerException);
        }
    }
}
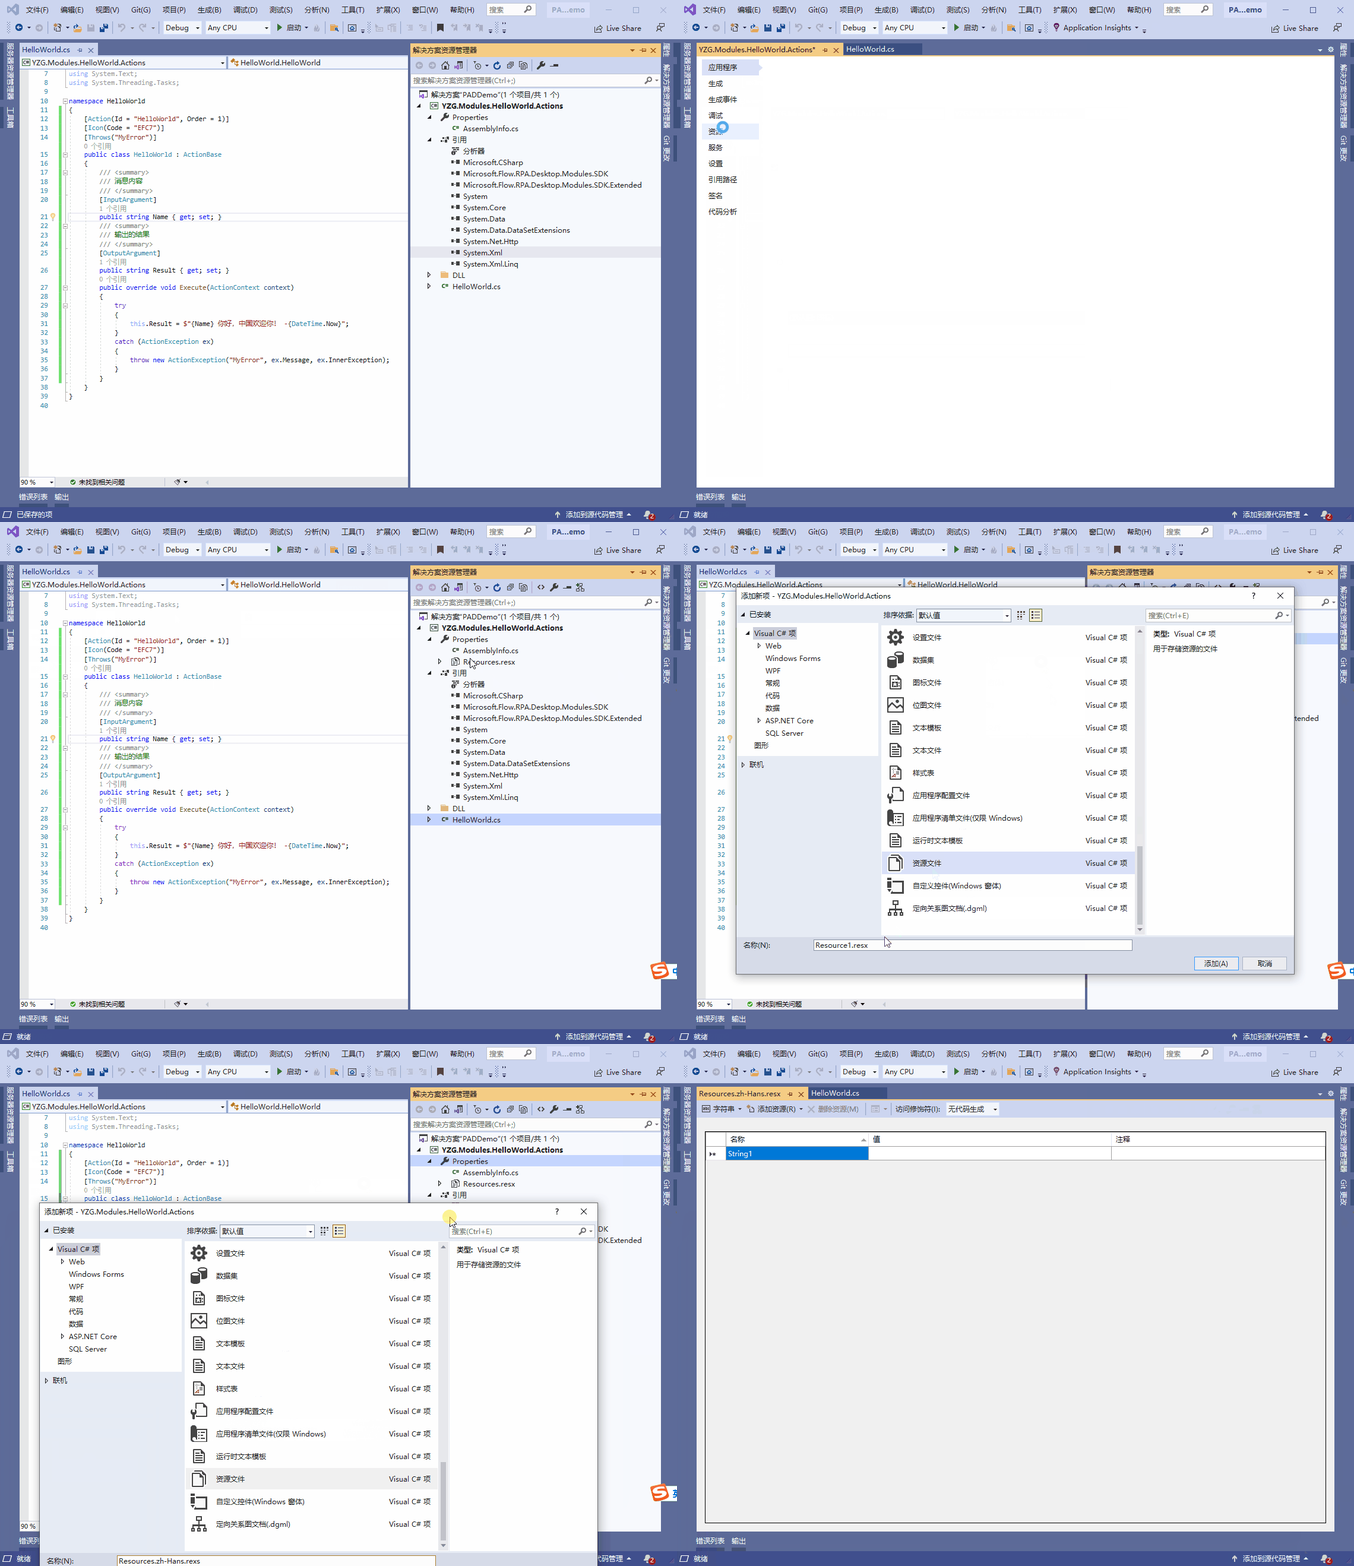
增加国际化支持
也不用增加外语,直接增加中文支持就可以了
首先,我们增加一个中文的资源文件(另外可以参考官网路径下的语言包来看内部结构分析)
组件显示大致规则
组件的名字从哪里来
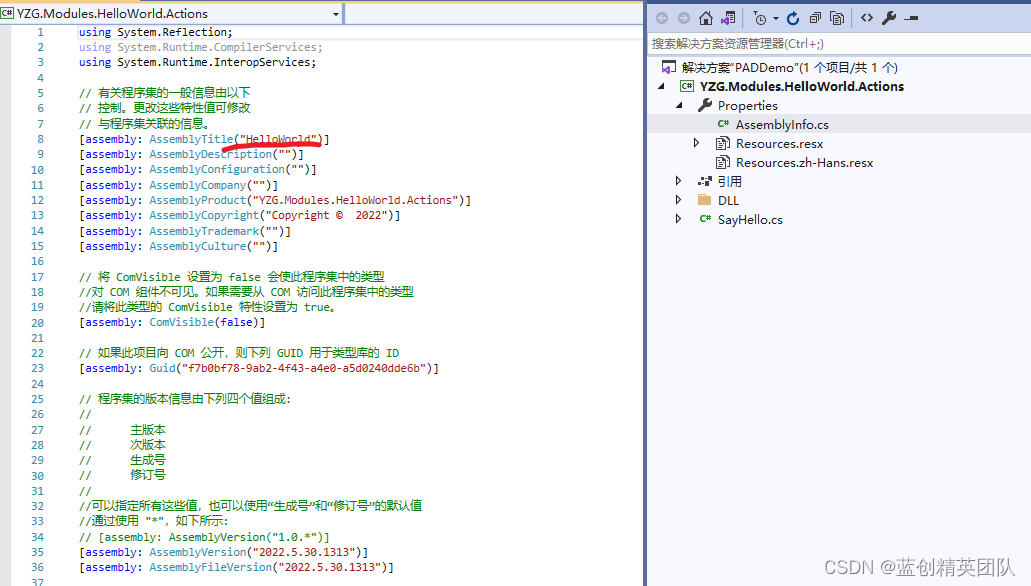
是从程序集信息里的 AssemblyTitle 来的,这个名字默认是英文,但是,也可以汉化的。
另外这个名字最好和组件 Action 的名字不一致。这样,显示会方便点
组件内容的显示大致规则
通过对 组件名 或者 类型 以及 类属性 分割。
增加
- _FriendlyName
- _Description
- _Summary
其中 FriendlyName 就是各种组件的主名称,Description就是提示语相当于,Summary就是关键信息,作用还是很明显的,内部使用了模板引擎变量 < 属性名大写 >来动态显示一些信息。
大体示例如下:
Close_Connection_Description = "新 SQL 连接的句柄"
Close_Connection_FriendlyName = "SQL 连接"
Close_Description = "关闭与数据库的开放连接"
Close_FriendlyName = "关闭 SQL 连接"
Close_Summary = "关闭 SQL 连接 <CONNECTION>"
ConnectAndExecute_Description = "连接到数据库并执行 SQL 语句"
ConnectAndExecute_Summary = "<if(RESULT)>\r\n执行 SQL 语句 <STATEMENT> 并将查询结果存储到 <RESULT> 中<else>\r\n执行 SQL 语句 <STATEMENT><endif>"
Connect_ConnectionString_Description = "用于连接到数据库的连接字符串"
Connect_ConnectionString_FriendlyName = "连接字符串"
Connect_Connection_Description = "新 SQL 连接的句柄"
Connect_Connection_FriendlyName = "SQL 连接"
Connect_Description = "打开与数据库的新连接"
Connect_FriendlyName = "打开 SQL 连接"
Connect_Summary = "<if(CONNECTION)>\r\n打开 SQL 连接 <CONNECTIONSTRING> 并将其存储到 <CONNECTION> 中<else>\r\n打开 SQL 连接 <CONNECTIONSTRING><endif>"
Database_Description = "连接到数据库并执行 SQL 语句"
Database_FriendlyName = "数据库"
ErrorMessage_CannotConnect = "无法连接到数据源"
ErrorMessage_CannotConnectError = "无法连接到数据源 {0}"
ErrorMessage_InvalidConnectionString = "连接字符串无效"
ErrorMessage_StatementError = "SQL 语句中的错误 {0}"
ErrorMessage_UniniatializedConnection = "SQL 连接未初始化。请仔细检查是否已指定正确的 SQL 连接,且该连接在“打开 SQL 连接”之后(而不是在已关闭该连接之后)使用"
Error_ConnectToDataSourceError_Description = "指示连接到数据源时出现问题"
Error_ConnectToDataSourceError_FriendlyName = "无法连接到数据源"
Error_InvalidConnectionStringError_Description = "指示指定的连接字符串无效"
Error_InvalidConnectionStringError_FriendlyName = "连接字符串无效"
Error_SqlStatementError_Description = "指示给定的 SQL 语句中存在错误"
Error_SqlStatementError_FriendlyName = "SQL 语句中的错误"
ExecuteSqlStatement_ConnectionString_Description = "用于连接到数据库的连接字符串"
ExecuteSqlStatement_ConnectionString_FriendlyName = "连接字符串"
ExecuteSqlStatement_Connection_Description = "新 SQL 连接的句柄"
ExecuteSqlStatement_Connection_FriendlyName = "SQL 连接"
ExecuteSqlStatement_Description = "连接到数据库并执行 SQL 语句"
ExecuteSqlStatement_FriendlyName = "执行 SQL 语句"
ExecuteSqlStatement_GetConnection_Description = "指定是从给定连接字符串创建新连接,还是选择已打开的连接"
ExecuteSqlStatement_GetConnection_FriendlyName = "获取连接的方式"
ExecuteSqlStatement_Result_Description = "来自数据库的结果,采用数据表的形式,包含行和列"
ExecuteSqlStatement_Result_FriendlyName = "查询结果"
ExecuteSqlStatement_Statement_Description = "要对数据库执行的 SQL 语句"
ExecuteSqlStatement_Statement_FriendlyName = "SQL 语句"
ExecuteSqlStatement_Timeout_Description = "等待来自数据库的结果的最长时间"
ExecuteSqlStatement_Timeout_FriendlyName = "超时"
Execute_Description = "连接到数据库并执行 SQL 语句"
Execute_Summary = "<if(RESULT)>\r\n对 <CONNECTION> 执行 SQL 语句 <STATEMENT> 并将查询结果存储到 <RESULT> 中<else>\r\n对 <CONNECTION> 执行 SQL 语句 <STATEMENT><endif>"
GetSQLConnectionBy_ConnectionString_FriendlyName = "连接字符串"
GetSQLConnectionBy_SQLConnectionVariable_FriendlyName = "SQL 连接变量"
Message_SqlConnection = "SQL 连接"
SqlConnectionHandle_FriendlyName = "SQL 连接"
SqlConnectionHandle_FriendlyNamePlural = "SQL 连接"
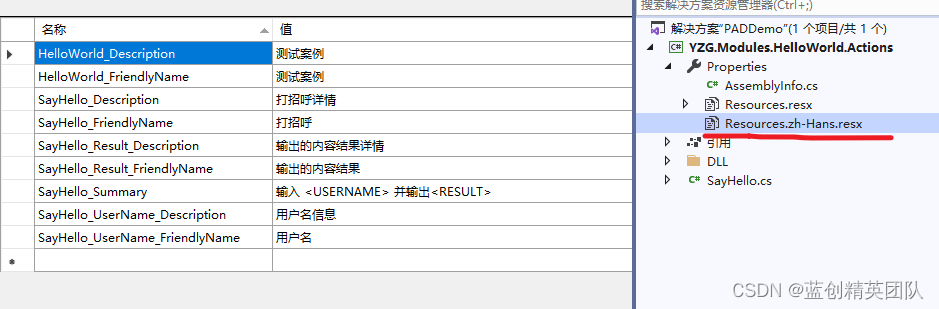
参考如上信息,接下来,我们对打招呼程序进行中文内容填充。
实际中文内容
我这边增加了这些内容
增加组件项目签名
有钱的自己搞代码签名证书,没钱的,按照我这个临时自发证书先来。
创建临时证书
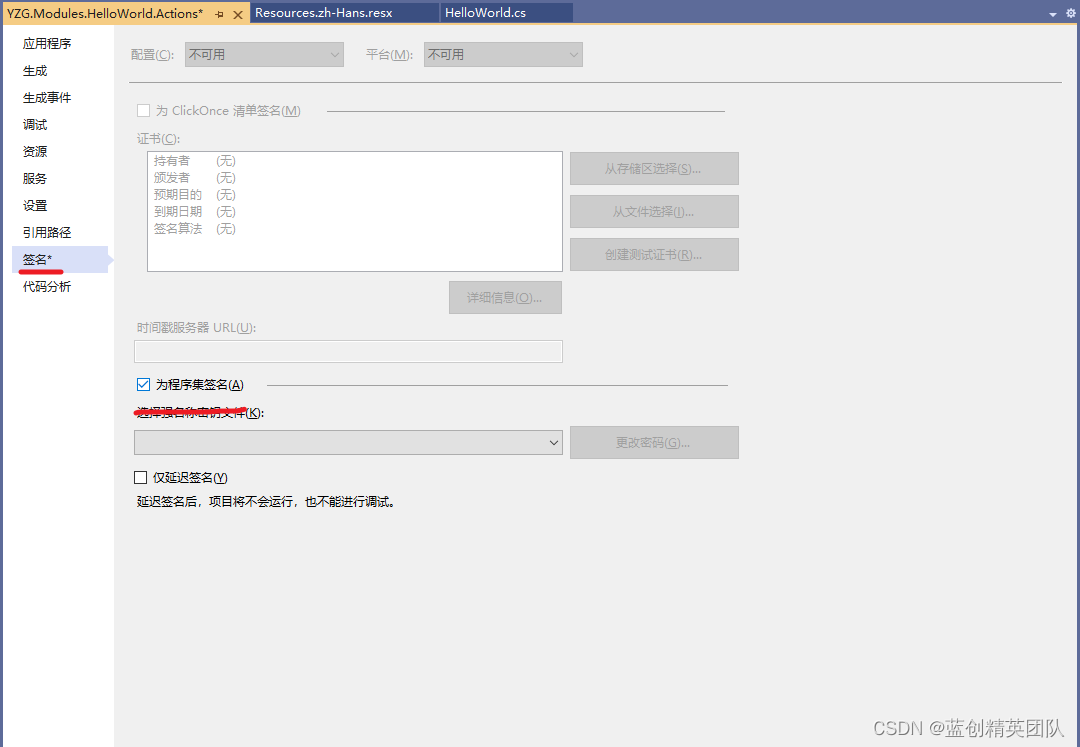
来创建一个新的签名(记得 VS 要管理员模式,就是以管理员方式启动)

然后,就创建了一个签名 pfx 文件
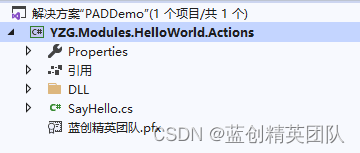
给组件 DLL 签名
这个时候,我们要用这个工具(signtool.exe)进行签名,只要安装了 vs 就会自带。
当然,我也会提供出来。
一个签名的 bat 脚本(默认签名密码为 123456)
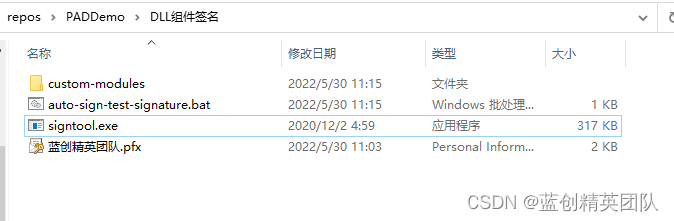
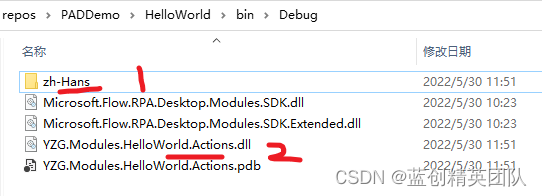
基本只需要这两个程序集进行签名,其他的,引用的 nuget 库是不需要的。
主要是YZG.Modules.HelloWorld.Actions.dll和zh-Hans\YZG.Modules.HelloWorld.Actions.resources.dll放到签名的地方
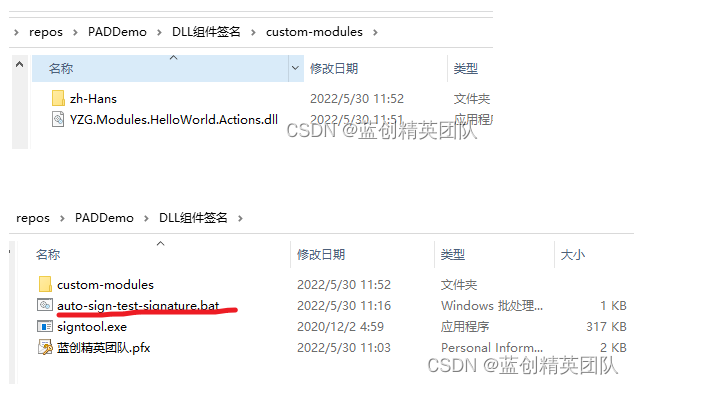
双击 bat 进行签名

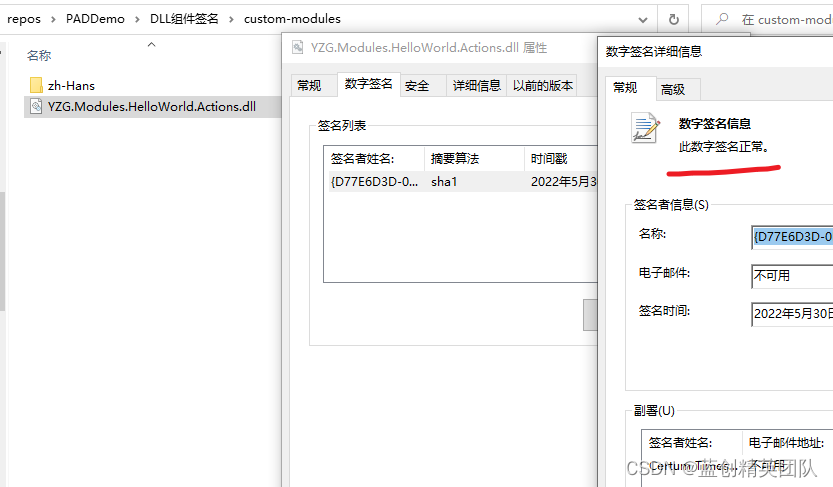
这样就签名成功了。另外在 DLL 上右键,是能看到签名信息的。
目标机器上安装证书
如果你的证书是掏钱买的,自然就不用安装了。直接被认可的。否则,还是要安装证书的。
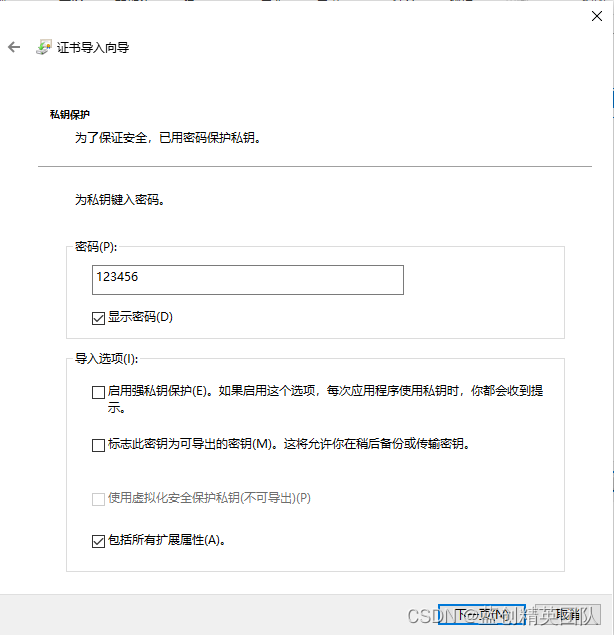
安装证书,非常的简单,直接双击,输入密码,然后,选择指定的位置即可。
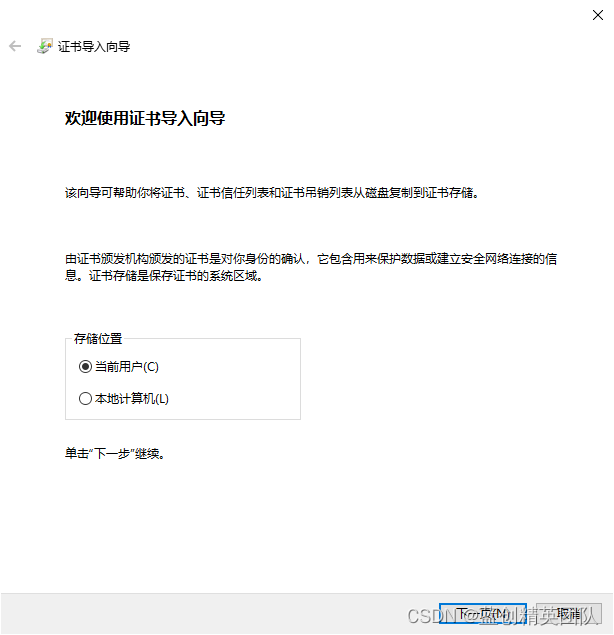
直接下一步
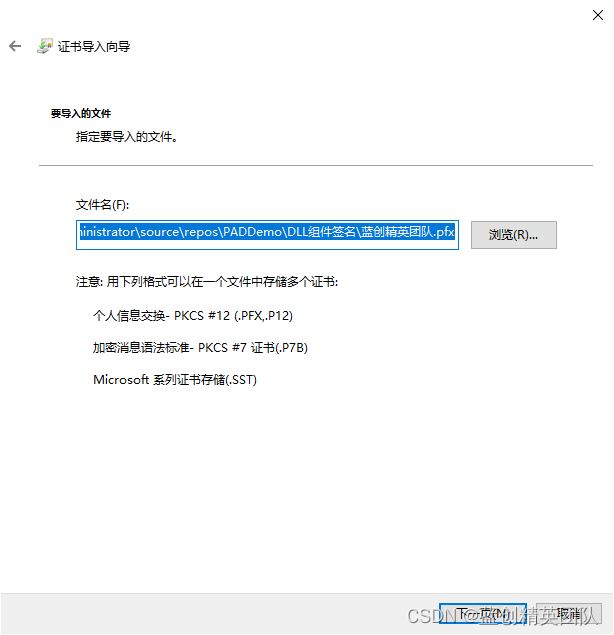
下一步
选择受信任的根证书颁发机构
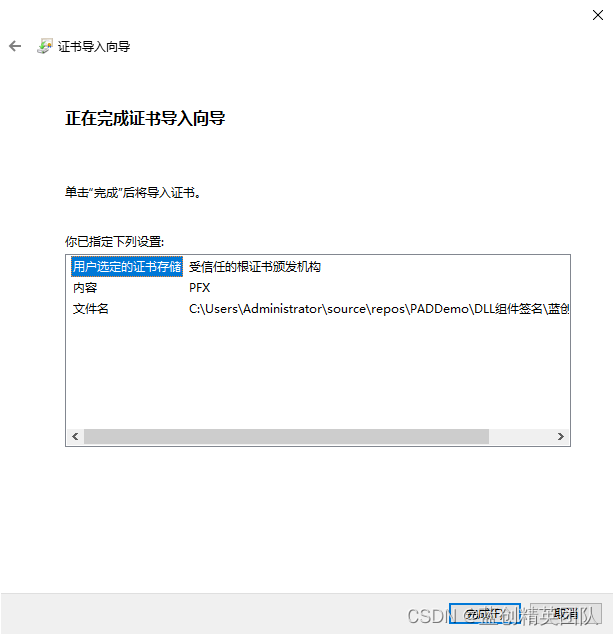
然后,完成,是否导入,是,确定,即可。
输入 CMD 命令( certmgr.msc ) 就可以看到指定分组下就有你的证书了。
至此,证书安装完毕。
组件部署
前提,应用服务要退出,

要不然,DLL 会被占用。
然后,把签名后的项目放入到安装目录下的指定插件目录里大致如下所示。
另外,我这个是 C 盘,还有一个权限的问题。需要注意,能安装到其他盘最好。
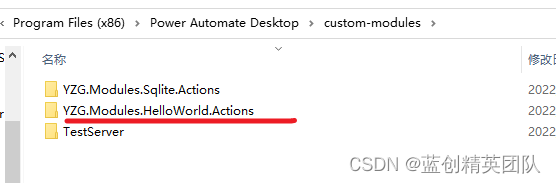
然后,运行 PAD 应用,新建一个任务流,或者编辑任意一个任务流。
如果出现以下问题,那就是证书没有安装到目标机器,安装一下就好。
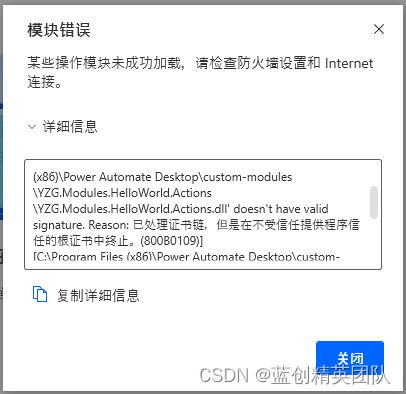
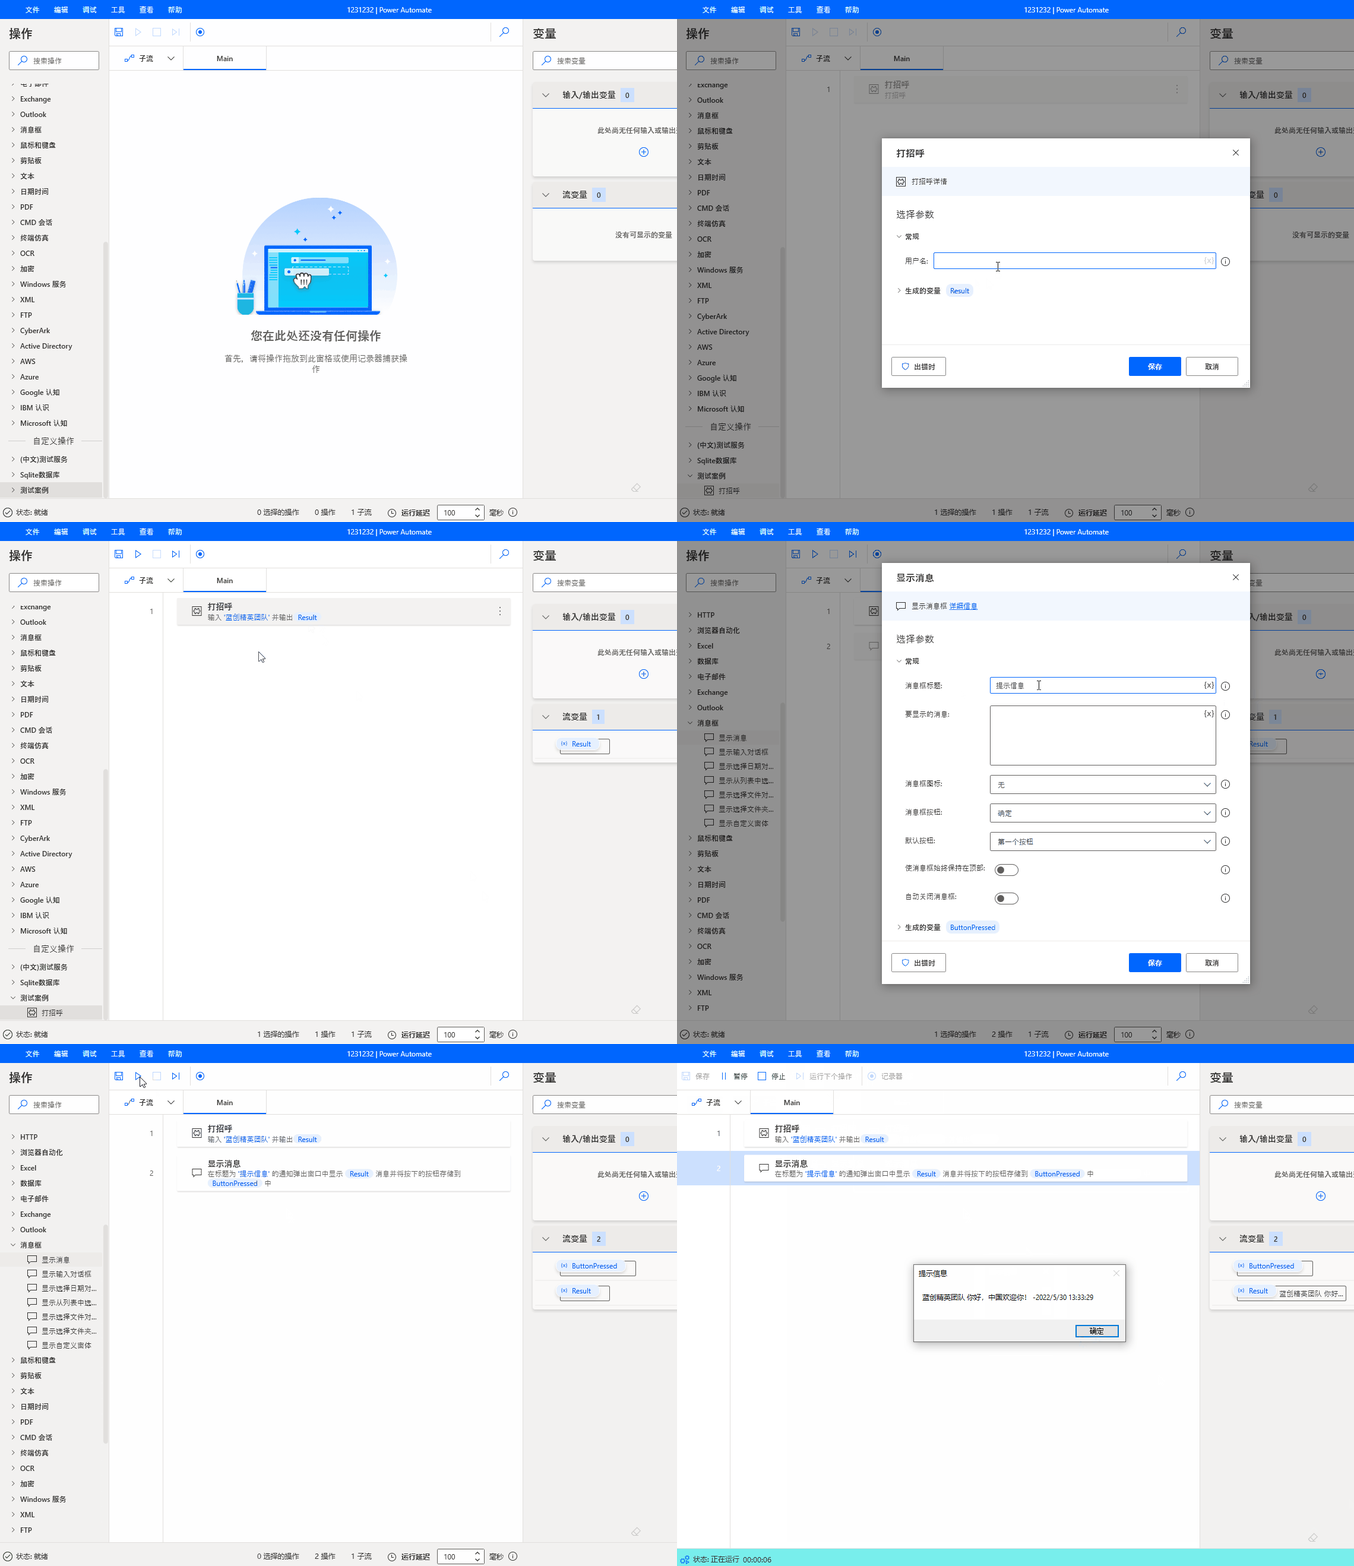
然后,正常情况下,打开 PAD 的设计视图,会如下所示:
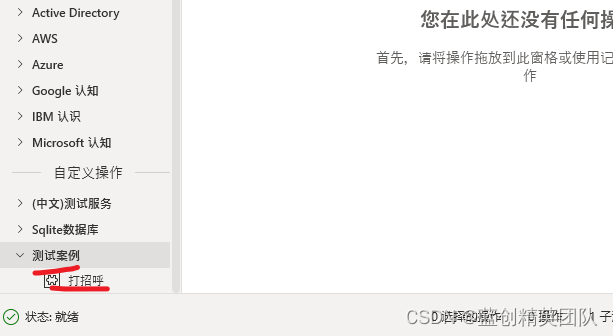
已经新增了一个功能 测试案例 -> 打招呼 并新增了一个功能。
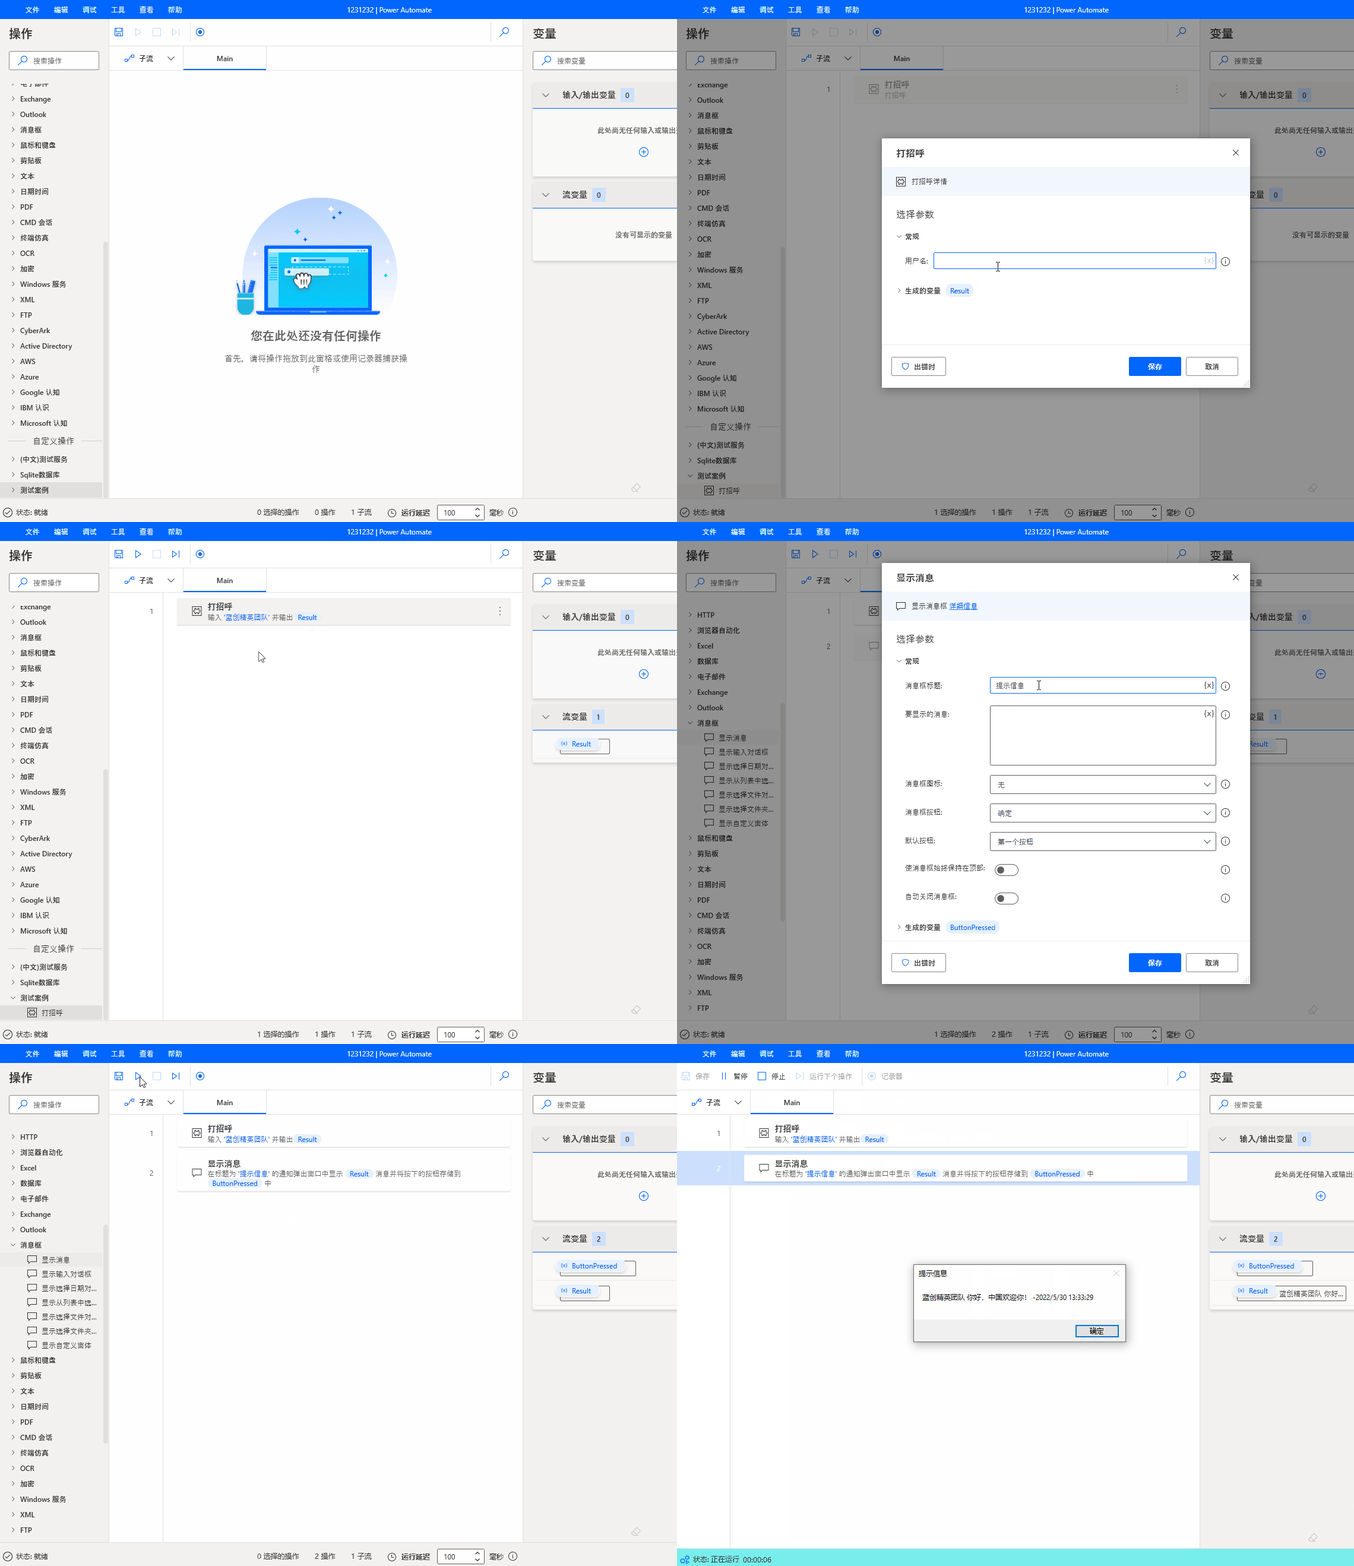
我们试一下
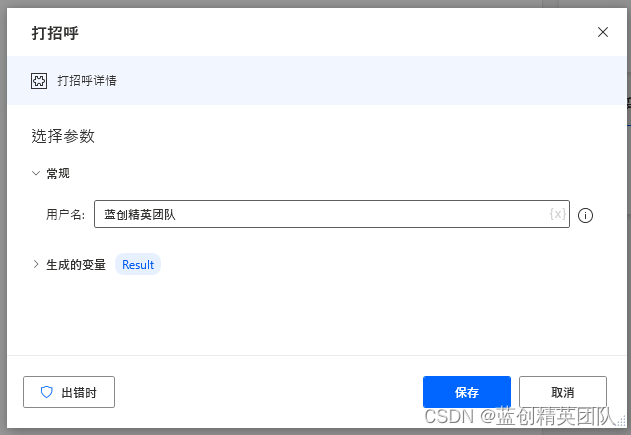
保存后如下所示

最后,可以看下实际的动作,效果很不错的说。
问题处理
- 第一,中文不显示的问题,建议增加中文语言包,里面的名字要跟代码相匹配,具体可以参考示例。
- 第二,加载不出来,提示错误,可以根据错误提示修改,或者添加缺失的引用包。
- 第三,更多细节,只能多挖掘和尝试了
扩展组件的参数信息
我这边根据网友(潘淳)的总结以及自己的总结,也输出一个这样的文档出来。
ActionBase 需要的相关参数
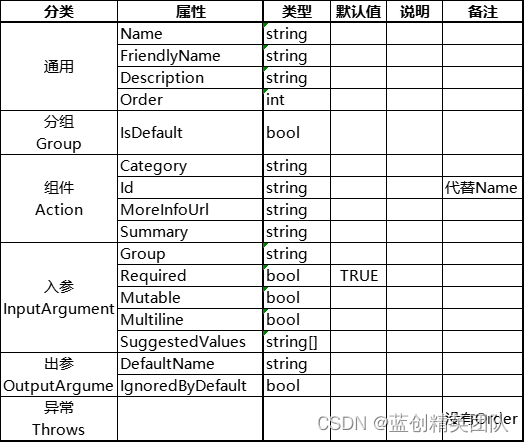
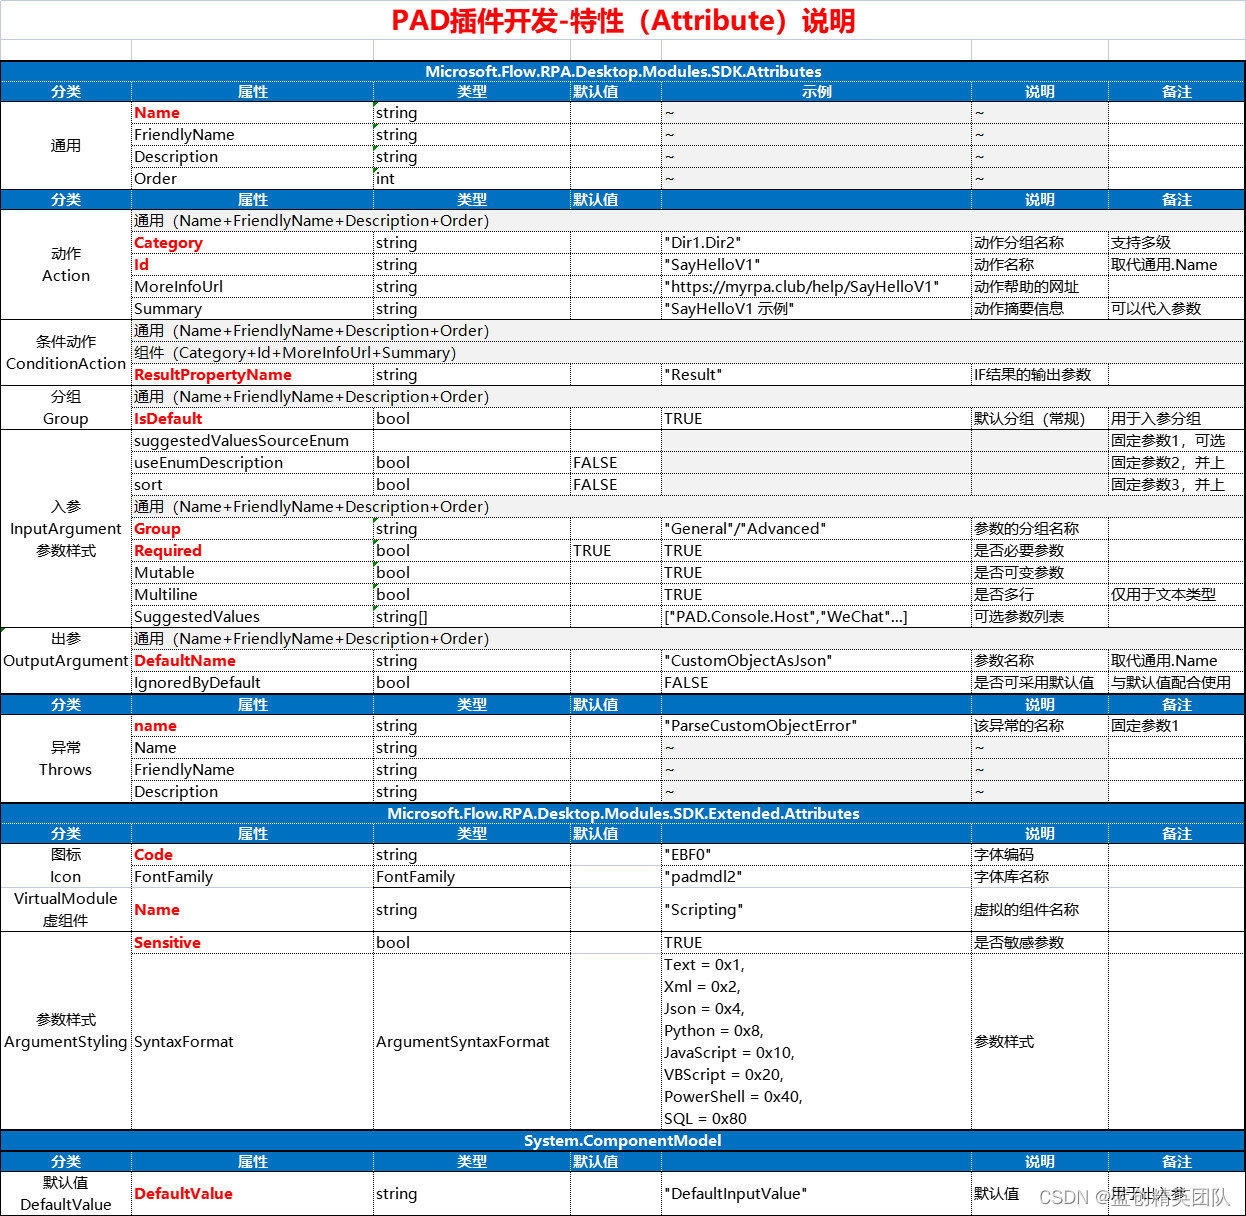
以及内置的相关类型
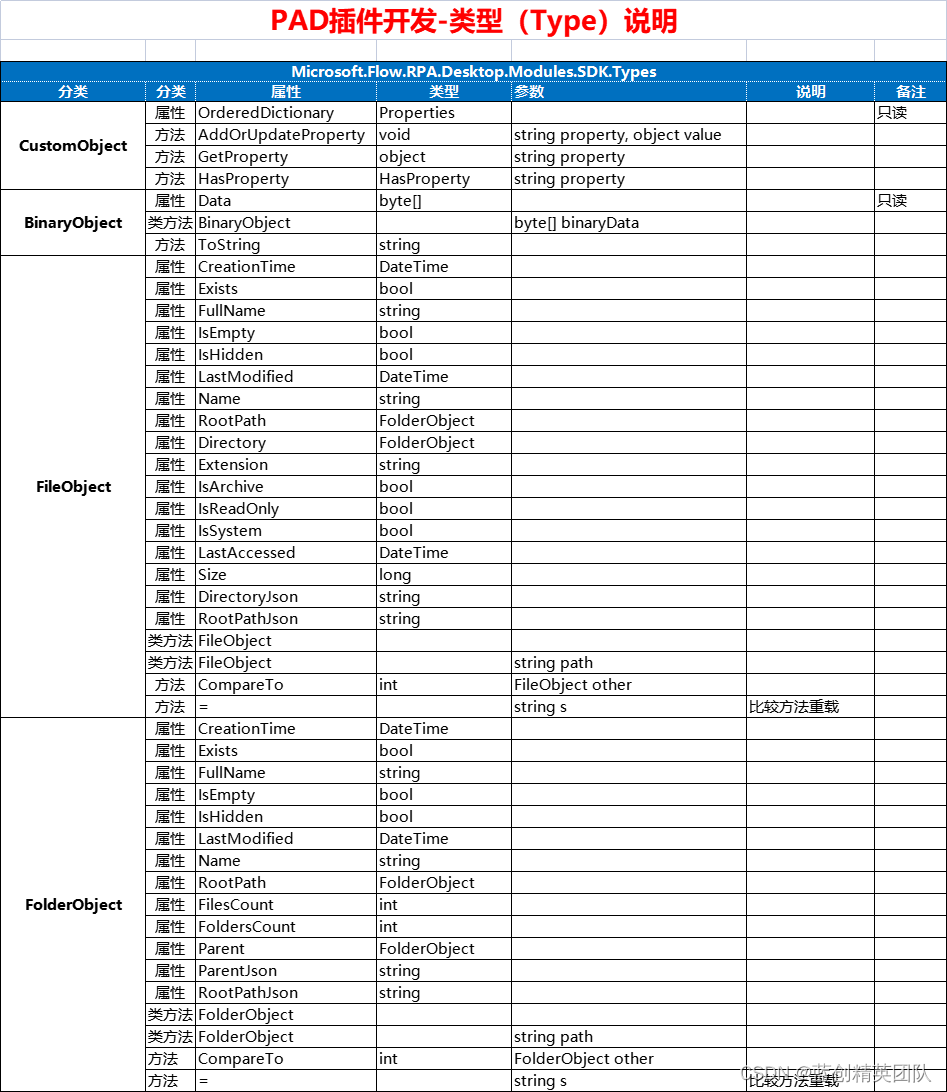
这里也感谢潘淳大佬的总结
完结
完结撒花,写这个还真不容易,特别是 PAD,识别你的组件的时候,会有各种各样的问题。
这个时候就要重试好多遍,好多遍。
不过还好,我已经基于这个能扩展的组件,写了一个 Sqlite 的组件。也会发到示例了。供大佬们参考。