
目前的 4 篇日志是来自我们写好的假数据,但正常来说不会这样做,而是有个按钮让用户点击了之后,增加或减少日志的数量。
增加的按钮会放在<Blog>,点击了「增加」按钮产生一条新的 Post 供用户输入,再让用户点击「确认」按钮储存日志。
删除的按钮则可以放在<Blog>,再在<Post>加入 checkbox,让用户自己勾选要删除哪些 Post;或是放在<Post>,点击删除按钮就删除该条日志。
新增按钮很简单,只要在<MyButton>加上@onclick事件即可,开始之前,先将版面稍作修改,顺便把FontSizeStyle移除。
Blog.razor
@page "/Blog" @inherits BlogBase @if (Blog == null) {
<p>Loading...</p>
} else {
<div class="container">
  <div class="row">
    <div class="col pl-0">
      <label>博客名称</label>
      <input @bind-value="Blog.Name" class="form-control w-25" />
      <MyButton
        value="Add"
        class="btn btn-info my-2"
        type="button"
        @onclick="Add"
      />
    </div>
  </div>
  <div class="row">
    @if (Blog.Posts != null) { foreach (var post in Blog.Posts) {
    <div class="col-md-3 border rounded p-3 mr-2 mb-2 w-25">
      <CascadingValue Value="ColorStyle" Name="ColorStyle" IsFixed="true">
        <Post Post="post" />
      </CascadingValue>
    </div>
    } }
  </div>
</div>
}
C#部分则加入Add()方法,原来LoadData()的日志删除。
BlogBase.razor.cs
using BlazorServer.Models;
using Microsoft.AspNetCore.Components;

namespace BlazorServer.Pages;

public class BlogBase : ComponentBase
{
	public BlogModel? Blog { get; set; }

	public string? ColorStyle { get; set; } = "color: goldenrod";
	public string? FontSizeStyle { get; set; } = "color: goldenrod";

	protected override Task OnInitializedAsync()
	{
		LoadData();
		return base.OnInitializedAsync();
	}

	private void LoadData()
	{
		Blog = new BlogModel
		{
			Id = 1,
			Name = "我的博客",
			Posts = new List<PostModel>(),
			CreateDateTime = new DateTime(2021, 12, 14, 23, 46, 59)
		};
	}

	protected void Add()
	{
		Blog?.Posts?.Add(new PostModel());
	}
}
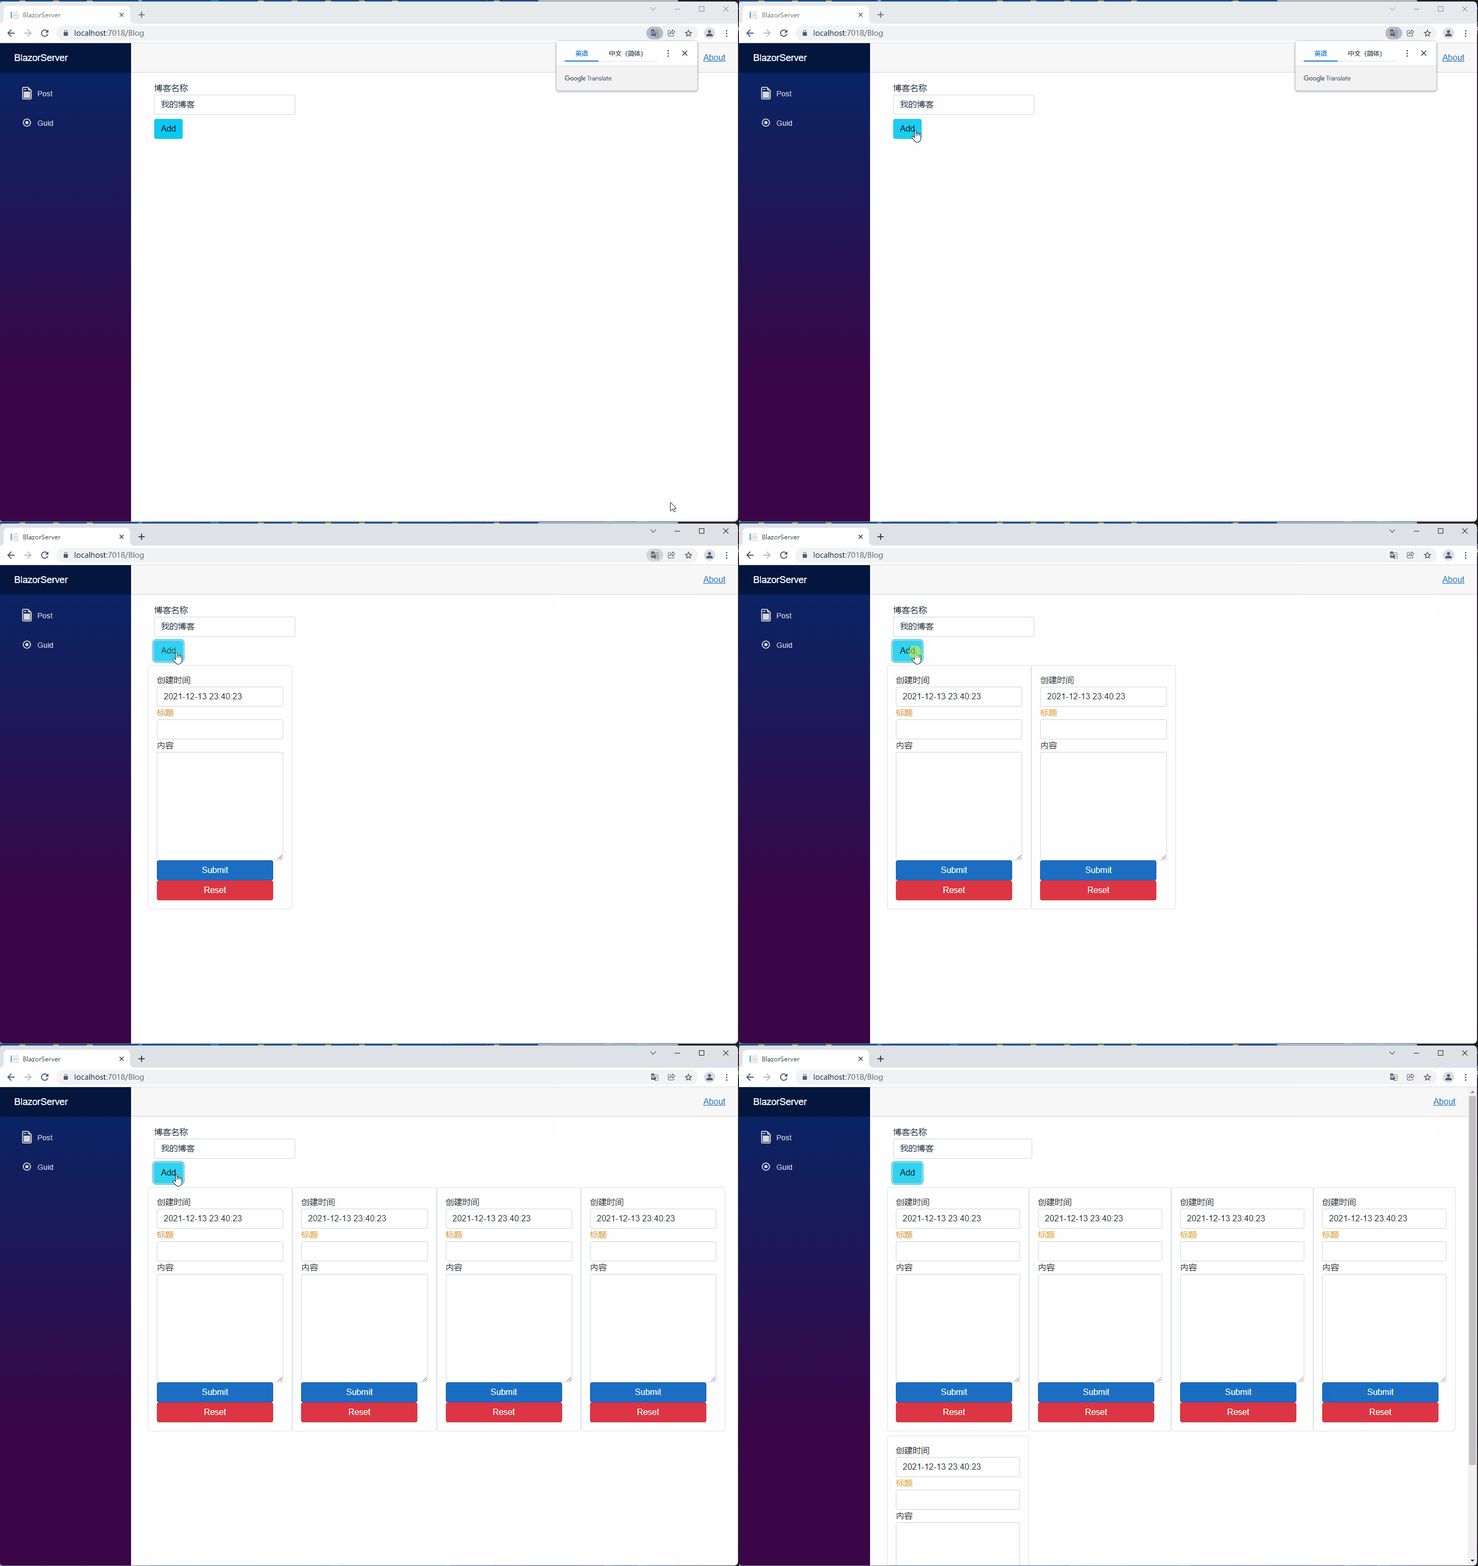
接着点击 Add 按钮,就可以看到日志条数增加了。
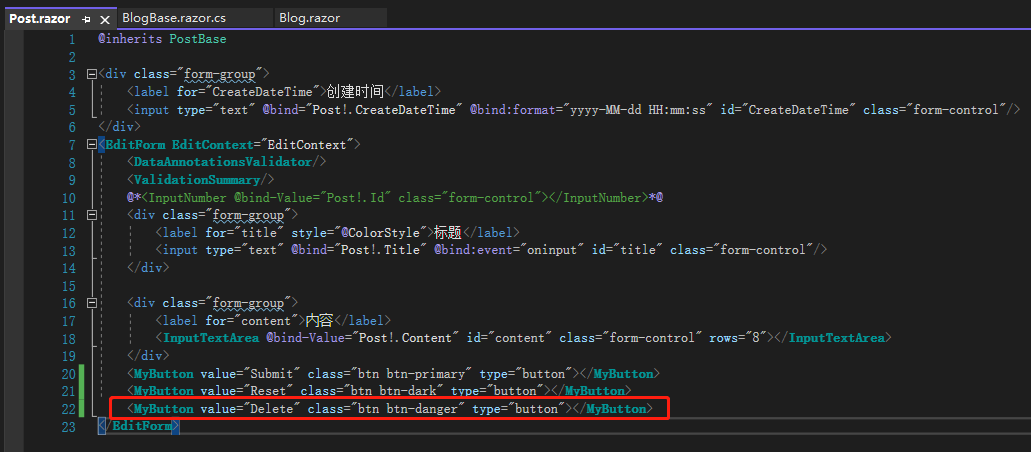
接着来做 Delete 功能,在Post.razor加入 Delete 按钮。
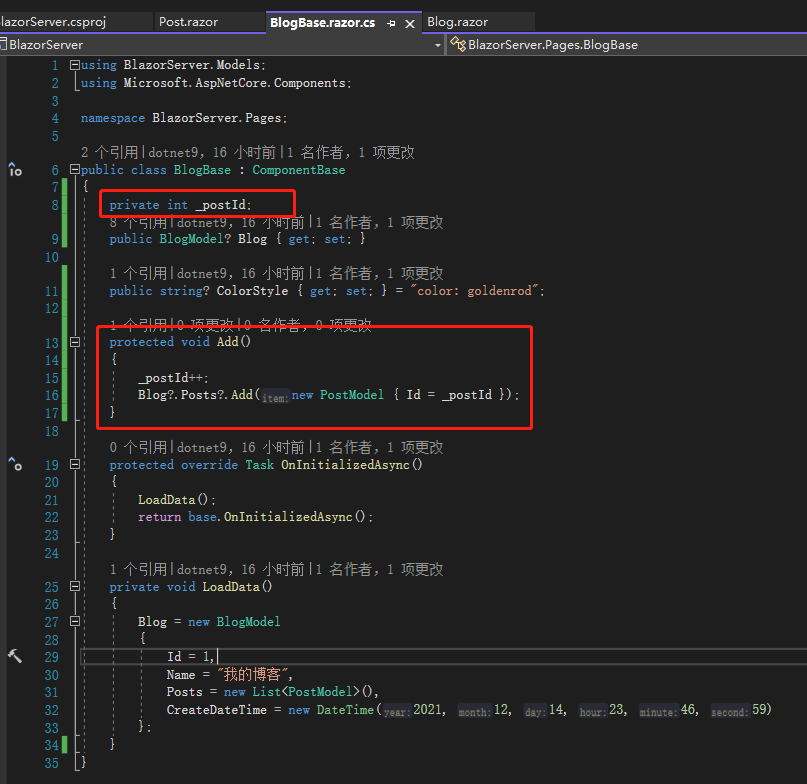
但问题来了,当我点击 Delete 按钮,<Blog>怎么知道我删除的是哪一条 Post?这时候就需要Id可以识别,于是加入一个私有变量_postId,每次点击Add()都+1,正常来说 PostId 会跟着 Post 而不是由 Blog 产生,不过因为还没接触到数据库,所以先这样将就,后面连接数据库后就会改变。
为了验证是否正确,删除原来Post.razor注释的 Post.Id,加入新样式的 Post.Id,可以看到没有问题。
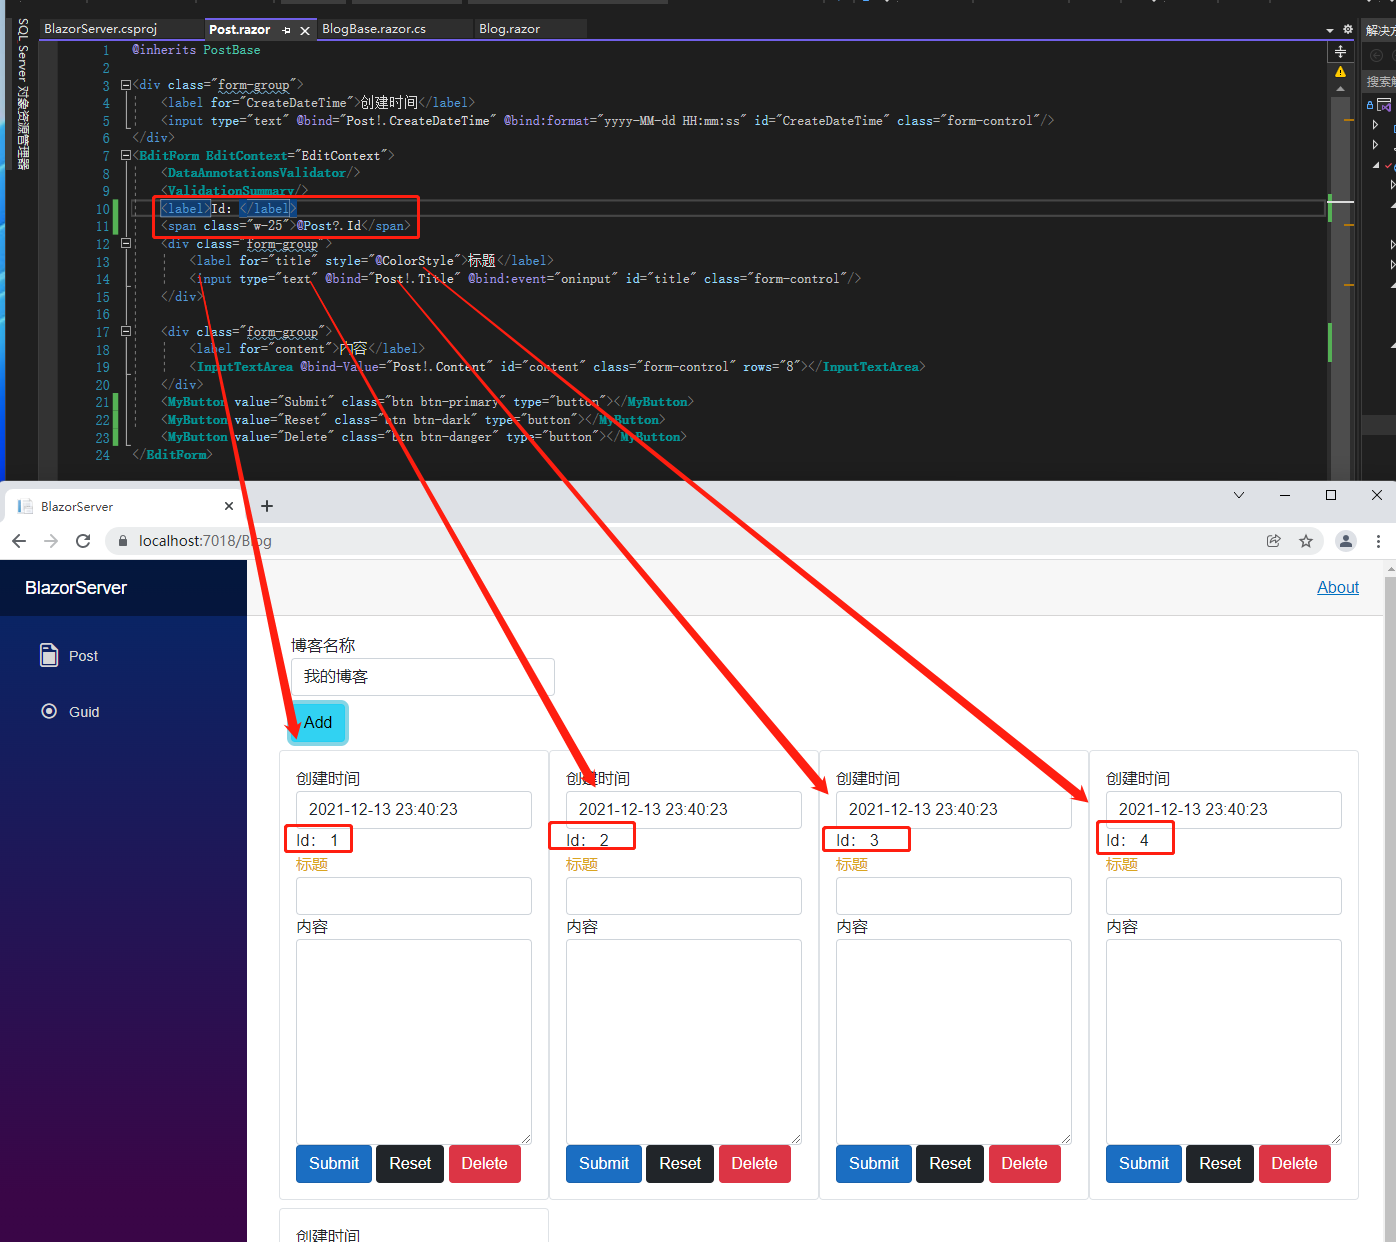
现在有了识别 Id,又产生了新问题,要怎么让<Blog>收到Id?目前 Id 由<Blog>产生,所以没这问题,等后面 Id 由数据库产生后,<Blog>就不会知道 Id 了。前面说的都是从父组件传递数据到子组件的方法,我们现在要从子组件传数据到父组件,有办法做到反向传回去吗?
有的,那就是EventCallback,但是要把Delete改成<input>而非<MyButton>,因为EventCallback是由子组件传向父组件,如果用<MyButton>,Id 的流向就必须先这样<Blog> => <Post> => <MyButton>,接着再用EventCallback反向<MyButton> => <Post> => <Blog>,实在太麻烦了。
先把 Delete 按钮改成<input>,加入@onclick="ReturnPostId"。
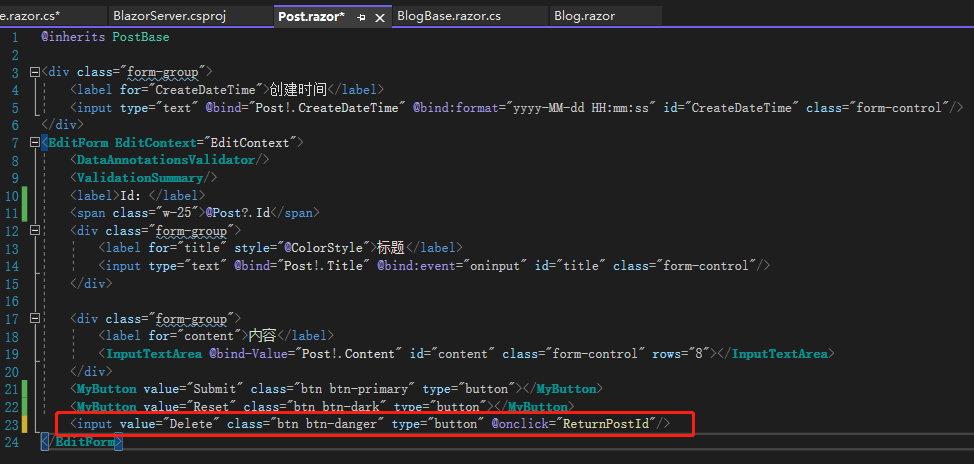
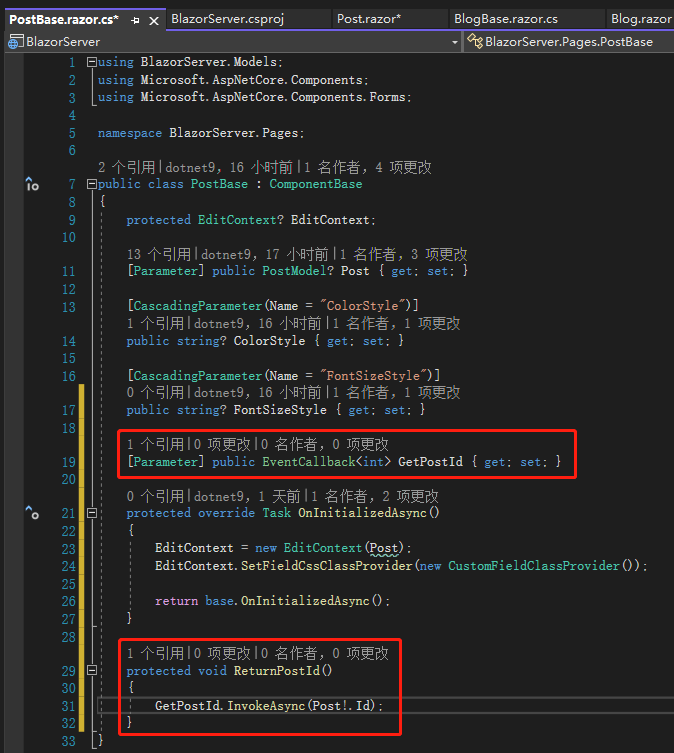
接着在PostBase.razor.cs定义类型为EventCallback<int>的属性 GetPostId,记住一定要加上[Parameter]特性,因为这要被<Blog>调用。然后完整定义ReturnPostId()方法,里面做的就是GetPostId.InvokeAsync(Post!.PostId);,当外部传来的GetPostId被触发时,就将Post.PostId传给父组件也就是<Blog>。
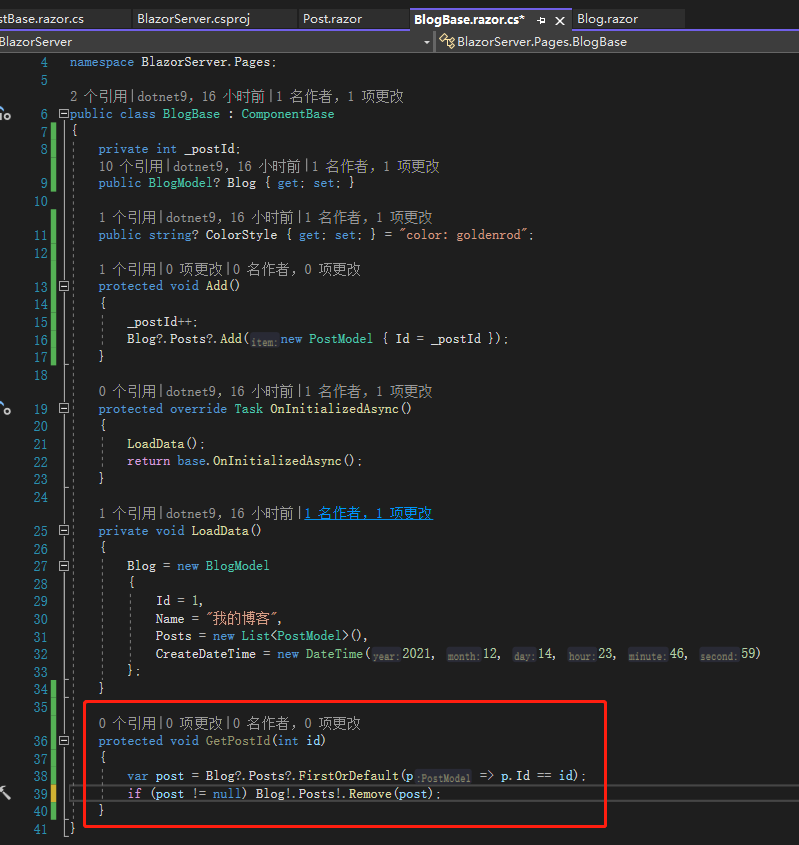
再在BlogBase.razor.cs定义同名方法GetPostId(int id),名字不需要一样,这边只是为了方便取同名,里面做的事情就是移除跟收到的 Id 有相同值的 Post。
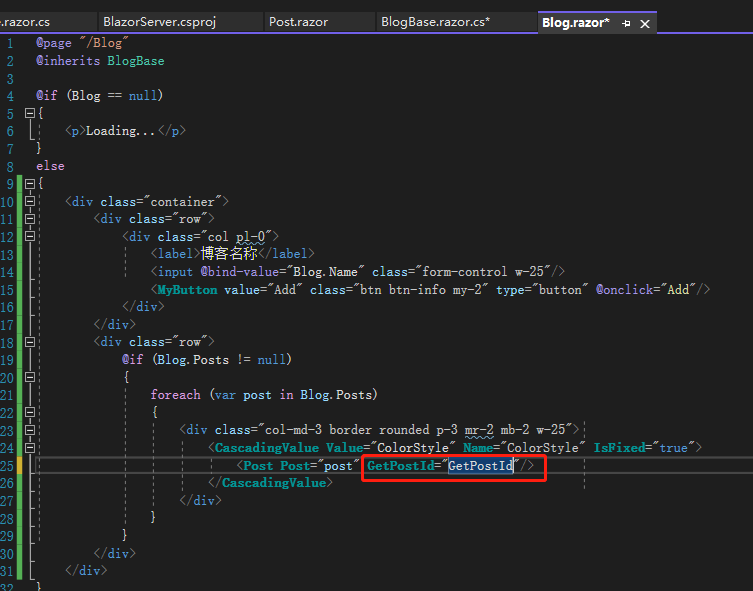
最后在Blog.razor的<Post>的GetPostId放入刚刚定义的方法就可以了。
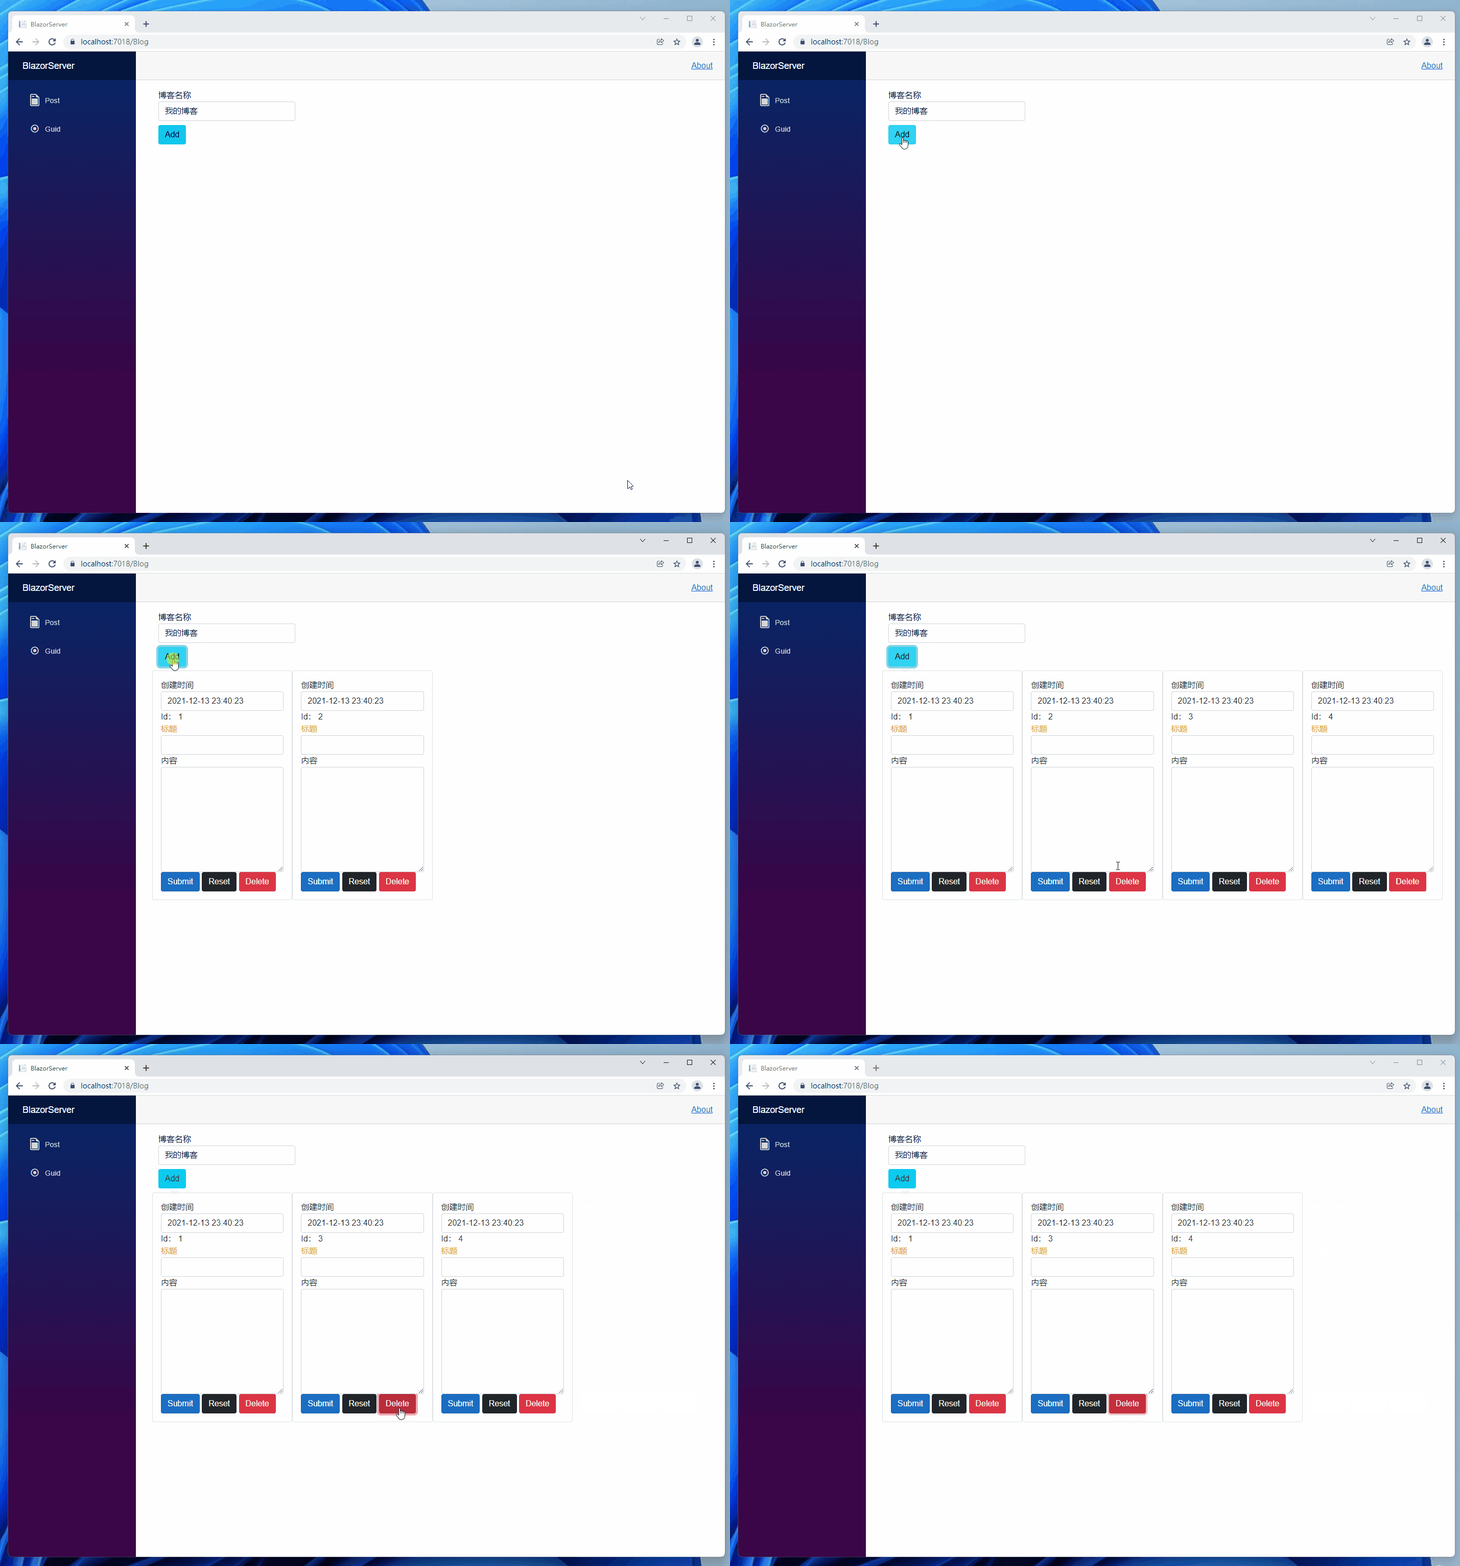
我们来验证看看,先新增 4 条日志,再删除第 2 条,可以看到 Id 等于 2 的那条成功被删除了。
除了 EventCallback,还有 Delegate 可以使用,不过局限性较大,我们也来试试看。
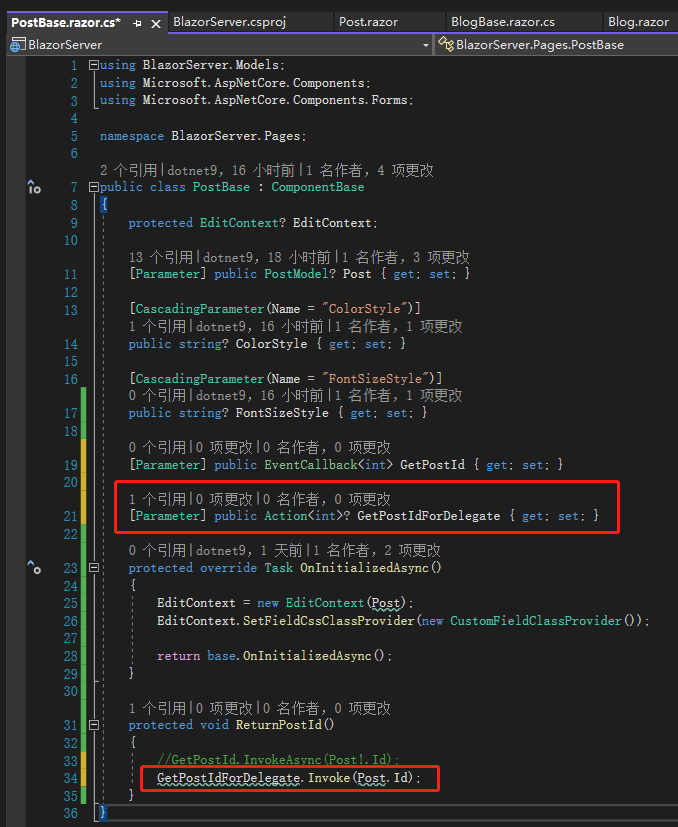
先在PostBase.razor.cs定义类型为Action<int>的属性 GetPostIdForDelegate,ReturnPostId()改用GetPostIdForDelegate。
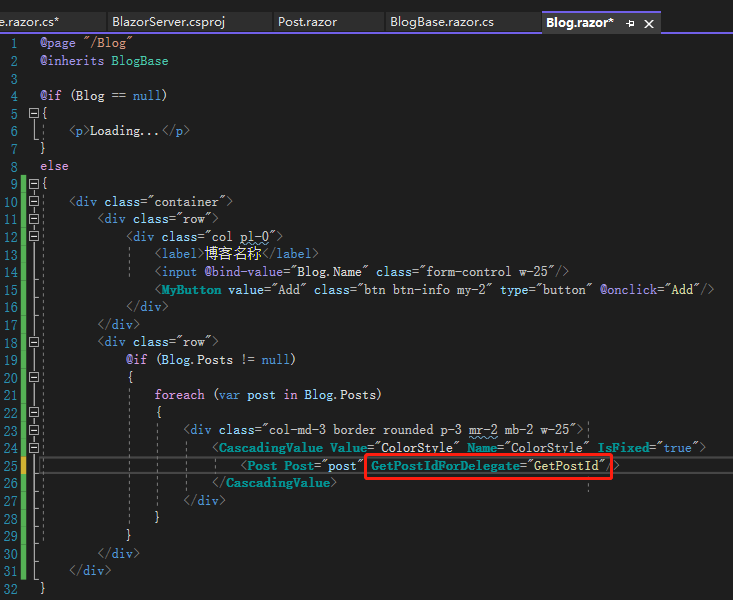
接着在Blog.razor的<Post>改用GetPostIdForDelegate。
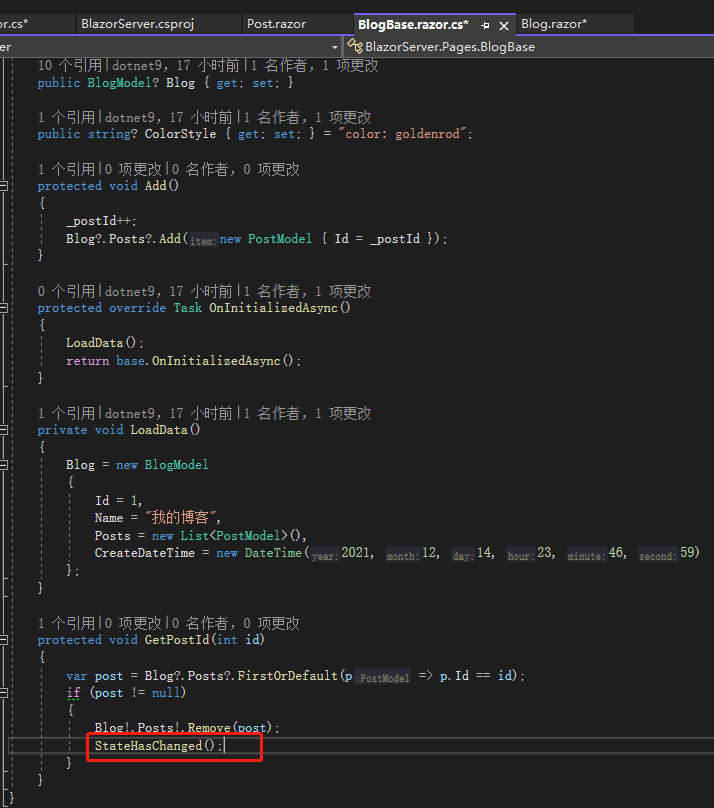
但是实际点击后会发现不会删除日志,这是因为 EventCallback 会监控 Component,一旦有变化就会重新渲染,委托则不会,委托必须在父组件也就是BlogBase.razor.cs调用StateHasChanged();方法,让父组件知道状态改变了。
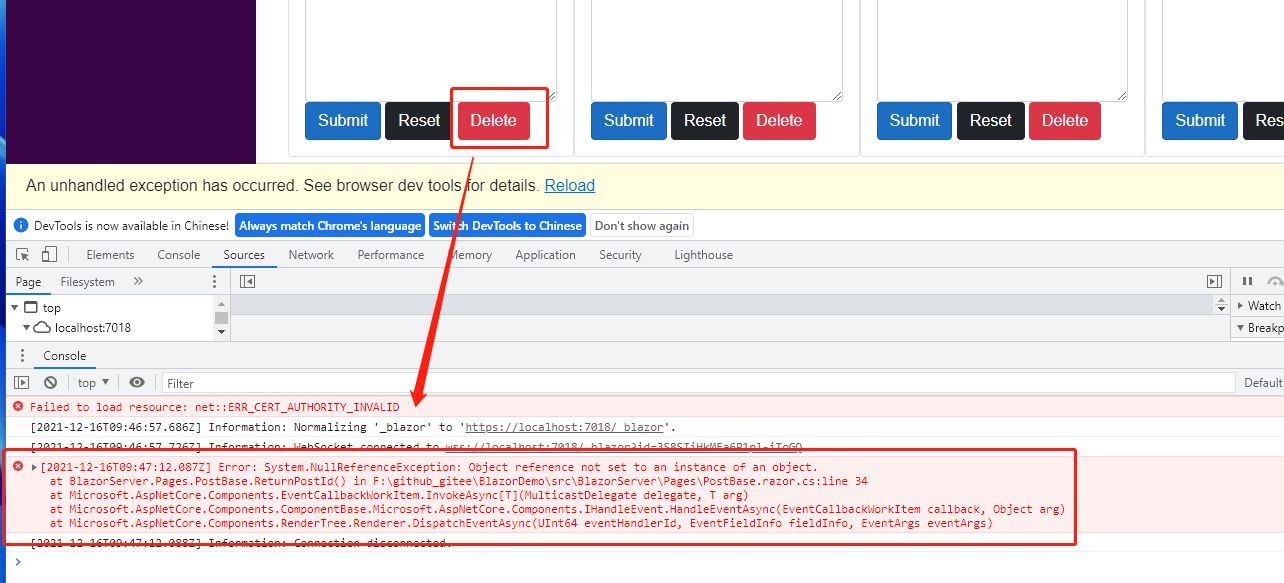
另外委托一旦在子组件中定义了,父组件就必须要调用,否则会发生错误,EventCallback 则没这问题。
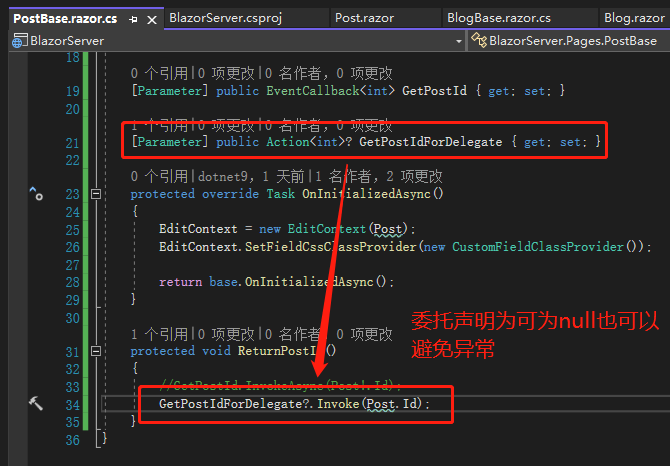
站长注:当然,善于使用 nullable 也可以避免这种异常:
引用:
- Blazor EventCallback
- EventCallback
- Blazor Tutorial - Ep11 - EventCallback and how it is different from delegate
注:本文代码通过 .NET 6 + Visual Studio 2022 重构,可点击原文链接与重构后代码比较学习,谢谢阅读,支持原作者