Although Blazor doesn't require JavaScript, it can still be convenient to use certain existing JS libraries. There's no need to completely abandon them just to avoid JavaScript. Blazor provides a way to call JavaScript, a feature known as JavaScript interoperability (or JS interop for short). In this article, we'll implement a confirmation dialog for the Delete button, since deleting is a critical operation—users shouldn't be able to delete something with a single accidental click.
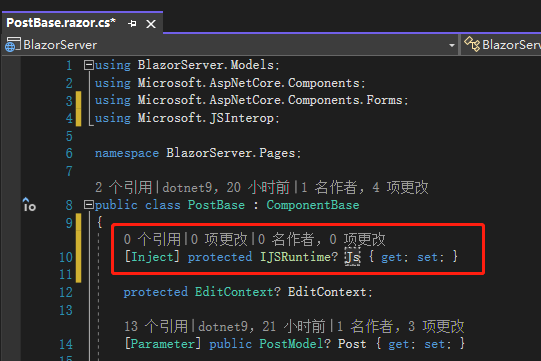
As mentioned on Day 07, Blazor has a built-in JavaScript Service, so we don't need to inject it via dependency injection in Program.cs; we can inject it directly into the page where it's needed. To inject it into a Razor component, simply add @inject IJSRuntime js.

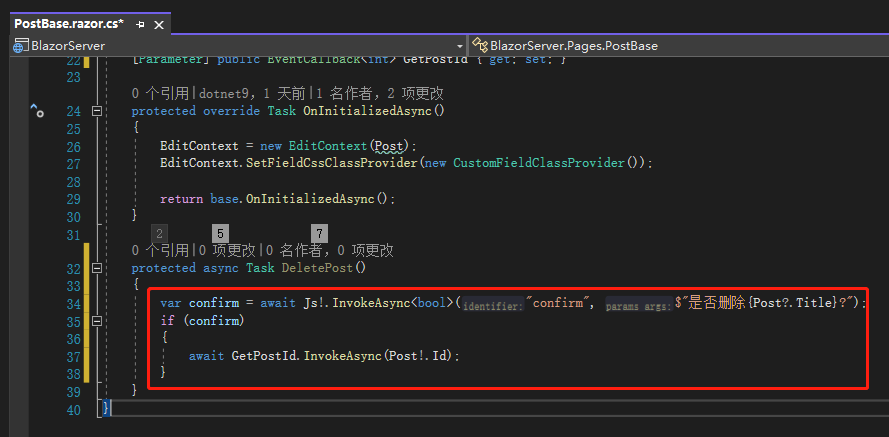
Next, rename the original ReturnPostId() method to DeletePost(), change its return type to Task, and slightly modify its internal logic. As you can see, JavaScript is also called via EventCallback. Besides InvokeAsync, which returns a value, there is also InvokeVoidAsync, which doesn't. The first parameter is the name of the JS method; if that method requires parameters, they are placed in order after the name.

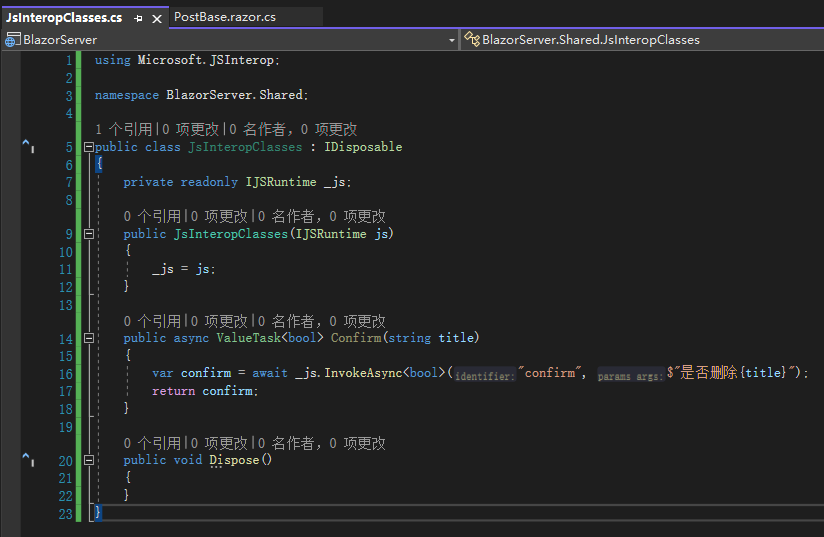
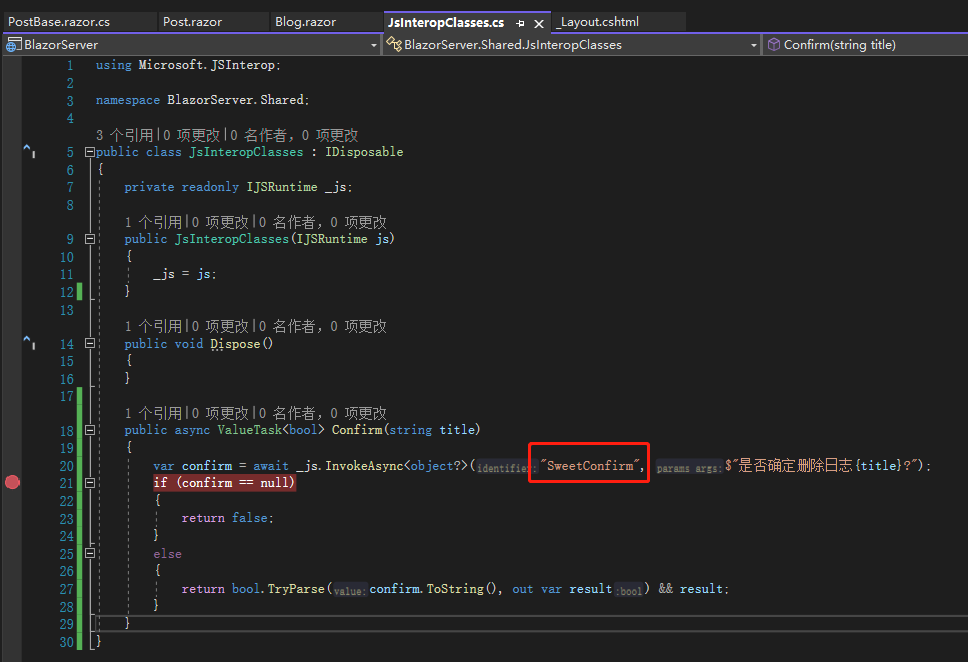
What if you want to encapsulate this logic in a custom C# class to benefit from strong typing? Blazor provides a way to do that. First, create a new file JsInteropClasses.cs in the Shared folder. It does three things: dependency injection, the original confirm method, and Dispose.

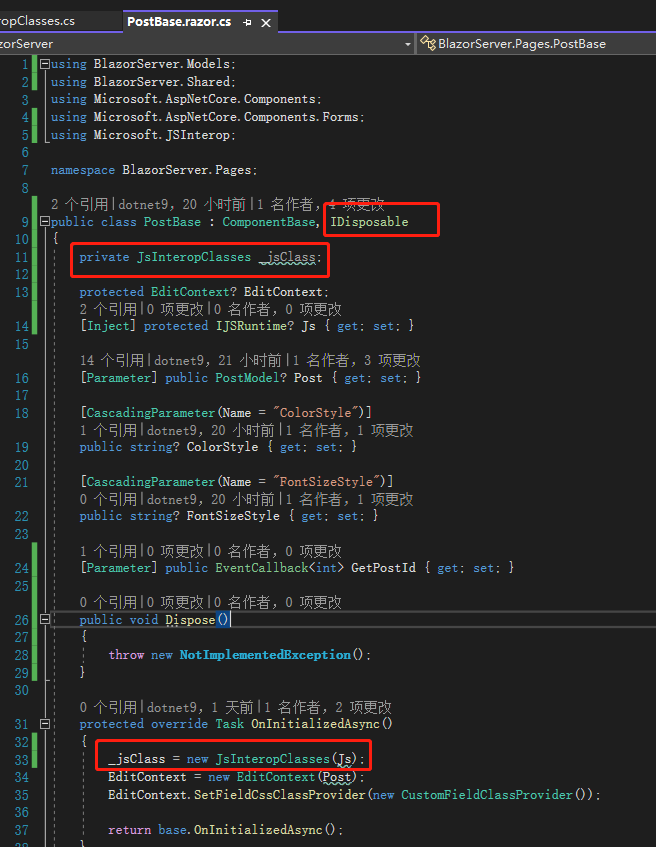
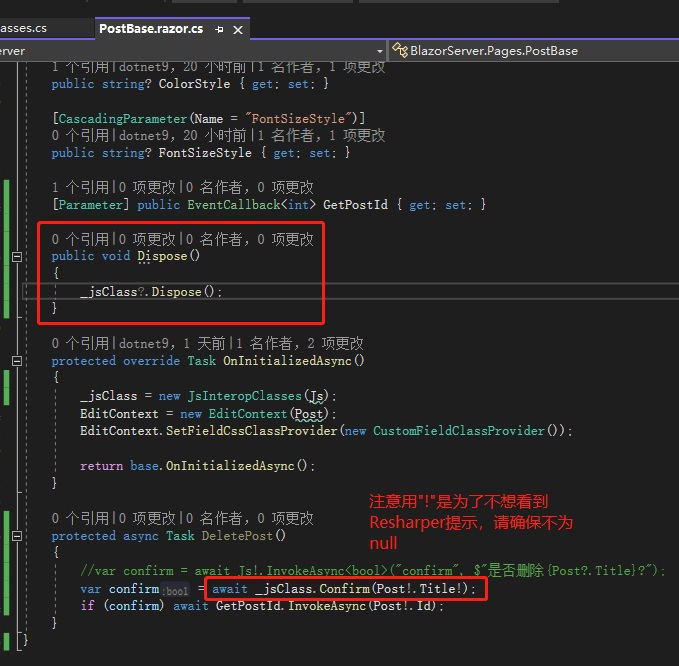
Then, in PostBase.razor.cs, inject the JS into JsInteropClasses at the beginning, and implement IDisposable.

Replace the original method with the newly encapsulated _jsClass.Confirm() method, and finally override the Dispose method.

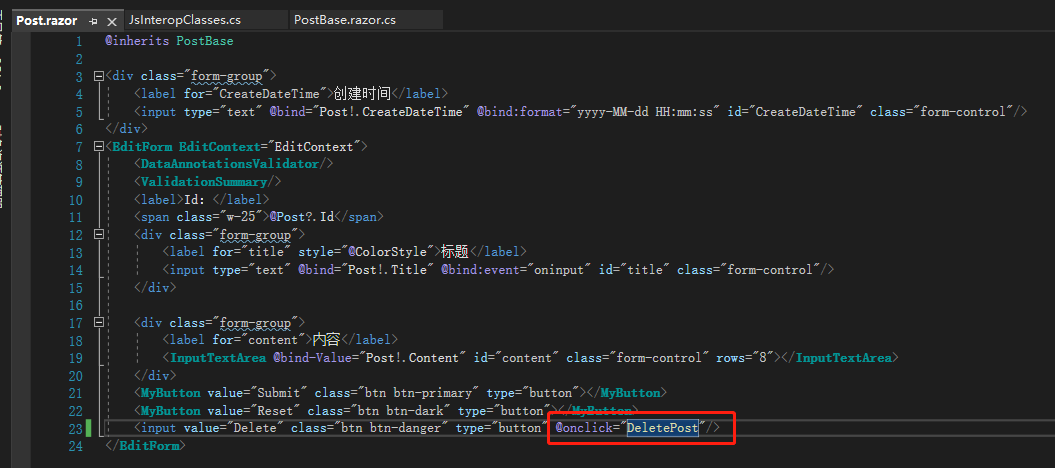
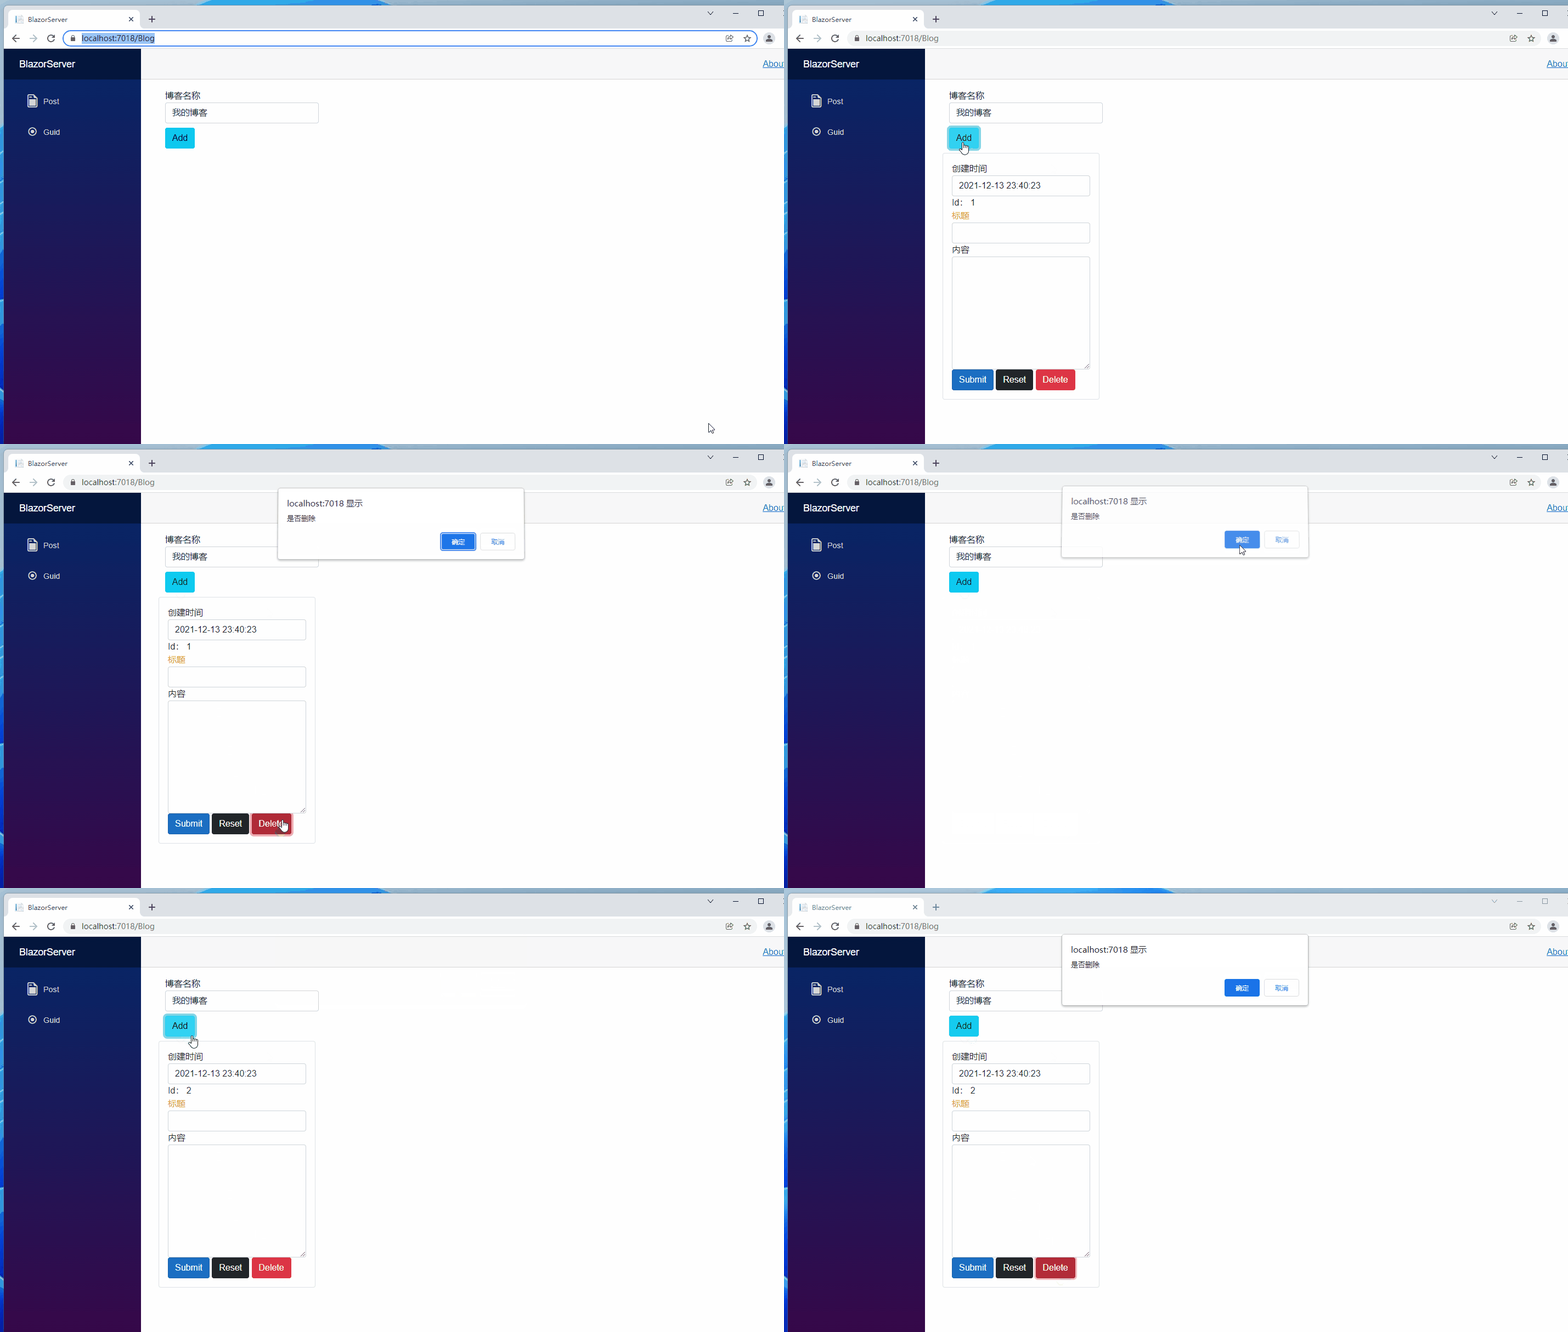
You can see that this yields the same result as directly calling the JS confirm from PostBase.razor.cs. Don't forget to change the Delete button's click event callback method to DeletePost in Post.razor.


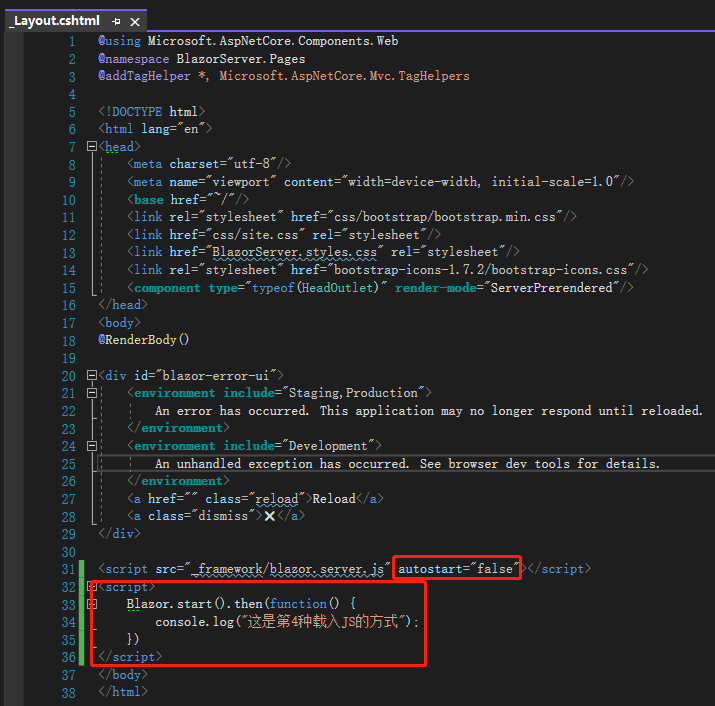
In Blazor, there are four places where you can load JS files: <head>, <body>, an external JS script, and after Blazor starts. The usual approach is to place the necessary <script> tags in _Layout.cshtml (Blazor Server) or index.html (Blazor WebAssembly). The last option is special, so let's explain it.
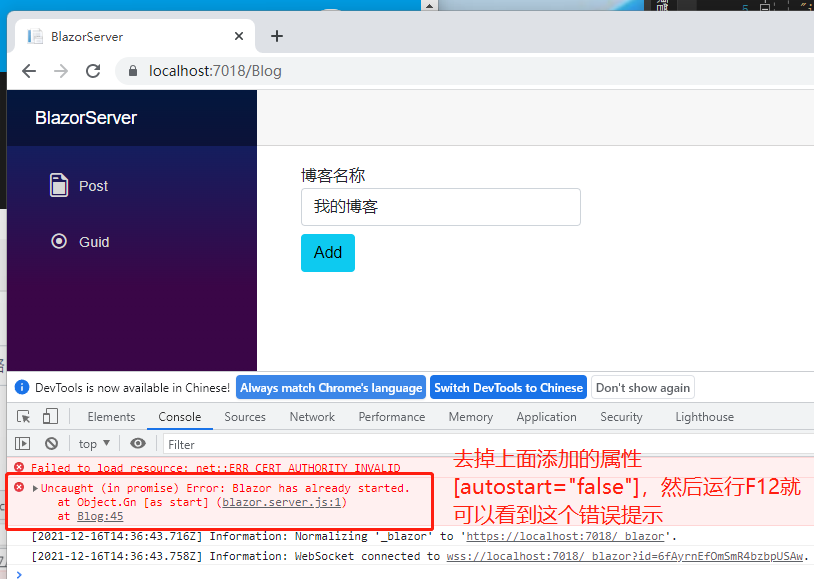
We added our own script below the existing _framework/blazor.server.js in _Layout.cshtml. It does something simple—just console.log a text. One thing to note: you must add the attribute autostart="false" to the original script tag. This tells Blazor not to start automatically. If you don't add this attribute, you'll get the following error message.


The current delete dialog looks rather plain, so let's replace it with a library. Many people use SweetAlert2, so we'll try that too.
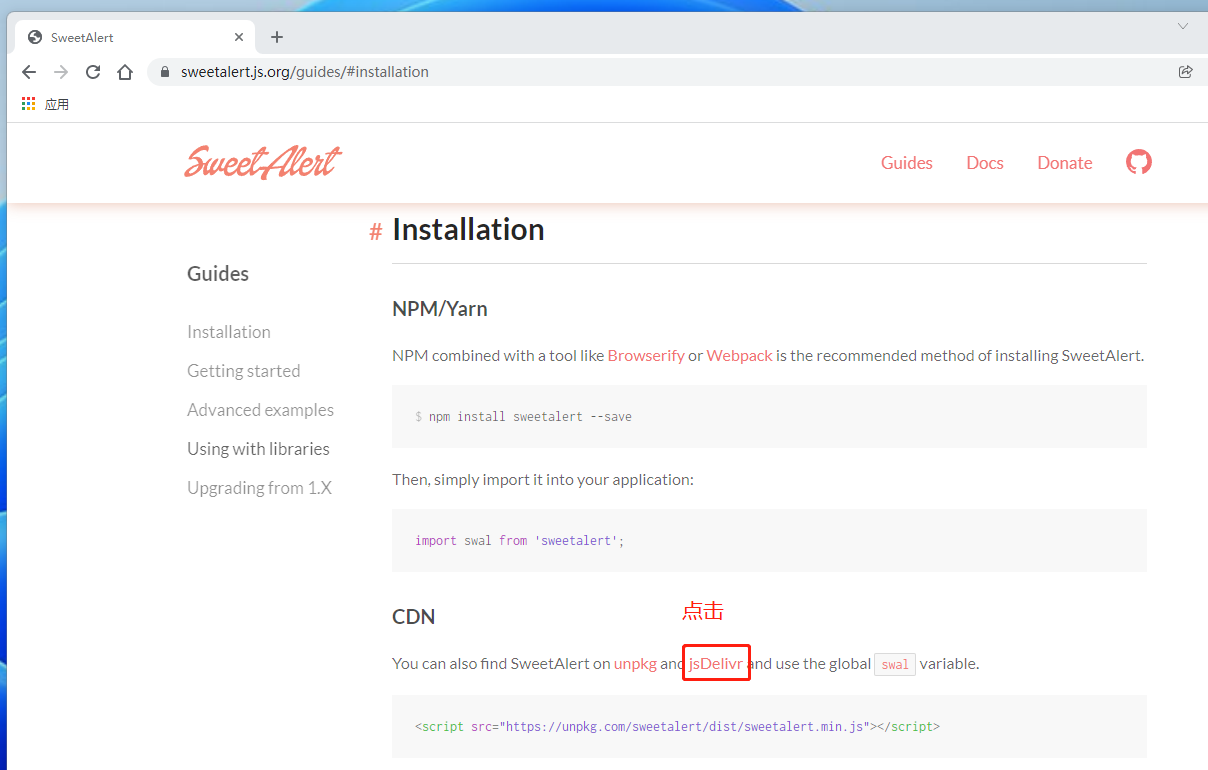
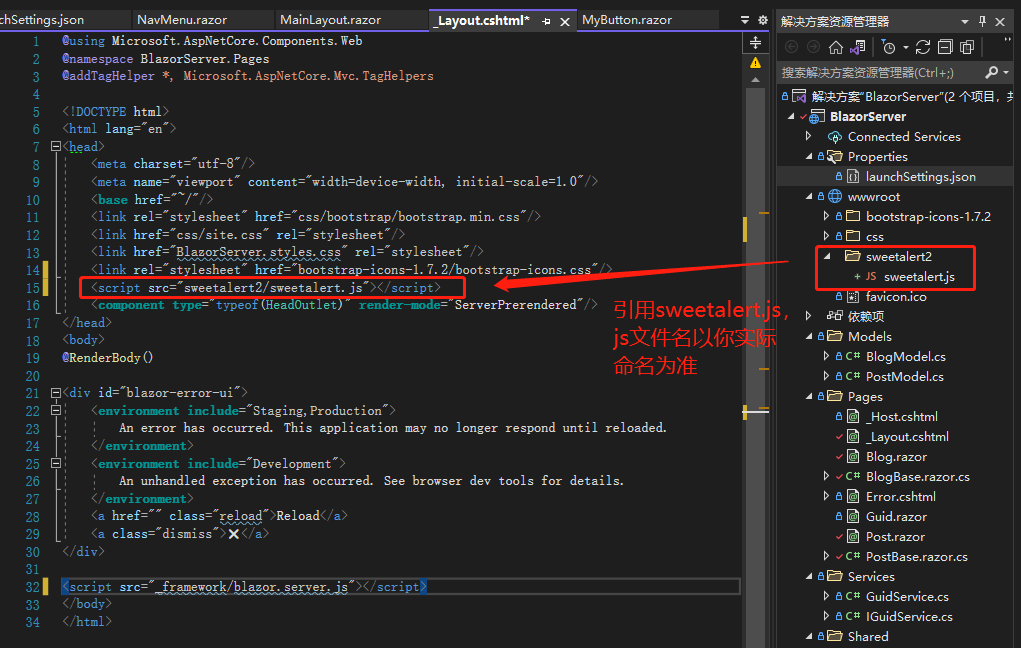
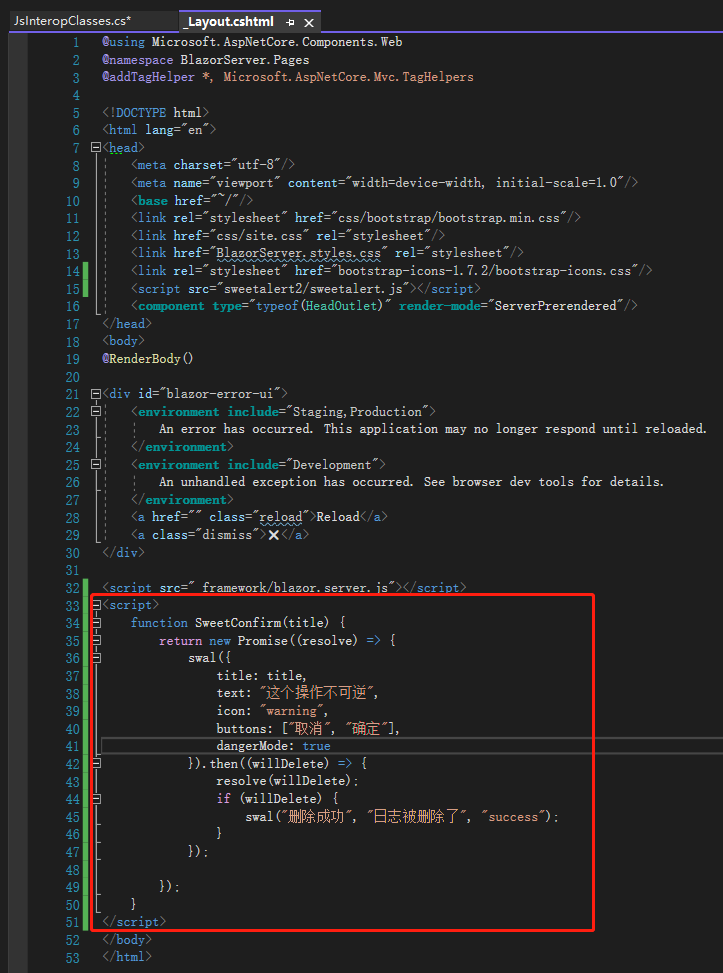
First, download the file from the SweetAlert2 official site. Then place sweetalert.js in the <head>, remove the earlier Blazor.start() (the 4th method), and remember to remove autostart="false" from _framework/blazor.server.js; or you can write it directly inside Blazor.start().


Then add your own <script>. This one uses Promise, a syntax that makes asynchronous code easier. resolve means the value returned when the operation is successful (here, "successful" means no exception occurs, so it returns regardless of whether the user clicks Confirm or Cancel).

The Confirm method is modified to call the newly defined SweetConfirm().

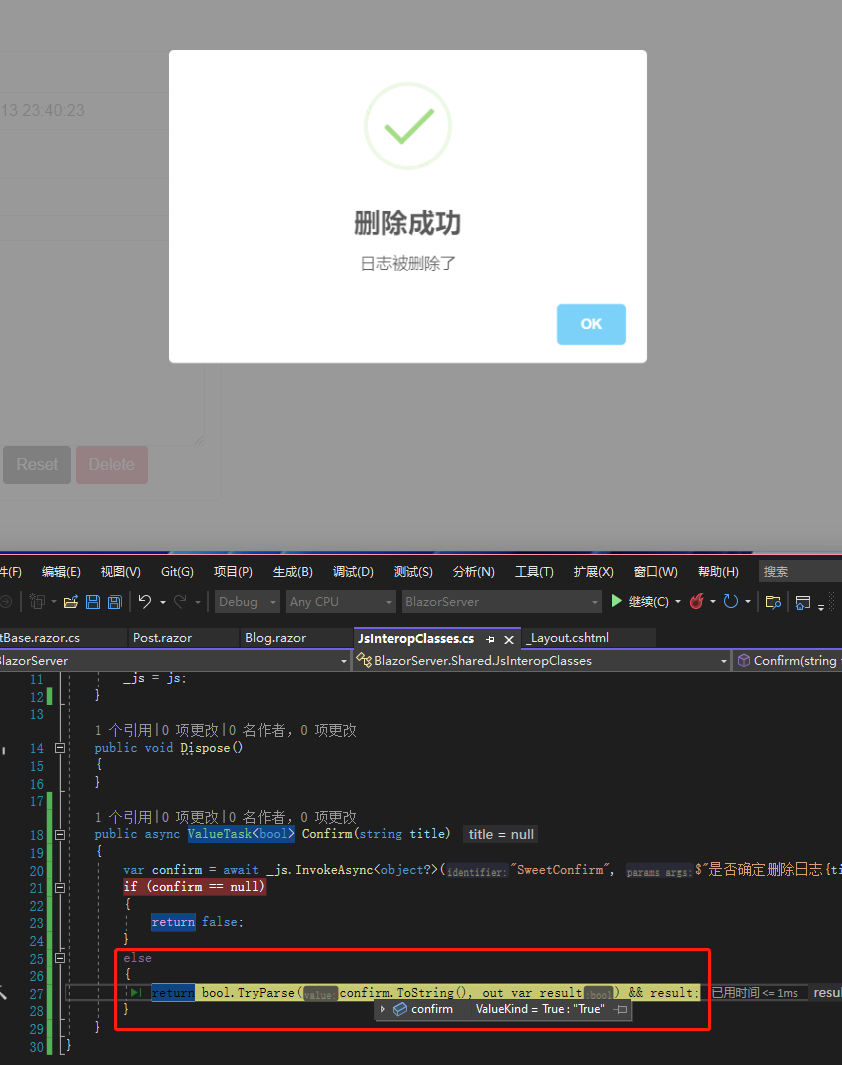
When the Delete button is clicked and the user presses Confirm, willDelete becomes true, so resolve passes willDelete back. The JsInteropClasses.Confirm method receives true (there's a minor issue: after clicking Confirm, "Delete succeeded" appears first, and then JsInteropClasses receives true; the site owner may optimize this later).

If the user clicks Cancel, willDelete is null.

Promise is an unavoidable syntax in front‑end development. If you're interested, you can check the links I've provided. I originally intended to use Observable and subscribe syntax, but SweetAlert2 hasn't implemented that yet.
Also, SweetAlert2 currently has a Blazor version you can use; the approach is similar. If you really don't want to touch JS, give it a try.
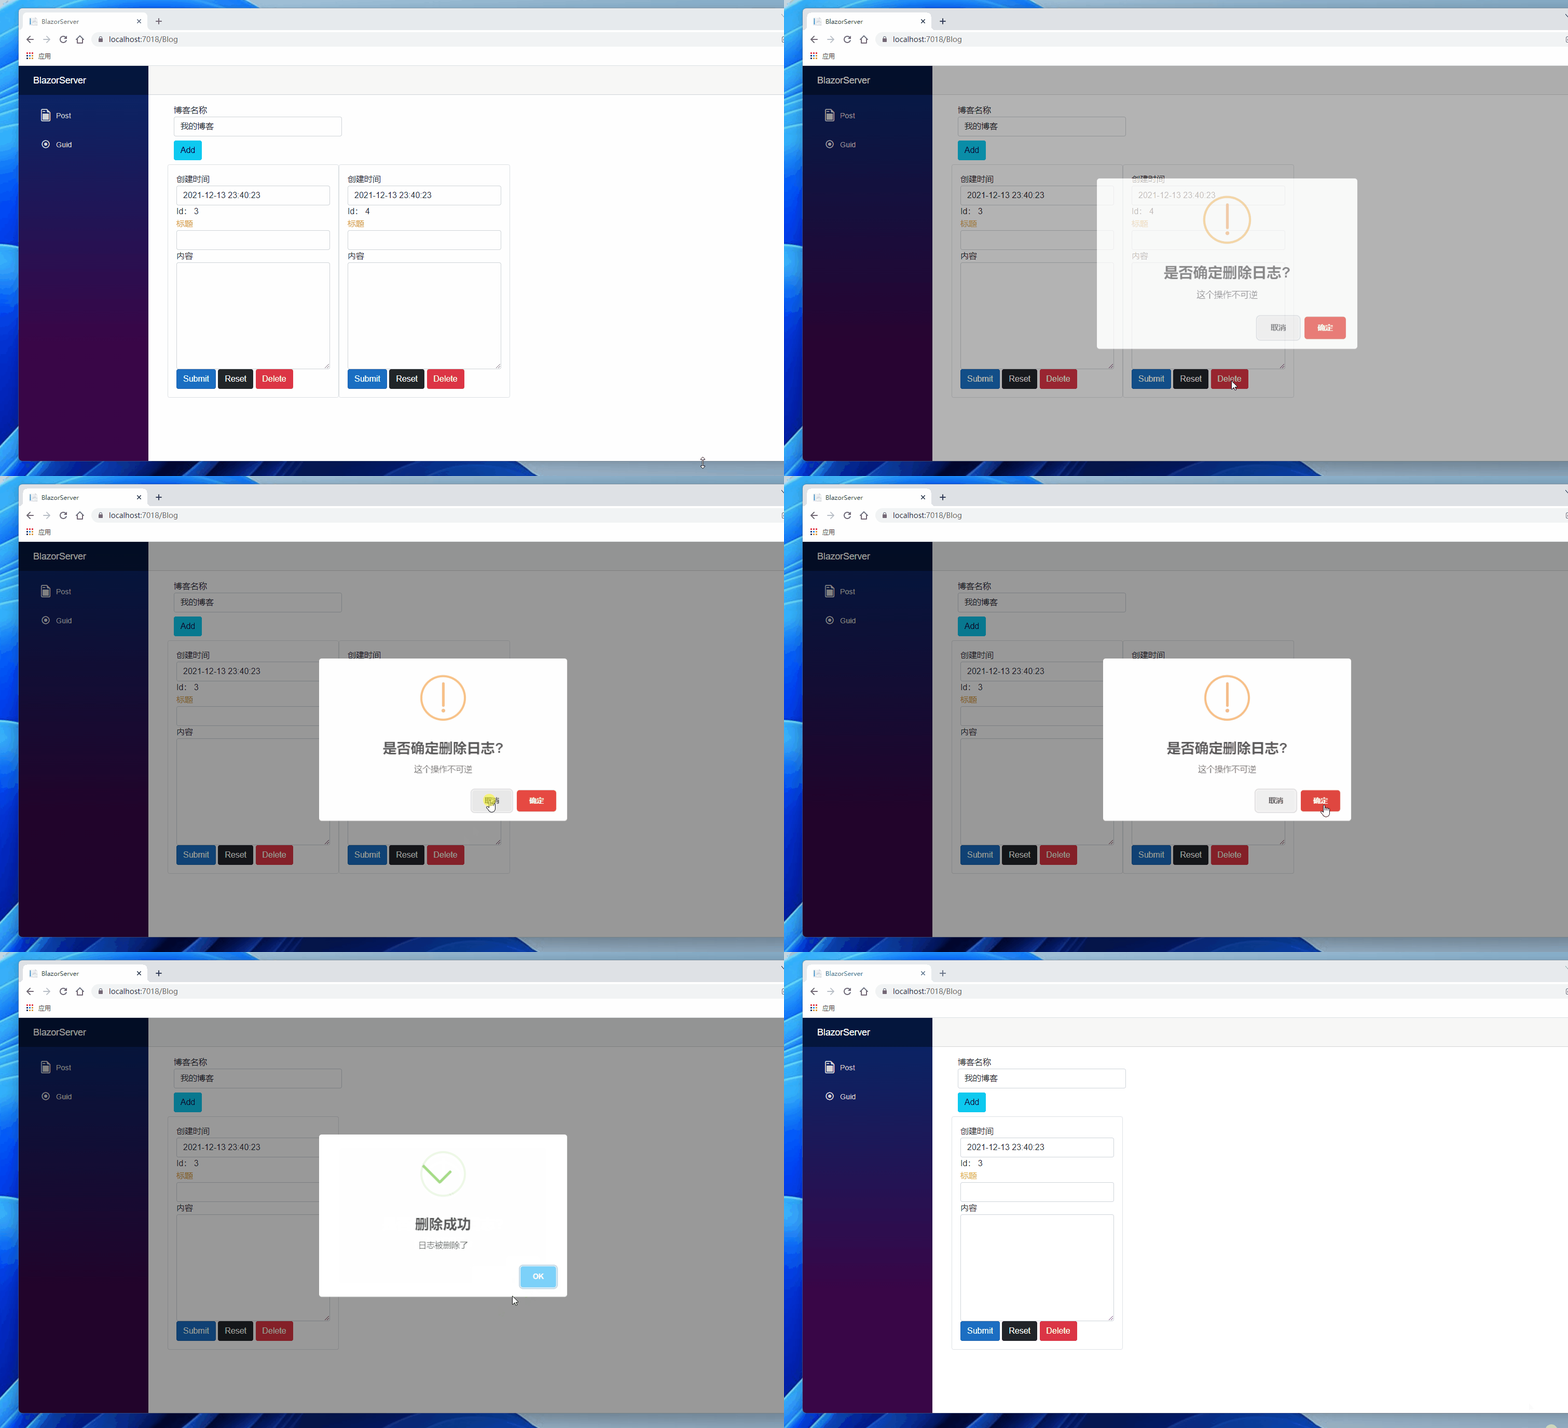
Finally, here's a GIF of the effect from this article. That wraps it up:

References:
- Blazor JavaScript interoperability (JS interop)
- Call JavaScript functions from .NET methods in ASP.NET Core Blazor
- HANDLING BUTTONS (CONFIRM, DENY, CANCEL)
- Day 20:JavaScript interop
- JavaScript Promise 全介绍
- Support ObservableLike #1982
- Blazor - Making a Promise in JS - SweetAlert2 Confirmation Dialog
- SweetAlert - upgrading-from-1x
Note: The code in this article has been refactored using .NET 6 + Visual Studio 2022, with SweetAlert version 2.0. There are significant differences from the original. You can compare the original link with the refactored code to study further. Thank you for reading.