

在大部分的网站中,上传图片也是很重要的功能,今天我们就来操作下。
(注:这是用 Blazor Server 的方式,但最好不要上传太多文件,所以限制上传 4 张照片的话就会提示,毕竟这些事都是在服务器上做,负担太大,微软也建议用.NET Core Web API 的方式操作)
我们先建立一个 Component FileUpload。
下面代码为FileUpload.razor,使用 Blazor 提供的 Component <InputFile>,multiple代表可以上传多个文件
@page "/FileUpload"

<div>
    <div>
        <InputFile OnChange="OnChange" multiple></InputFile>
    </div>
    <div>
        <MyButton value="Submit" class="btn btn-primary" type="submit" @onclick="OnSubmit"></MyButton>
    </div>
</div>
@if (ImageList.Count > 0)
{
    <table>
        <tr>
            @foreach (var img in ImageList)
            {
                <td>
                    <img src="@img" width="150" height="150"/>
                </td>
            }
        </tr>
    </table>
}
下面代码为FileUpload.razor.cs,这里用partial class
using BlazorServer.ViewModels;
using Microsoft.AspNetCore.Components;
using Microsoft.AspNetCore.Components.Forms;
using Microsoft.JSInterop;
using System.Text.Json;

namespace BlazorServer.Shared;

public partial class FileUpload
{
	private JsInteropClasses? _jsClass;

	// 取得`<InputFile>`的文件内容
	public IReadOnlyList<IBrowserFile>? ImageFiles;

	public List<string> ImageList = new();
	public string? ImageSrc;
	[Inject] protected IJSRuntime Js { get; set; }

	/// <summary>
	///     用以判断runtime期间在什么环境执行
	/// </summary>
	[Inject]
	protected IWebHostEnvironment? Env { get; set; }

	protected override Task OnInitializedAsync()
	{
		_jsClass = new JsInteropClasses(Js);
		return base.OnInitializedAsync();
	}

	public async Task OnChange(InputFileChangeEventArgs e)
	{
		ImageList = new List<string>();
		const string format = "image/jpeg";

		// 取得文件
		ImageFiles = e.GetMultipleFiles();
		foreach (var file in ImageFiles)
		{
			// 将图片内容转换成指定类型及最大尺寸
			var imageFile = await file.RequestImageFileAsync(format, 1200, 675);

			// 利用Stream读取图片内容
			await using var fileStream = imageFile.OpenReadStream();

			// 将 Stream读取到内存中,如果没有确定要上传不要这么做,以免浪费内存
			await using var memoryStream = new MemoryStream();
			await fileStream.CopyToAsync(memoryStream);
			ImageSrc = $"data:{format};base64,{Convert.ToBase64String(memoryStream.ToArray())}";

			// 以Data URI的方式将图片呈现
			ImageList.Add(ImageSrc);
		}
	}

	public async Task OnSubmit()
	{
		// 将提示信息变成ViewModel
		var sweetConfirm = new SweetConfirmViewModel
		{
			RequestTitle = "是否确定上传图片?",
			ResponseTitle = "上传成功"
		};
		var jsonString = JsonSerializer.Serialize(sweetConfirm);
		var result = await _jsClass!.Confirm(jsonString);
		if (result && ImageFiles != null && ImageFiles.Any())
		{
			long maxFileSize = 1024 * 1024 * 15;

			// 指定图片存储路径
			var folder = $@"{Env!.WebRootPath}\images";
			foreach (var file in ImageFiles)
			{
				// 使用Stream 将文件存储到指定路径
				await using var stream = file.OpenReadStream(maxFileSize);

				//如果文件夹不存在先创建
				Directory.CreateDirectory(folder);

				var path = $@"{Env.WebRootPath}\images\{file.Name}";

				//创建文件
				var fs = File.Create(path);

				// 将图片Stream复制到文件中
				await stream.CopyToAsync(fs);

				// Stream用完记得关闭
				stream.Close();
				fs.Close();
			}
		}
	}
}
为了方便,NavMenu.razor加上路由可跳转这个 Component
<div class="nav-item px-3">
  <NavLink class="nav-link" href="FileUpload" Match="NavLinkMatch.All">
    <span class="bi bi-card-image h4 p-2 mb-0" aria-hidden="true"></span> File
    Upload
  </NavLink>
</div>
建立新的ViewModel 让SweetConfirm可以通用
namespace BlazorServer.ViewModels;

public class SweetConfirmViewModel
{
	public string? ResponseTitle { get; set; }

	public string? ResponseText { get; set; }

	public string? RequestTitle { get; set; }

	public string? RequestText { get; set; }
}
再把_Layout.cshtml的SweetConfirm修改一下
function SweetConfirm(jsonString) {
    // 这里要parse才能正常传回来
    var arg = JSON.parse(jsonString);
    return new Promise((resolve) => {
        swal({
            title: arg.RequestTitle,
            text: arg.RequestText,
            icon: "warning",
            buttons: ["取消", "确定"],
            dangerMode: true
        }).then((willDelete) => {
            resolve(willDelete);
            if (willDelete) {
                swal(arg.ResponseTitle, arg.ResponseText, "success");
            }
        });

    });
}
既然这边改了,PostBase.razor.cs的DeletePost也要修改
protected async Task DeletePost()
{
    // 改成ViewModel
    var sweetConfirm = new SweetConfirmViewModel
    {
        RequestTitle = $"是否确定删除日志 {Post!.Title}?",
        RequestText = "这个操作不可恢复",
        ResponseTitle = "删除成功",
        ResponseText = "日志被删除了"
    };
    var jsonString = JsonSerializer.Serialize(sweetConfirm);
    var result = await _jsClass.Confirm(jsonString);
    if (result)
    {
        var deleted = await PostRepository!.DeletePost(Post.Id);
        if (deleted.IsSuccess)
            await GetPostId.InvokeAsync(Post!.Id);
        else
            await _jsClass.Alert(deleted.Message!);
    }
}
JsInteropClasses.cs的Confirm()改成 JSON 字串
public async ValueTask<bool> Confirm(string jsonString)
{
    var confirm = await _js.InvokeAsync<object?>("SweetConfirm", jsonString);
    if (confirm == null)
        return false;
    return bool.TryParse(confirm.ToString(), out var result) && result;
}
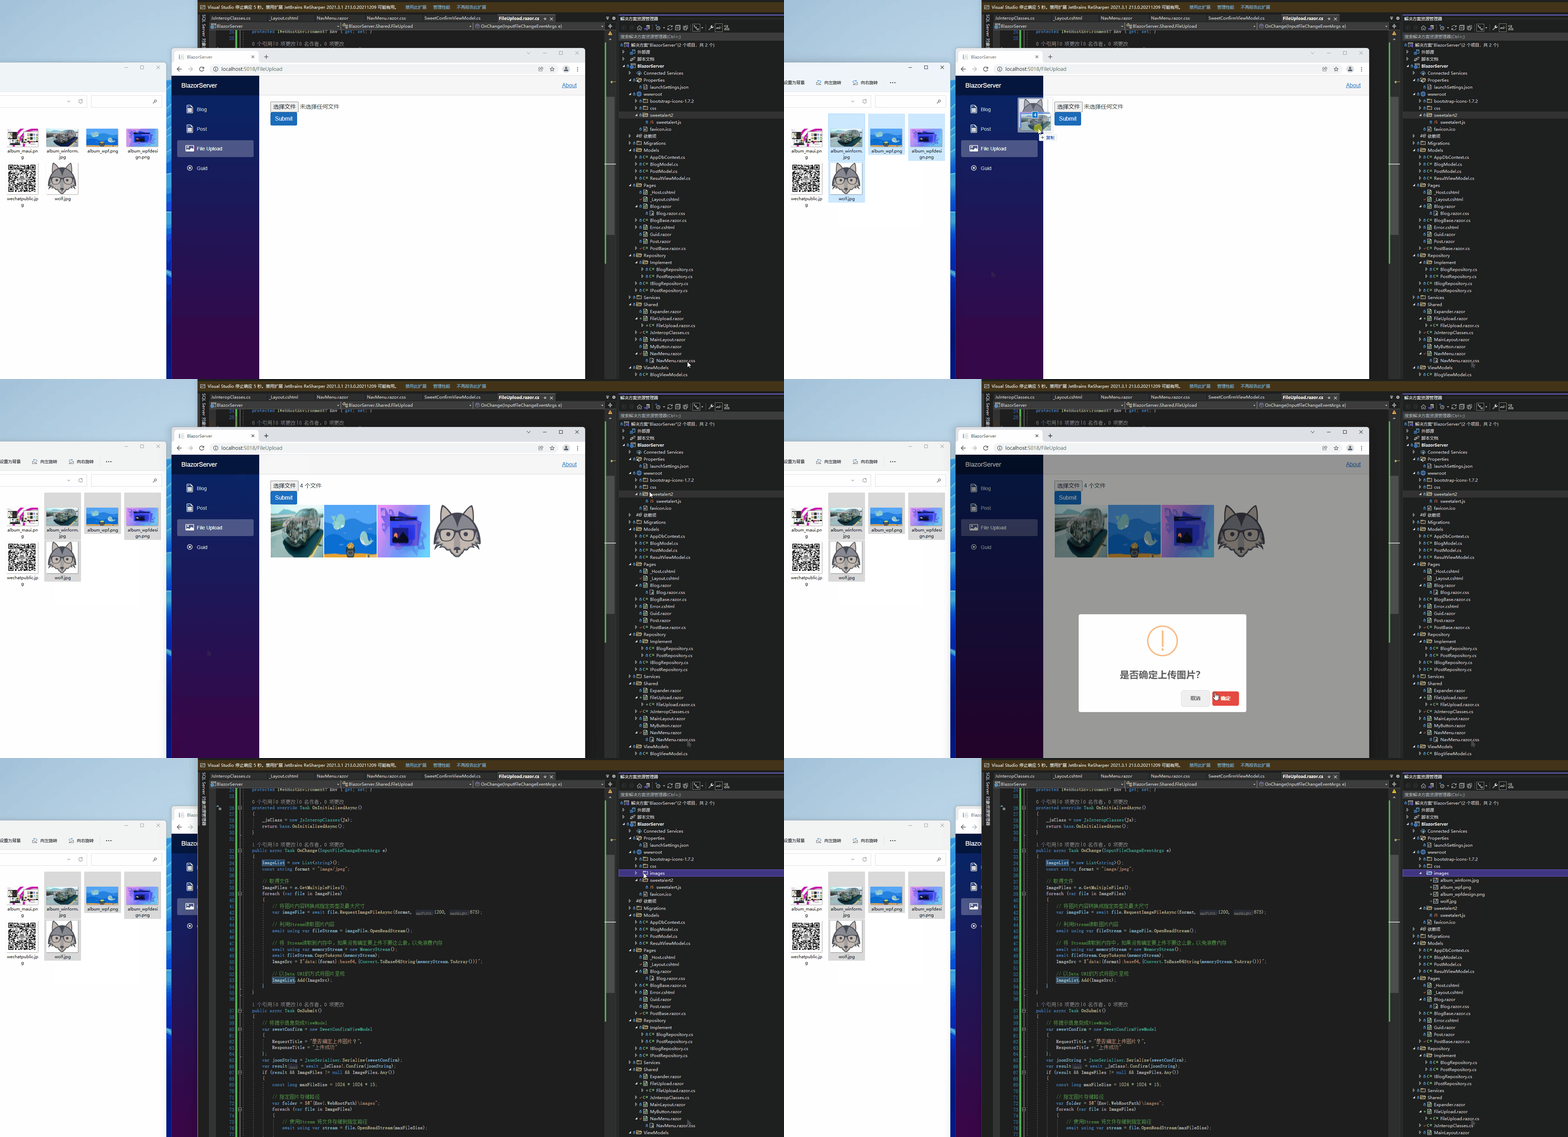
可以看到图片上传成功了
引用:
- ASP.NET Core Blazor file uploads
- Upload Files Using InputFile Component In Blazor
- What scope does a using statement have without curly braces
- BrowserFileExtensions.RequestImageFileAsync(IBrowserFile, String, Int32, Int32) 方法
- Day 26:Blazor WebAssembly 上传文件
注:本文代码通过 .NET 6 + Visual Studio 2022 重构,可点击原文链接与重构后代码比较学习,谢谢阅读,支持原作者