Using TTF Icon Fonts in WPF

Using TTF Icon Fonts in WPF

Packaging vector graphics into font form, the usage is the same as using fonts, allowing free setting of icon size and color. Compared to traditional images, the advantages are obvious:

Last updated 12/20/2021 12:21 AM
丑萌气质狗
6 min read
Category
WPF
Tags
.NET WPF

What Are Icon Fonts

Packaging vector graphics into a font format lets you use them just like regular fonts—freely setting size and color. Compared to traditional images, the advantages are obvious:

  1. Small size, fast loading, high performance
  2. Vector-based (freely scalable without distortion)
  3. Flexibility (change color via code)

But because they behave like fonts, there are drawbacks:

  1. Hard to retrofit existing designs; heavy replacement work
  2. Hard to match designers' mockups exactly; coordination/communication costs are higher

Commonly Used Icon Fonts

First recommendation: Alibaba Vector Icon Library. It offers many options and complete icon sets. Try them out. Previously only login was required, but now it seems you also need to verify your phone number—kinda annoying.

Next: Font Awesome. It has old and new versions (V5 or Pro). The old version is free but has fewer icons.

Microsoft provides two sets: one for Windows 10 – Segoe MDL2 Assets, and one for Windows 11 – Segoe Fluent Icons.

Google has an open-source set called Material Design Icons. It used to be downloadable locally, but seems gone now: Material Design Icons by Google.

I won't list the rest—there are many icon fonts out there. Go search for yourself!

How to Use Icon Fonts in WPF

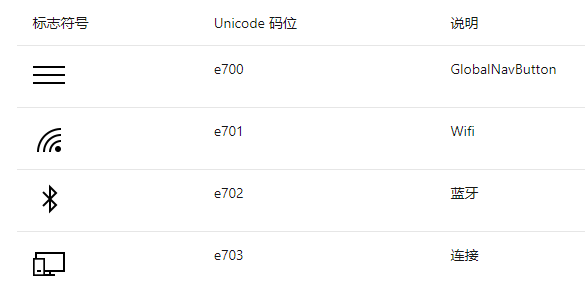
This example uses Microsoft's Segoe MDL2 Assets. Below is a partial preview from the website showing the icon fonts. You can see a Unicode codepoint—this identifies the current glyph, and we'll need it later to display the font.

font preview

Usage in Windows 10

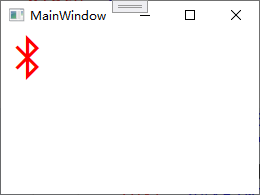
This icon font is built into Windows 10, so you can just set the FontFamily property to Segoe MDL2 Assets:

<TextBlock
  FontFamily="Segoe MDL2 Assets"
  FontSize="50"
  Foreground="Red"
  Text="&#xE702;"
/>

The Text is formed from the Unicode codepoint shown in the description. You need to prefix with &#x and suffix with a semicolon ;. The full form is "&#xE702;".

Reference a Font File Directly

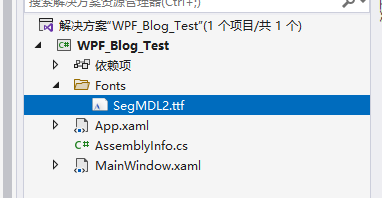
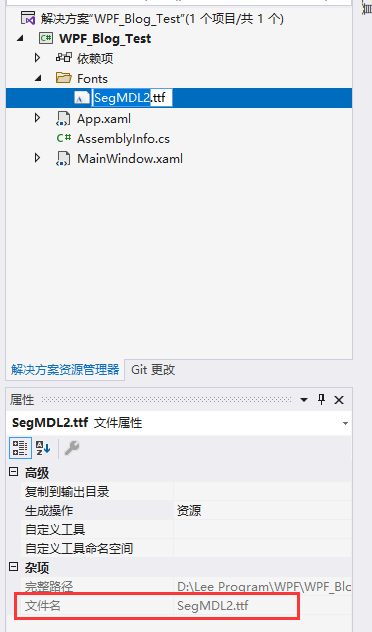
However, that approach only works on Windows 10. On other systems it won't display, so we download the Segoe MDL2 Assets font, extract SegMDL2.ttf, and copy it into our project. For easier management, I put it in a new Fonts folder:

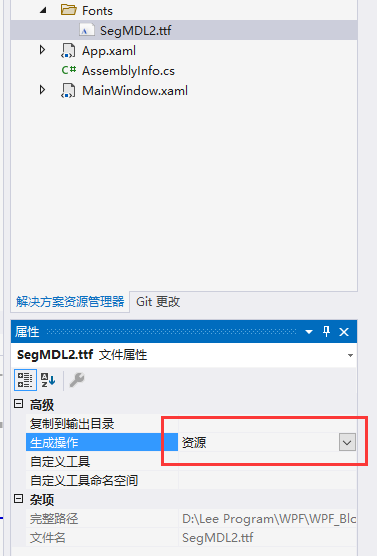
Then select SegMDL2.ttf and, in the property panel below, change Build Action to Resource. This includes the file as a resource in our WPF program:

Using the icon font is the same as before, but because it's added as an external font to the WPF program, the FontFamily value needs a specific format: pack://application:,,,/project_namespace;component/font_path/font_filename#font_actual_name. Let's break it down (This rule can also be used when referencing custom resource files later, but the #font_name part is not needed in that case; see details below):

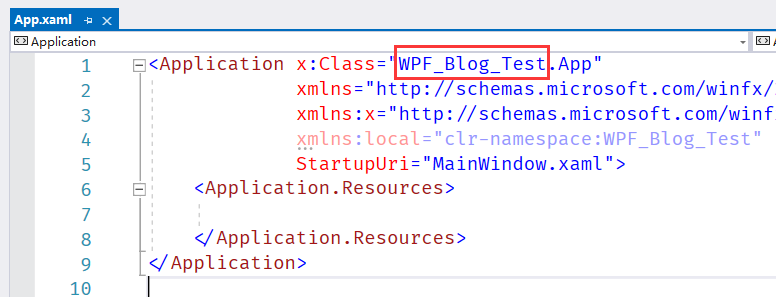
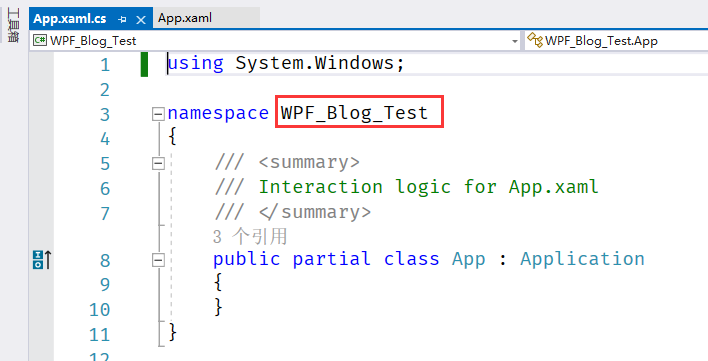
project_namespace: If you haven't changed the project namespace, it's the project name. My project is called WPF_Blog_Test, so that's the namespace. If you're unsure, open a XAML file like App.xaml and look at the x:Class attribute or the code-behind namespace:

font_path/filename: The font file is in the Fonts folder, so my path and filename are Fonts/SegMDL2.ttf. A small note: use the filename shown in the properties:

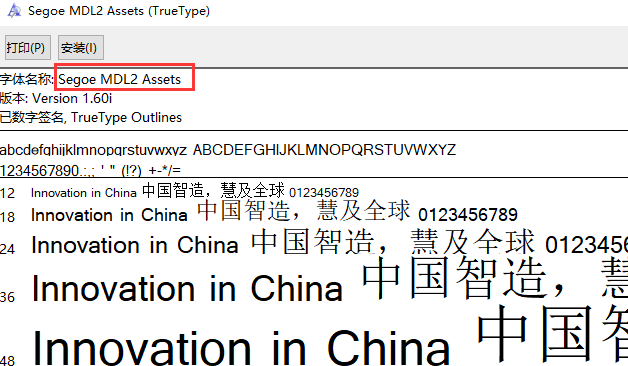
font_actual_name: Double-click the font file (not in VS—that shows bytecode; open it from Windows File Explorer) to see the actual name. For SegMDL2.ttf, the actual name is Segoe MDL2 Assets:

So the FontFamily should be: pack://application:,,,/WPF_Blog_Test;component/Fonts/SegMDL2.ttf#Segoe MDL2 Assets. Here's the code:

<TextBlock
  FontFamily="pack://application:,,,/WPF_Blog_Test;component/Fonts/SegMDL2.ttf#Segoe MDL2 Assets"
  FontSize="50"
  Foreground="Red"
  Text="&#xE702;"
/>

PS: To avoid writing this long FontFamily every time, consider defining a resource or a TextBlock style. (If you already know about resource definitions, you can skip the next section.)

Custom Resource

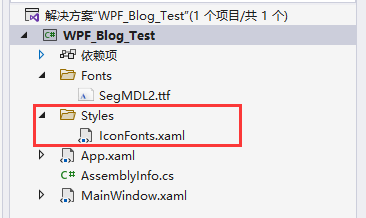
Create a new folder Styles, and inside it create a resource dictionary file IconFonts (right-click Styles, choose Add Resource Dictionary). For demonstration, I'll put both approaches in the same IconFonts file:

Write our custom styles (code below the image):

<FontFamily x:Key="SegIconFont">
  pack://application:,,,/WPF_Blog_Test;component/Fonts/SegMDL2.ttf#Segoe MDL2
  Assets
</FontFamily>

<Style x:Key="tbSegIconFontKey" TargetType="{x:Type TextBlock}">
  <Setter Property="FontFamily" Value="pack://application:,,,/WPF_Blog_Test;component/Fonts/SegMDL2.ttf#Segoe MDL2 Assets" />
  <Setter Property="Foreground" Value="Red" />
  <Setter Property="FontSize" Value="50" />
</Style>

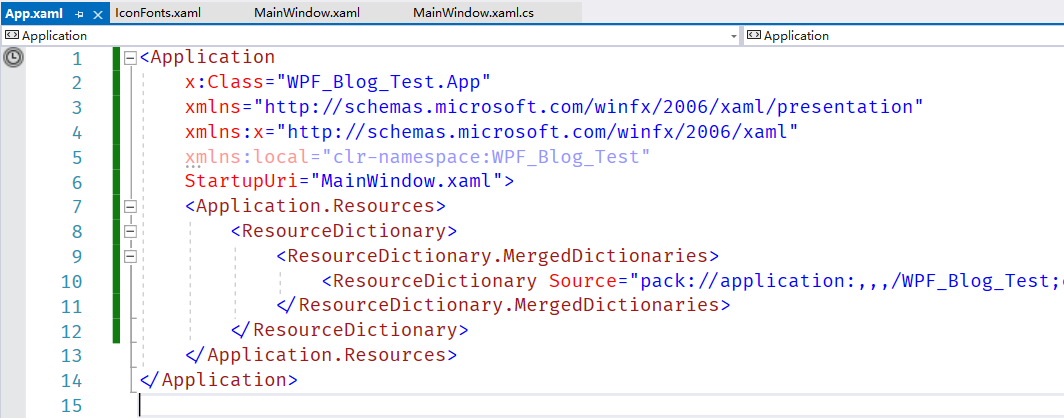
Now we have a resource dictionary named IconFonts, but it still needs to be merged into the application so it can be used in views. Open App.xaml and add a reference: <ResourceDictionary Source="pack://application:,,,/WPF_Blog_Test;component/Styles/IconFonts.xaml" />. The namespace and resource path rules are the same as above. Here's a screenshot of App.xaml:

Now use it in your program:

<!--  Most direct way  -->
<TextBlock
  FontFamily="pack://application:,,,/WPF_Blog_Test;component/Fonts/SegMDL2.ttf#Segoe MDL2 Assets"
  FontSize="50"
  Foreground="Red"
  Text="&#xE702;"
/>

<!--  Using FontFamily resource  -->
<TextBlock
  FontFamily="{StaticResource SegIconFont}"
  FontSize="50"
  Foreground="Red"
  Text="&#xE702;"
/>

<!--  Using TextBlock Style  -->
<TextBlock
  FontSize="50"
  Foreground="Red"
  Style="{StaticResource tbSegIconFontKey}"
  Text="&#xE702;"
/>

I didn't expect to take so many screenshots. Hopefully the logic is clear. Thanks for reading!

This article is from the blog garden, author: Ugly气质狗, original link: https://www.cnblogs.com/choumengqizhigou/p/15550133.html

Please indicate the source. QQ Group: 560611514

Keep Exploring

Related Reading

More Articles
Same category / Same tag 9/13/2025

Migration Series from WPF to Avalonia: Why I Must Migrate My WPF Application to Avalonia

In the past few years, our host computer software has mainly been developed using WPF and WinForm . These technologies work well on the Windows platform and have accompanied us from small-scale trial production to the current stage of large-scale delivery. However, with business development and changes in customer requirements, the single Windows technology stack has gradually become a hurdle we must overcome.

Continue Reading
Same category / Same tag 1/26/2025

Implementing Internationalization in WPF Using Custom XML Files

This article details the method of implementing internationalization in WPF applications using custom XML files, including installing the necessary NuGet packages, dynamically retrieving the language list, dynamically switching languages, using translated strings in code and XAML interfaces, and provides a source code link to help developers easily achieve internationalization in WPF applications.

Continue Reading