
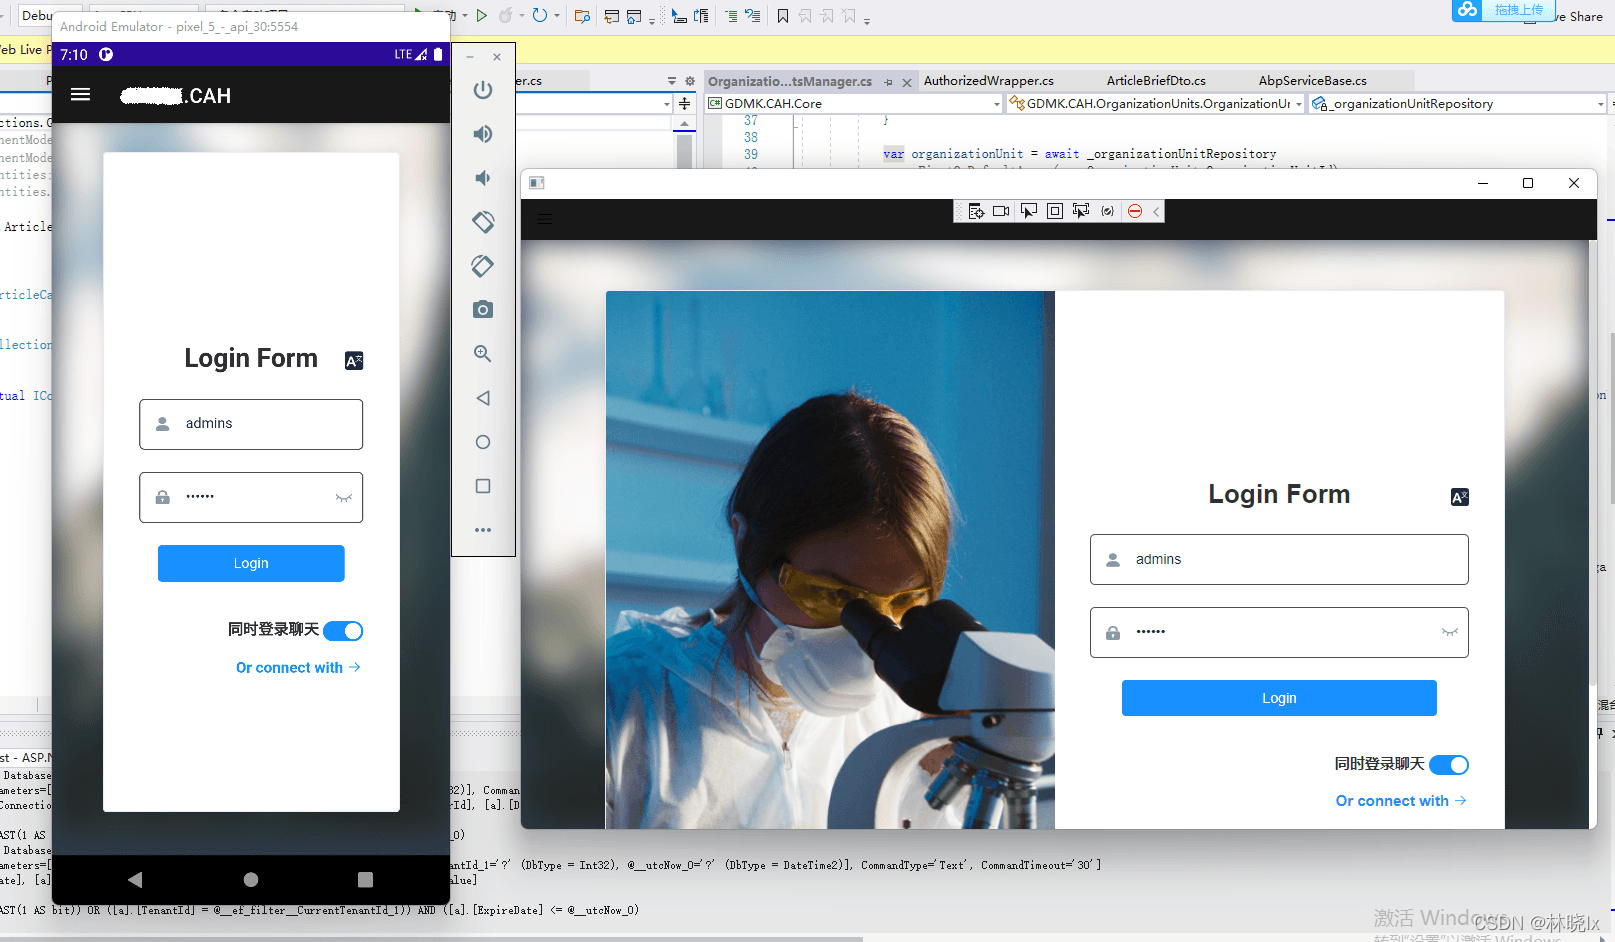
在 MAUI 微软的官方方案是使用 Blazor 开发,但是当前市场大多数的 Web 项目使用 Vue,React 等技术构建,如果我们没法绕过已经积累的技术,用 Blazor 重写整个项目并不现实。
Vue 是当前流行的 web 框架, 简单来说是一套模板引擎,利用“模板”和“绑定”两大特性实现 web 页面 mvvm 模式开发。利用.NET MAUI 框架可以将 Vue 应用嵌入到 Web 容器中。可以实现跨平台的混合开发。
例如我在某医疗行业项目中,已经用这个混合开发的方式生成应用,Vue 代码不需要做什么改动,就能跨平台运行:
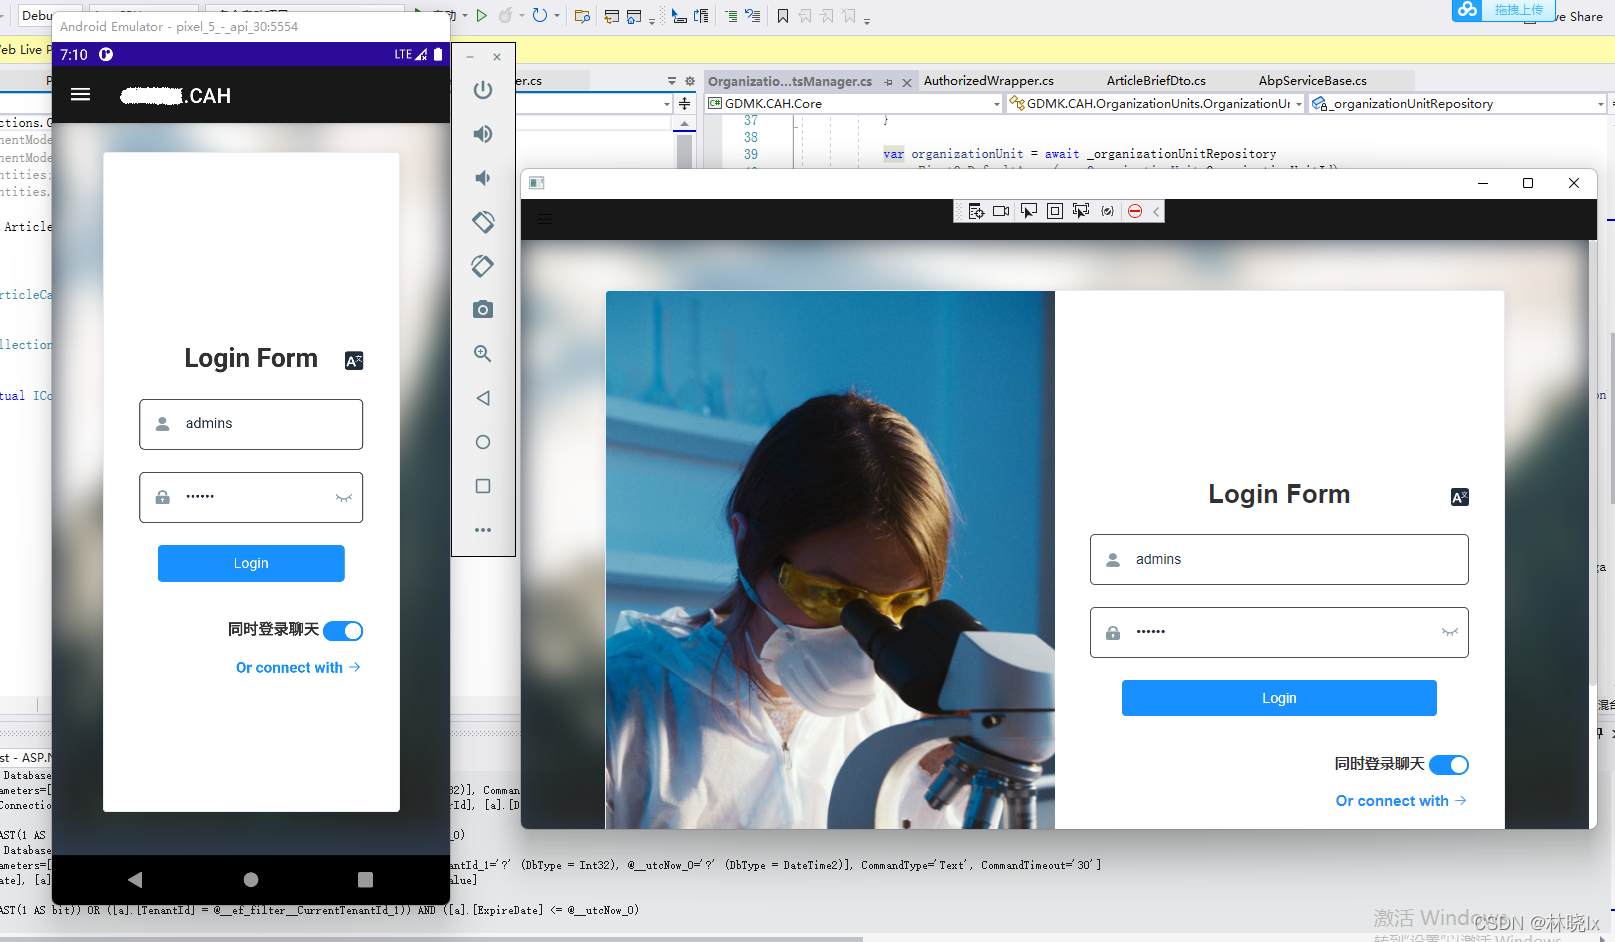
如果你有一套 Vue 开发的网站,可以根据这篇文章,尝试移值进你的 iPhone,Android 以及平板电脑等移动设备。
混合开发的核心工作是构建 Web 与.net 的互操作,我们将利用 Blazor 引擎的如下功能:
- 资源的统一管理
- js 代码的注入
- js 调用 C#代码
- C#调用 js 代码
如果你还不了解混合开发的概念,请回看上一章节[MAUI] 混合开发概念_jevonsflash 的专栏-CSDN 博客
整个工作分为 MAUI 部分,Vue 部分和混合改造。
MAUI 部分
创建 Maui App 项目:
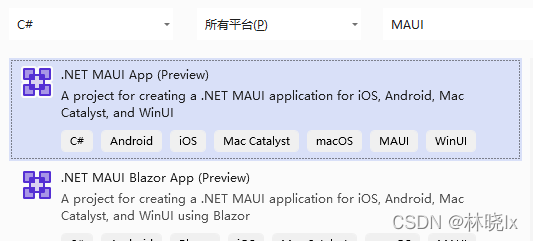
你也可以创建 Maui Blazor App 项目,命名为 MatoProject,但是这个模板主要围绕 Blazor 开发,有的功能我们并不需要,得删很多文件。
创建完成后编辑 MatoProject.csproj,在 Sdk 最末尾加上.Razor,VS 会自动安装 Microsoft.AspNetCore.Components.WebView.Maui 依赖包(注意不要手动 NuGet 添加这个包,否则程序无法运行)

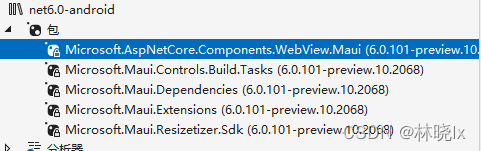
安装完成后在项目目录中创建一个 wwwroot 文件夹
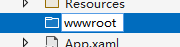
这个文件夹将是混合开发 Web 部分的根目录,这个名称不能随便定义,我们看看为什么:
打开 Microsoft.AspNetCore.Components.WebView.Maui.targets 这个文件:
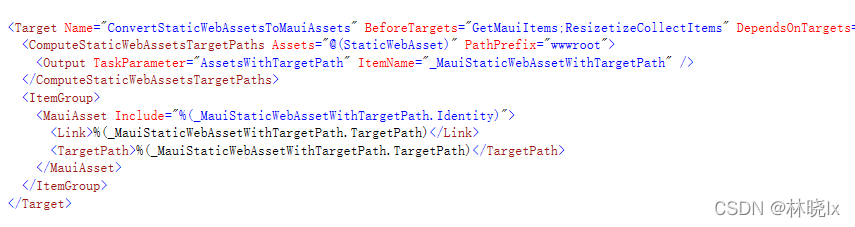
我们可以看到构建项目时,这个库会将 wwwroot 文件夹里的内容作为 Maui 资源(MauiAsset)类型设置标签,编译器则会根据 MauiAsset 标签将这些内容打包进各个平台的资源文件夹,具体的 Maui 资源类型可以参考这个文章.NET MAUI – Manage App Resources – Developer Thoughts (egvijayanand.in) ,
打开 MauiProgram.cs 在 builder 中注册 BlazorMauiWebView 组件,在服务中使用扩展方法 AddBlazorWebView()来添加相关 Blazor 的服务
using Microsoft.Maui;
using Microsoft.Maui.Hosting;
using Microsoft.Maui.Controls.Compatibility;
using Microsoft.Maui.Controls.Hosting;
using Microsoft.AspNetCore.Components.WebView.Maui;
using Microsoft.Extensions.DependencyInjection;

namespace MatoProject
{
	public static class MauiProgram
	{
		public static MauiApp CreateMauiApp()
		{
			var builder = MauiApp.CreateBuilder();
			builder
				.RegisterBlazorMauiWebView()
				.UseMauiApp<App>()
				.ConfigureFonts(fonts =>
				{
					fonts.AddFont("OpenSans-Regular.ttf", "OpenSansRegular");
				});
			builder.Services.AddBlazorWebView();
			return builder.Build();
		}
	}
}
打开 MainPage.xaml,编辑原生应用的主页面:
建立 BlazorWebView 控件铺满屏幕,并设置 HostPage 为 Web 部分的主页 index.html
<ContentPage xmlns="http://schemas.microsoft.com/dotnet/2021/maui"
             xmlns:x="http://schemas.microsoft.com/winfx/2009/xaml"
             x:Class="MatoProject.MainPage"
             xmlns:b="clr-namespace:Microsoft.AspNetCore.Components.WebView.Maui;assembly=Microsoft.AspNetCore.Components.WebView.Maui"
             BackgroundColor="{DynamicResource SecondaryColor}">

    <Grid>
        <b:BlazorWebView HostPage="wwwroot/index.html">
            <b:BlazorWebView.RootComponents>
                <b:RootComponent Selector="#blazorapp" x:Name="MainWebView" ComponentType="{x:Type local:Index}/>
            </b:BlazorWebView.RootComponents>
        </b:BlazorWebView>
    </Grid>
</ContentPage>
建立_import.razor
@using System.Net.Http @using Microsoft.AspNetCore.Components.Forms @using
Microsoft.AspNetCore.Components.Routing @using
Microsoft.AspNetCore.Components.Web @using
Microsoft.AspNetCore.Components.Web.Virtualization @using Microsoft.JSInterop
@using MatoProject
Vue 部分
至此我们建立好了原生开发的 Web 容器,接下来需要处理 Vue 项目了:
cd 到项目目录,使用 vue-cli 创建一个空白 Vue 项目:
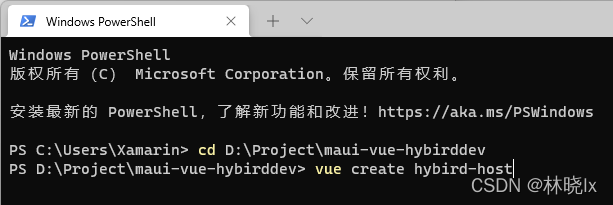
这里可以按照 Vue 的编程喜好建立,比如我选择了 2.0 项目,支持 Typescript,es6 的 class 命名方式等,最终都要通过 webpack 打包成静态资源,所以无所谓。
建立 src/api/fooService.ts,创建如下的函数:
window['DotNet']对象将是 MAUI Blazor 中注入的交互操作对象
export async function GetAll(data) {
  var result = null;
  await window["DotNet"]
    .invokeMethodAsync("MatoProject", "GetFoo")
    .then((data) => {
      console.log("DotNet method return the value:" + data);
      result = data;
    });
  return result;
}

export async function Add(data) {
  var result = null;
  await window["DotNet"]
    .invokeMethodAsync("MatoProject", "Add", data)
    .then((data) => {
      console.log("DotNet method return the value:" + data);
      result = data;
    });
  return result;
}
打开 Home.vue 编辑:
这是 Web 的主页面,我们需要三个按钮以及相关函数,测试 js 与 C#的交互操作。
<template>
  <div class="home">
    <img alt="Vue logo" src="../assets/logo.png" />
    <div>
      <h3>foo:</h3>
      <button @click="getFoo">click to get foo</button>
      <br />
      <span>{{ foo }}</span>
    </div>
    <div>
      <h3>bar:</h3>
      <span>{{ bar }}</span>
    </div>
    <div>
      <button @click="add">click here to add</button>
      <span>click count:{{ cnt }}</span>
    </div>
  </div>
</template>
<script lang="ts">
import { Component, Vue } from "vue-property-decorator";
import HelloWorld from "@/components/HelloWorld.vue"; // @ is an alias to /src
import { GetAll, Add } from "@/api/fooService";

@Component({
  components: {
    HelloWorld,
  },
})
export default class Home extends Vue {
  foo: string = "";
  bar: string = "";
  cnt: number = 0;

  async created() {
    window["postBar"] = this.postBar;
  }
  async add() {
    this.cnt = await Add({ a: this.cnt, b: 1 });
  }

  async getFoo() {
    var foo = await GetAll(null);
    this.foo = foo;
  }

  async postBar(data) {
    this.bar = data;
    console.log("DotNet invocked the function with param:" + data);
    return this.bar;
  }
}
</script>
到此已经完成了一个简单的 Vue 项目
运行打包命令:
PS D:\Project\maui-vue-hybirddev\hybird-host> yarn build
将 dist 目录中的所有内容复制到 wwwroot 文件夹下。
混合改造
这是混合开发的重点,改造 MAUI 项目,以适配 Vue
打开 wwwroot/index.js 重写为:
<!DOCTYPE html>
<html lang="">
  <head>
    <meta charset="utf-8" />
    <meta http-equiv="X-UA-Compatible" content="IE=edge" />
    <meta name="viewport" content="width=device-width,initial-scale=1" />
    <link rel="icon" href="favicon.ico" />
    <title>hybird-host</title>
    <link href="js/about.dc8b0f2b.js" rel="prefetch" />
    <link href="css/app.03043124.css" rel="preload" as="style" />
    <link
      href="js/app.b6b5425b.js"
      rel="preload"
      as="script"
      crossorigin="anonymous"
    />
    <link
      href="js/chunk-vendors.cf6d8f84.js"
      rel="preload"
      as="script"
      crossorigin="anonymous"
    />
    <link href="css/app.03043124.css" rel="stylesheet" />
  </head>
  <body>
    <div id="blazorapp">Loading...</div>
    <script src="_framework/blazor.webview.js" autostart="false"></script>
  </body>
</html>
注意,仅全部重写 body 部分,不要更改 head 的 link 标签内容,仅在 js 后面加上 crossorigin="anonymous" 以解决跨域问题。
建立 Index.razor 文件:
@using Microsoft.Maui.Controls @inject IJSRuntime JSRuntime @implements
IDisposable
<noscript
  ><strong
    >We're sorry but CareAtHome doesn't work properly without JavaScript
    enabled. Please enable it to continue.</strong
  ></noscript
>
<div id="app"></div>
@code { [JSInvokable] public static Task<string>
  GetFoo() { return Task.FromResult("this is foo call C# method from js"); }
  [JSInvokable] public static Task<int>
    Add(AddInput addInput) { return Task.FromResult(addInput.a + addInput.b); }
    public async void Post(object o, EventArgs a) { await
    JSRuntime.InvokeAsync<string
      >("postBar", "this is bar call js method from C#"); } protected override
      async Task OnAfterRenderAsync(bool firstRender) { ((App.Current as
      App).MainPage as MainPage).OnPostBar += this.Post; try { if (firstRender)
      { await JSRuntime.InvokeAsync<IJSObjectReference
        >("import", "./js/chunk-vendors.cf6d8f84.js", new { crossorigin =
        "anonymous" }); await JSRuntime.InvokeAsync<IJSObjectReference
          >("import", "./js/app.b6b5425b.js", new { crossorigin = "anonymous"
          }); } } catch (Exception ex) { Console.WriteLine(ex); } } public void
          Dispose() { (Application.Current.MainPage as MainPage).OnPostBar -=
          this.Post; } }</IJSObjectReference
        ></IJSObjectReference
      ></string
    ></int
  ></string
>
注意以下这两个语句需要对应打包生成的实际文件名,并且加上跨域标签
await JSRuntime.InvokeAsync<IJSObjectReference>("import", "./js/chunk-vendors.cf6d8f84.js", new { crossorigin = "anonymous" });
await JSRuntime.InvokeAsync<IJSObjectReference>("import", "./js/app.b6b5425b.js", new { crossorigin = "anonymous" });
MainPage.xaml 建立一个按钮并且设置触发事件方法:
<button
  Text="Post Bar To WebView"
  HorizontalOptions="Center"
  VerticalOptions="End"
  HeightRequest="40"
  Clicked="PostBar_Clicked"
></button>
CodeBehind:
using System;
using Microsoft.Maui.Controls;
using Microsoft.Maui.Essentials;

namespace MatoProject
{
	public partial class MainPage : ContentPage
	{
        public event EventHandler<EventArgs> OnPostBar;

		int count = 0;

		public MainPage()
		{
			InitializeComponent();
		}

		private async void PostBar_Clicked(object sender, EventArgs args)
		{
			OnPostBar?.Invoke(this, args);
		}
	}
}
至此,所有的代码工作已经完成,在 PC 上可以选择 Windows 或者 Android 模拟器来运行程序
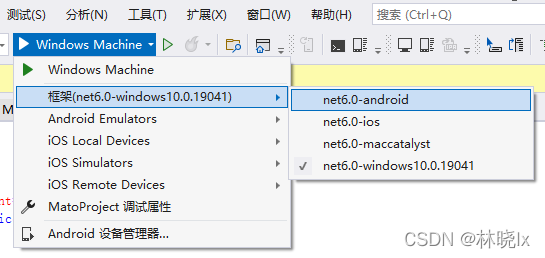
运行效果:
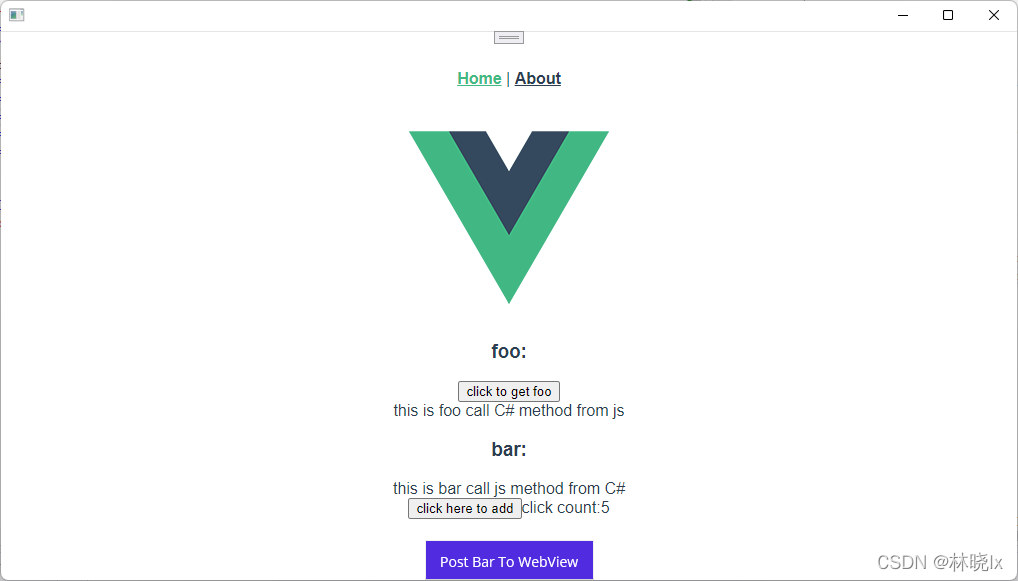
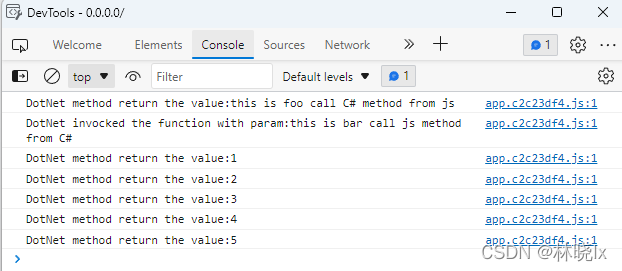
若在 windows 平台上运行,原生控件使用 Edge WebView2 呈现器加载页面, 按 f12 会调用原生的调试工具,在这里看到打印
现在,可能有人会问为什么要使用这样的技术架构?明明可能有更好用的混合开发技术 Ionic,React Native,Uni-app。首先不可否认这些技术都有他们的特点与优势,但当你拥有一个成熟的 Xamarin 框架,你可以轻松迁移到 MAUI,利用 EFCore 实现数据持久化或者集成 Abp 框架来配置依赖注入,全局事件,本地化等移动开发常用的功能(另一篇文章将会教大家如何将 Abp 移值进 MAUI)。Xamarin 是一个设备抽象层,提供的 WebView 也有较好的 H5 兼容性。
当然主要原因还是在快速开发上,你的代码积累才是宝贵的,更少的修改代码量才是王道,如果你在用 React 技术栈编写 Web 代码,也许 React Native 才是你最佳选择 。没有最优的技术,只有最适合你的技术。
代码仓库: