
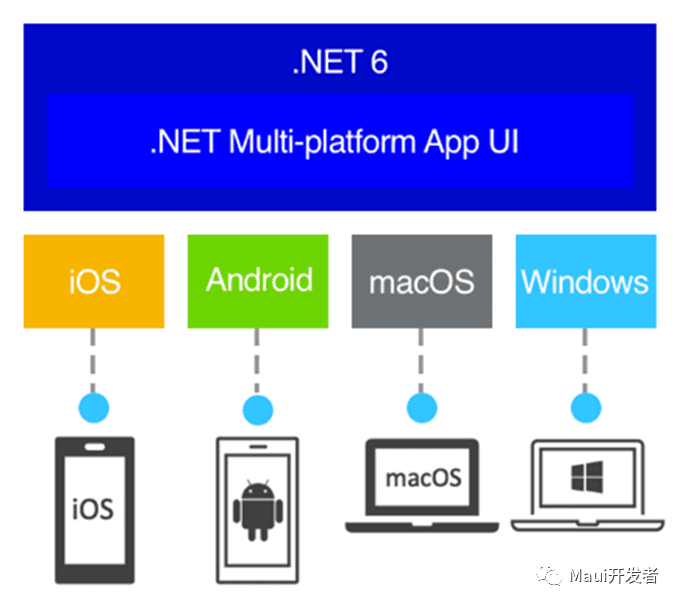
上一篇我们做了 Maui 的基本介绍,理论上这一篇应该会创建第一个 Maui 的应用,以便对此进行详细的评估,并逐步深入。
如果你需要进行 Maui 首个应用的创建,那么欢迎访问.NET MAUI 创建移动应用—Get Start,以及MAUI 与 Blazor 共享一套 UI,媲美 Flutter,实现 Windows、macOS、Android、iOS、Web 通用 UI,本文的重点不是创建 Maui 的应用而是如何更好的配置 Maui 的工程。
解决烦人的“obj”
长久以来都有一个问题深深得困扰着我们,每当 c#程序编译后,总会在项目文件夹下生成“obj”目录,非常刺眼,一旦提交 git 我们需要进行逐个排除(如果项目很多会生不如死)这让人非常恼火。那么我们能不能把他移走?
在完成以下设置之前,请跟我做如下的事情:
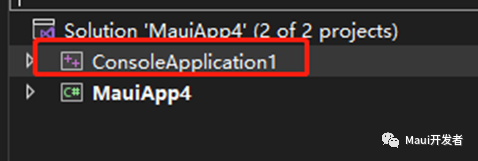
- 创建一个 c工程(我们并非是要进行 c程序开发而是他会对我们后续的学习产生非常积极的作用)
创建一个 xml 文件,把他重命名为Directory.build.props(这个名称随意,只是喜欢这么叫)
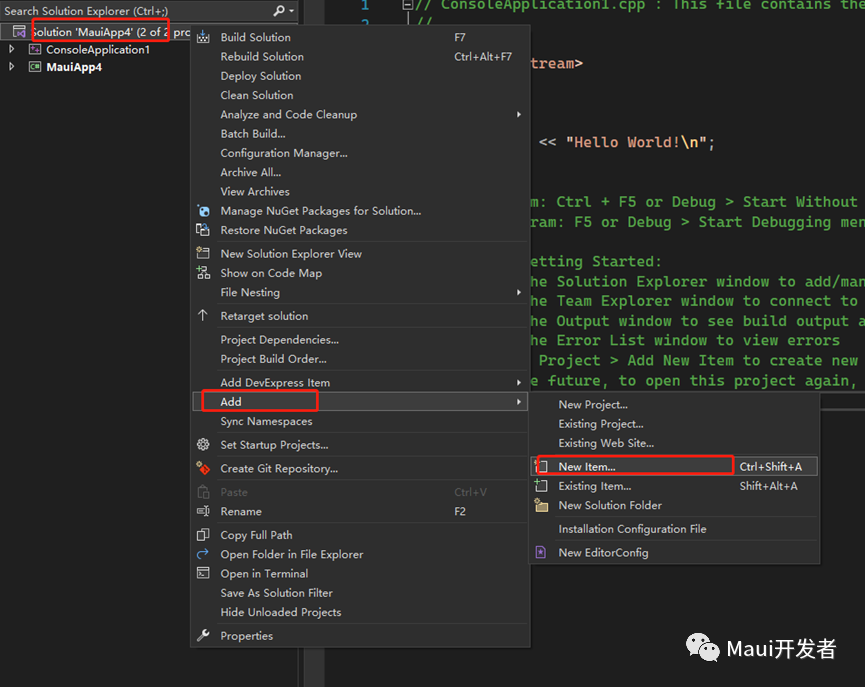

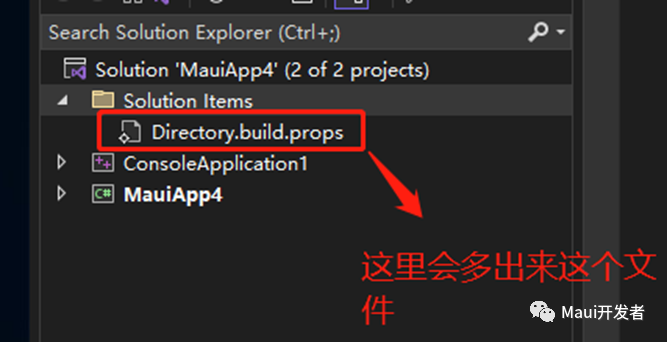
双击Directory.build.props文件打开并编辑,删除 xml 中所有内容,在该文件中添加如下设置
<Project>
 <PropertyGroup>
  <BaseIntermediateOutputPath>$(MSBuildThisFileDirectory).vs\$(SolutionName)\Intermediate\$(MSBuildProjectName)\</BaseIntermediateOutputPath>
 </PropertyGroup>
</Project>
这里我不会介绍BaseIntermediateOutputPath这个设置字段的用意,如果你需要知道请访问:常用的 MSBuild 项目属性 - MSBuild | Microsoft Docs(如果你是用的是 vs2022 for mac,那么很抱歉的告诉你他不支持这个属性,我在官方的 issue 翻阅过这个 bug 早在 vs2019 for mac 就存在,只不过微软视而不见),所以为了避免尴尬的事情发生,我们需要加上一个条件判定,这个条件就是当操作系统是 windows 时这个设置项才生效
 <!--这个属性可以让你跟obj say goodbye-->
 <PropertyGroup Condition="$([MSBuild]::IsOSPlatform('windows'))">
  <BaseIntermediateOutputPath>$(MSBuildThisFileDirectory).vs\$(SolutionName)\Intermediate\$(MSBuildProjectName)\</BaseIntermediateOutputPath>
 </PropertyGroup>
在这里我不得不说微软 vs 团队是真的强大,你只需要安装 vs 就能在不同的平台打开同一份代码,而不需要做其他的编译设置
我们是一家人
当一个解决方案(Solution)存在多个项目时(csproj),我们一定希望所有项目生成的 dll 或者 exe 以及配置文件都统统编译生成到一个固定的地方,通常我们都会手动设置编译生成路径,这个方式极不推荐因为你所做的选择总是一个不可靠的路径(如果这是一个团队合作的项目),我们只需要做如下一点点改变(该设置仍然是在Directory.build.props中进行添加)
<PropertyGroup>
  <!--这个属性可以让你规划统一生成路径-->
  <OutputPath>$(MSBuildThisFileDirectory)Binary\</OutputPath>
 </PropertyGroup>
让他成为全部
我们常常有这样的思考,能不能在一个地方配置,所有工程都能有改变,比如 Nullable 的启用,比如 C#的语言版本等等,那么只需要对Directory.build.props增加如下配置
<PropertyGroup>
  <!--这个属性可以让你规划统一生成路径-->
  <OutputPath>$(MSBuildThisFileDirectory)Binary\</OutputPath>
  <LangVersion>latest</LangVersion>
  <Nullable>enable</Nullable>
  <ImplicitUsings>enable</ImplicitUsings>
</PropertyGroup>
不能没有你
你是否有这样的困惑,当我的解决方案(Solution)下的所有项目(csproj)都需要用到同一个 package 时,我能否只要做一次包的引用行为?接下来请跟我一起操作:
- 创建一个 xml(这已经很熟悉了),将他改名为
Directory.build.targets(我喜欢这个名字)

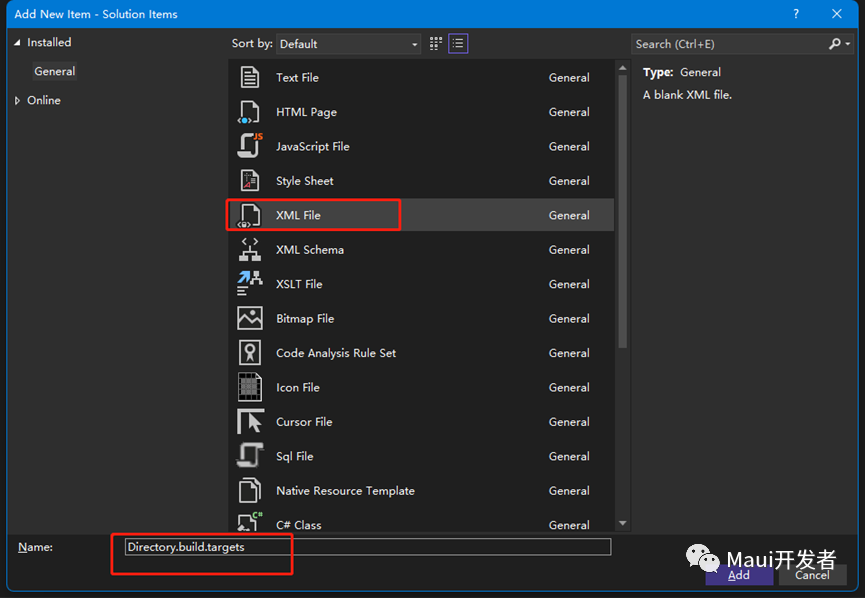
- 将
Directory.build.targets中的内容修改为:
<Project>
 <!--这样的设计可以让你当前解决方案下的所有项目都能获取到package-->
 <ItemGroup>
  <PackageReference Include="Newtonsoft.Json" Version="13.0.1" />
 </ItemGroup>
</Project>
让他变得主动
完成上述设置你已经成为一个解决方案管理高手了,但是这还不够,我们都知道.net6 或者是 c#10 引入了文件级别的命名空间(File-scoped)你只需要写一个 namespace xxx,更少的大括号让你的代码看起来更加简洁,很可惜如果你不做任何改变,那么他永远不会那么主动,你创建的默认 class 他一定长这样:
namespace MauiLib1
{
   internal class Class2
   {
   }
}
请跟我完成以下操作,他会变得更听话:
- 创建一个 editorconfig

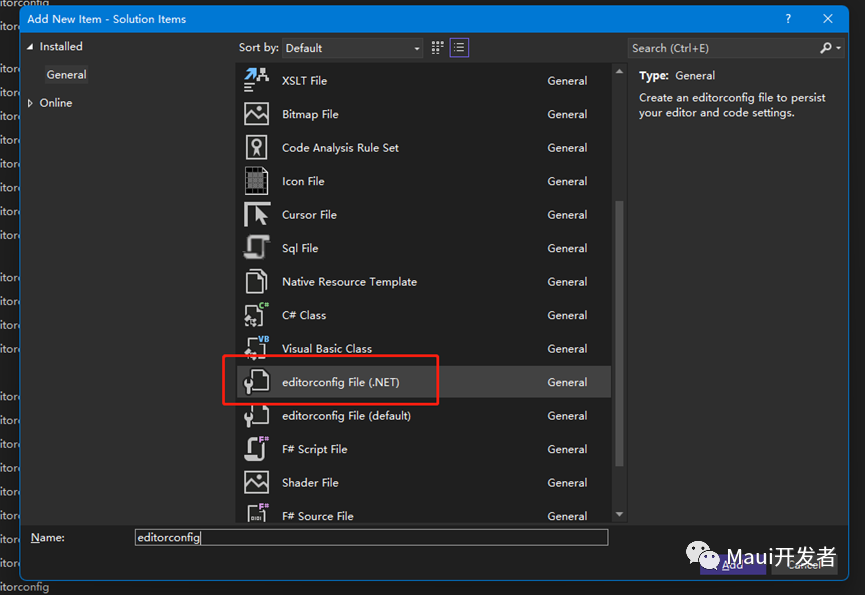
- 双击.editorconfig,开启 File scped 配置(如果你打开的不是设置界面而是直接打开的文本,请不用担心,在下一次重启后再完成后续的设置即可)

至此你就完成了部分高效设置,关闭 vs,重新打开解决方案,上述所有设置才会生效,别忘了删除已经产生的编译垃圾,如以下这些:
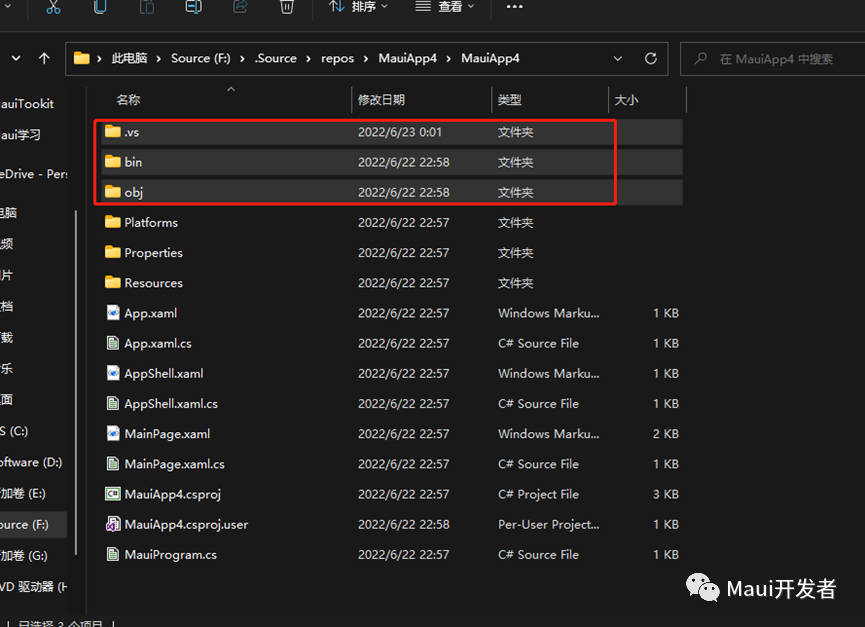
此时你创建的新的 class,他变成了这样:
namespace MauiLib1;
internal class Class3
{
}
重新编译解决方案,你的所有 dll 和 exe 都已经生成到 binary 下面了,每一个 csproj 目录下都相当干净了(注意以上设置对 c工程无效,c工程需要单独配置,这里不做介绍。
别忘了他
完成上述设置,我们刚刚创建的 c工程似乎都没有起到任何作用,没错 c工程只是给你看看的(我就是玩儿你),接下来我们需要探讨的是,这些你是怎么知道的(如图)

其实这些是 vs 的一些内置宏定义,我们在 c#中无法得知为什么有这些宏,此时我们需要用到 c++项目

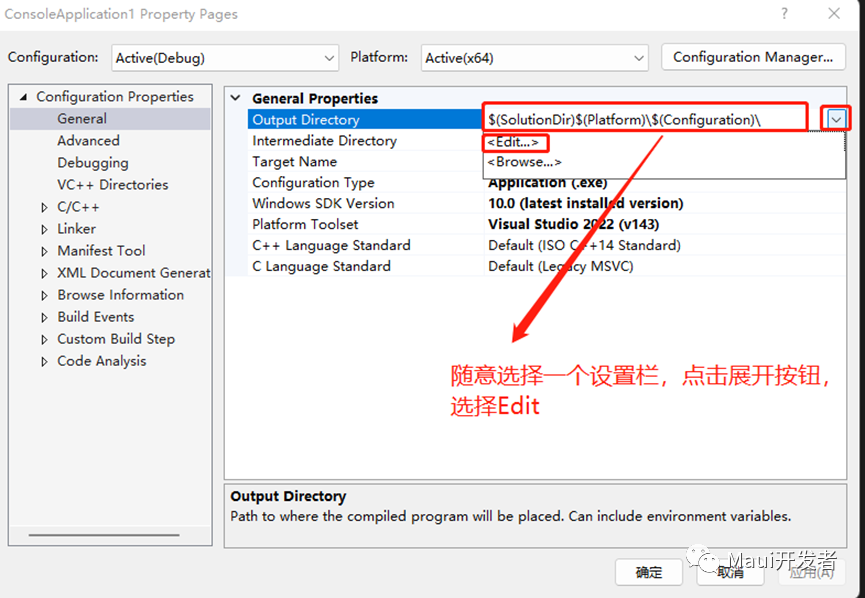

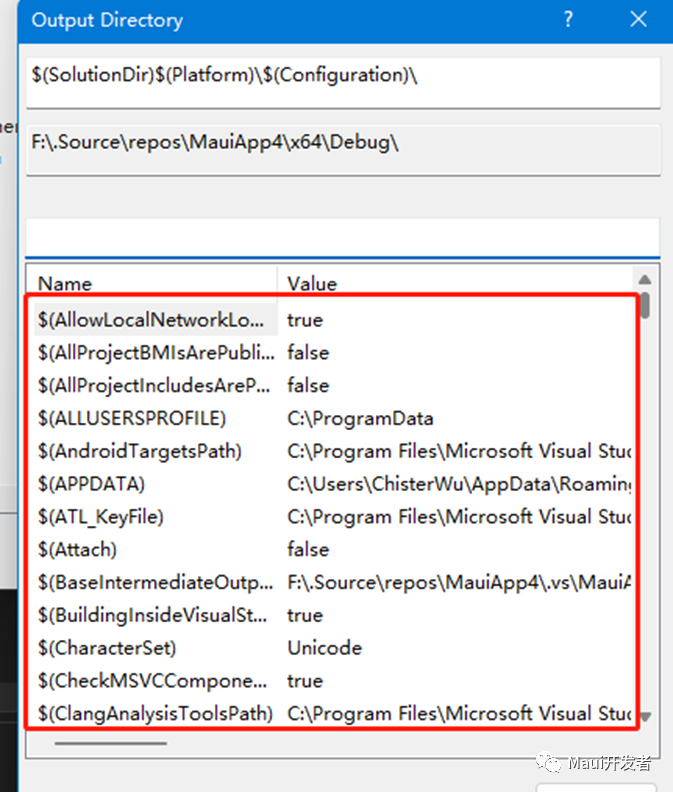
在这里你可以看到这些形形色色的设置字段以及对应宏所显示的值了,这个宏是属于 vs 的,所以 c#工程也有效
给得实在太多了
接下来我们会进行一些 Maui 的深层设置探讨,在 Windows 上,总是默认给我编译出 android 、ios、maccatalyst,太多了我根本不需要,那么可以修改 TargetFrameworks(比如像这样)

注意:一旦修改了这项,也就意味着你再也不能够选择其他平台查看代码是否正确(代码可靠性将得不到保证)(去掉其他平台编译设置最直观的表象就是编译变得异常的快)
让她变得忠诚
当我生成 Window 的应用时,我们要引用一个 Window 平台相关的 package,比如我们很熟悉的 Pinvoke.User32,很明显这个库只适合 Windows 平台,其他平台引用过去虽然不会造成编译错误,但是在打包文件内势必会有这个一个不相关的 dll(也许没有我没测试过,我猜他有),这是我们不希望看到的,所以我们要这样:
<!--这是一个专属于Windows的设定,让他成为Windows忠诚的伴侣-->
<ItemGroup Condition="$(TargetFramework.Contains('-windows'))">
  <!-- Required - WinUI does not yet have buildTransitive for everything -->
  <PackageReference Include="PInvoke.User32" Version="0.7.104" />
</ItemGroup>
他们需要隔离
在编写代码时,我们通常会遇到我的部分代码是适用于 Windows 的而不适用于其他平台,此时你可以使用编译宏命令 #if #elif #else #endif等
public static MauiApp CreateMauiApp()
{
   var builder = MauiApp.CreateBuilder();
   builder
    .UseMauiApp<App>()
    .ConfigureFonts(fonts =>
    {
     fonts.AddFont("OpenSans-Regular.ttf", "OpenSansRegular");
     fonts.AddFont("OpenSans-Semibold.ttf", "OpenSansSemibold");
    });

#if WINDOWS
    string? name = "Windows";
#elif MACCATALYST
    string? name = "Mac";
#else
   string? name = "Mobile";
#endif
   return builder.Build();
}
让他做回自己
我们很期待使用 Maui 编写的 Windows 应用双击 exe 就能够直接运行(这在以前是个奢望),现在你只需要修改两项设置就可以做到(在主程序的工程文件 csproj),增加如下两个配置(使用该配置后就不再支持 anycpu 编译,所以我们做一个条件编译):
<!--这个方案可以让你的Maui在Windows下生成的exe做回自己-->
<PropertyGroup Condition="'$(Platform)' != 'AnyCPU' And $(TargetFramework.Contains('-windows'))">
  <!-- Unpack : SelfContainedDeployment for winui3 -->
  <WindowsPackageType>None</WindowsPackageType>
  <WindowsAppSDKSelfContained>true</WindowsAppSDKSelfContained>
</PropertyGroup>
多编译平台配置
在上一项改动中,因为需要实现 exe 直接运行,增加的设置在 anycpu 编译环境下是完全不支持的,所以你需要配置多平台编译方案(比如 x64 x86 ARM64 等),配置方法如下:
- 点开 Configuration Manager

- 新增 X64 等平台编译

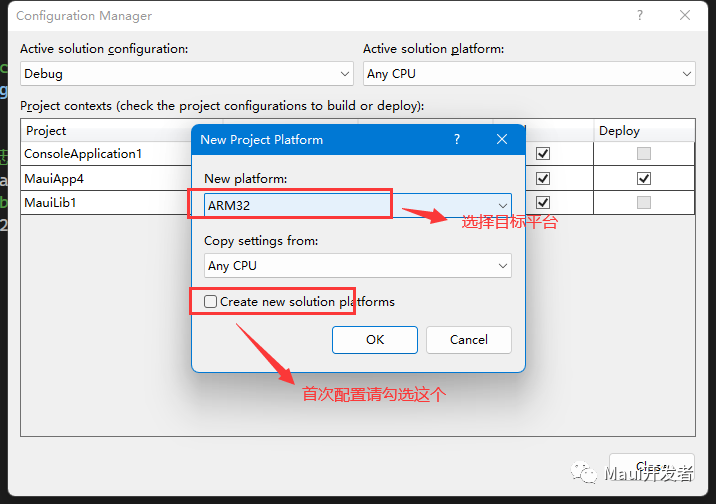
综上,我们完成了解决方案(Solution)以及项目(csproj)中的绝大多数设置,做好这些设置会让你一部分工作变得得心应手。
以上设置都已上传github